Clay Jewellery Handmade Butterfly
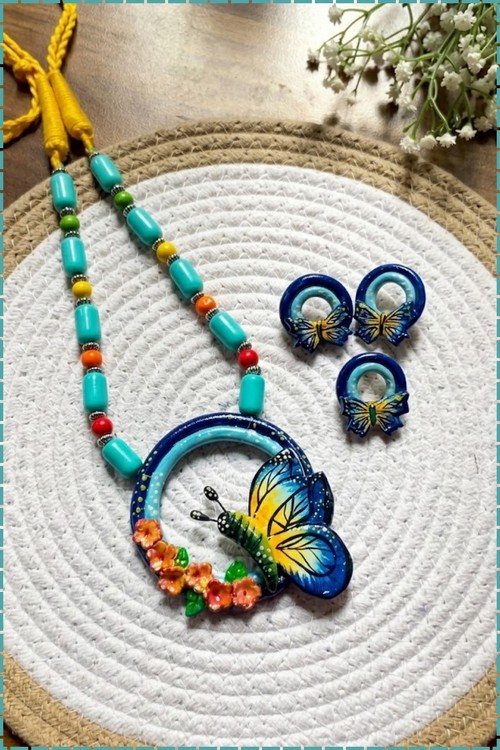
Butterfly lovers get a full matching set from one block of white air-dry clay: a 35 mm ring frame pendant, two 20 mm earring frames and a 25 mm butterfly charm framed by moulded flowers. Hand painted wings finish this DIY butterfly clay jewelry without an oven.
Wings pressed flat and then lifted at the edges give this piece its shape. The clay jewellery handmade butterfly comes as a pendant body, two formed wings, and whatever findings you attach at the end, a loop, a cord, a pin back.
Clay Jewellery Handmade Butterfly
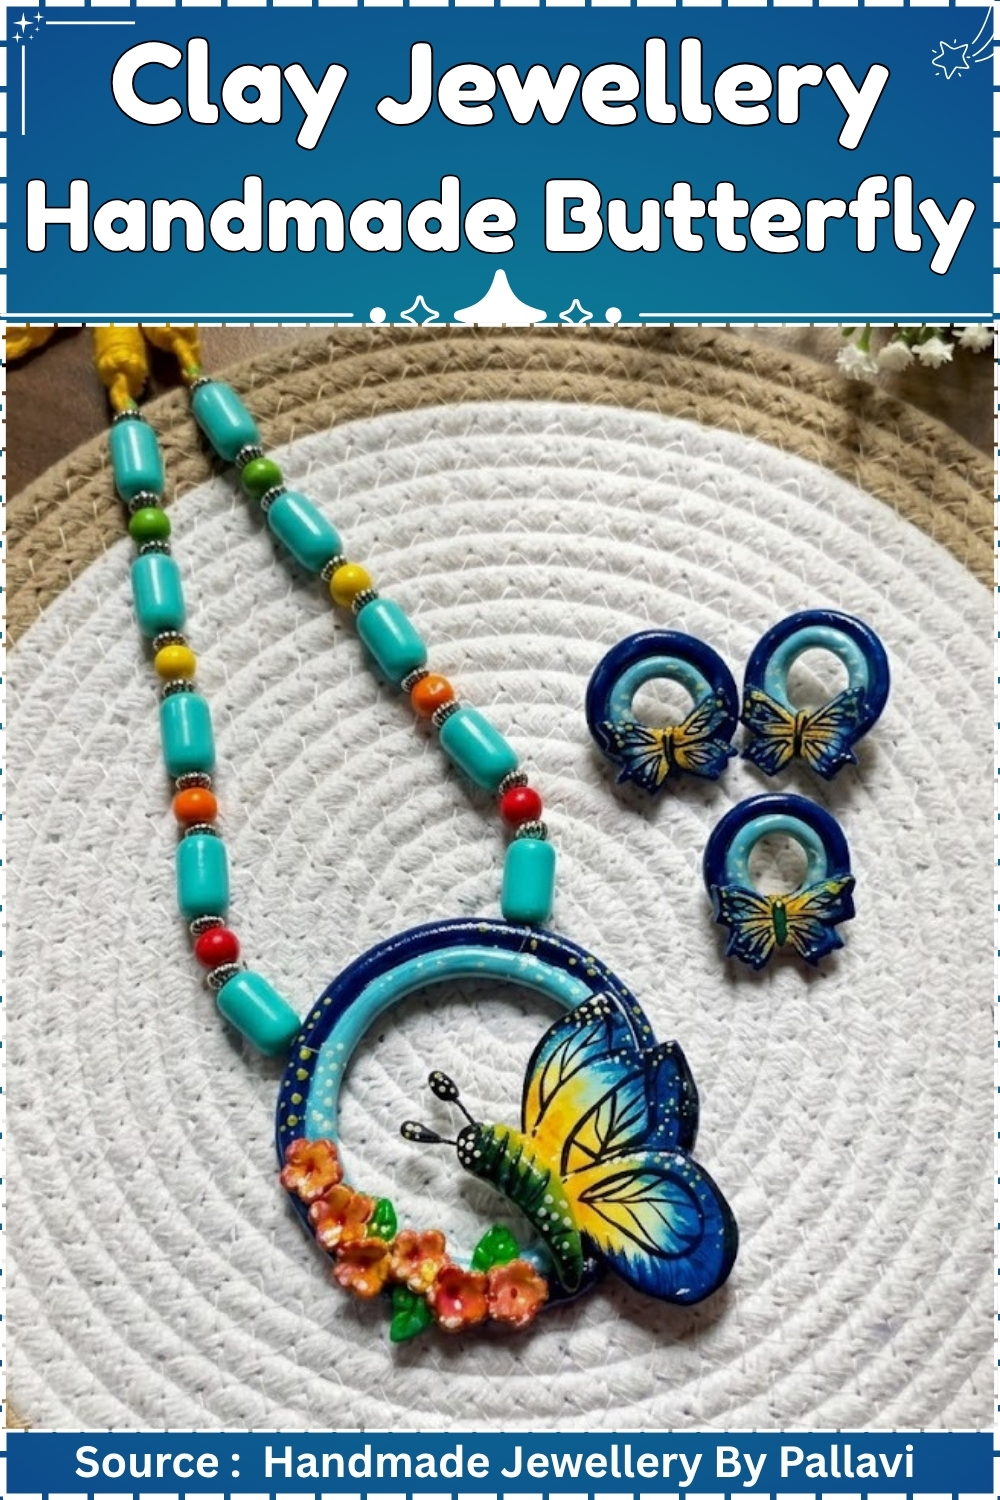
Wings can sit symmetrical or offset slightly depending on how you position them before baking. The baked surface holds detail from stamps or veining tools. Firm and lightweight once cured.
Pricing the Labour
Hands-on time across two sessions runs to roughly ninety minutes. At a modest craft rate, the labour floor for the pendant-plus-earring set sits at $15 to $20 before materials. Retail range for a painted clay butterfly set is $28 to $45 depending on your market and the finish quality. A gift-boxed set commands the upper end reliably when the presentation is clean.
At a Glance
- Clay type: Air-dry clay, no heat
- Recommended brand: DAS or Crayola Air-Dry
- Tools: Rolling pin, circular cutters 35 mm and 20 mm, craft knife, silicone flower mould, toothpick, needle tool, flat and liner brushes
- Cure: Room temperature, 24 to 48 hours drying time
- Finished sizes: Pendant 35 mm ring frame, earrings 20 mm ring frames, butterfly motif 25 mm wingspan
- Hands-on time: 50 minutes shaping, 40 minutes painting
- Total time: 50 hours including drying and paint drying
- Difficulty: Intermediate
Materials and Tools
Essential
- Air-dry clay, white, half a standard 500 g block
- Rolling pin or smooth glass jar
- Ceramic tile (work and drying surface)
- Circular cutters: 35 mm and 20 mm
- Circular cutter or straw: 25 mm and 14 mm (for ring frame inner cuts)
- Craft knife
- Silicone flower mould, 8 to 10 mm cavities
- Toothpick
- Needle tool
- Acrylic paints: ultramarine blue, cadmium yellow, mars black, orange
- Flat brush, 6 mm
- Liner brush, size 0
- Acrylic decor varnish, gloss finish
- Jump rings, 5 mm, nickel-free, four pieces
- Earring hooks, surgical steel, one pair
- Black or yellow waxed cotton cord, 2 mm, 80 cm
- E6000 adhesive
Nice to have
- Leaf-shaped cutter or silicone mould
- Small silicone mat
- Skewer rack for drying beads upright
- Fine sandpaper, 320 grit
- Dust mask, P2
Colour Recipes
- Wing base: Ultramarine blue, full strength. No mixing needed. Two thin coats gives better coverage than one heavy one.
- Wing accent: Orange straight from the tube. Apply to the outer wing edges and spots using the size 0 liner.
- Wing veins and body: Mars black, undiluted. Lines drawn with the size 0 liner while the blue base is fully dry.
- Flower centres and cord accent: Cadmium yellow, full strength.
How to Make the Butterfly Clay Jewellery Set
Conditioning and rolling the clay
- Knead the air-dry clay for 2 minutes until smooth and pliable with no surface cracks.
- Place the clay on the ceramic tile and roll it to 3 mm thickness.
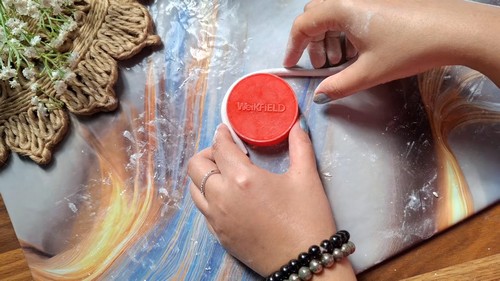
Pendant ring frame
- Press the 35 mm cutter straight down and lift cleanly.
- Press the 25 mm cutter inside the first cut circle and lift cleanly to remove the centre, leaving a 5 mm wide ring.
- Smooth the inner and outer edges with a damp fingertip.
- Set the ring flat on the tile.
Earring ring frames
- Press the 20 mm cutter straight down twice and lift cleanly.
- Press the 14 mm cutter inside each earring circle to remove the centres, leaving 3 mm wide rings.
- Smooth the edges with a damp fingertip.
- Set both rings flat on the tile.
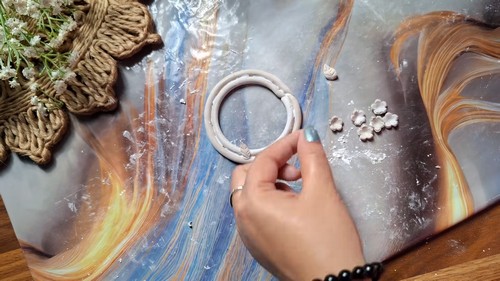
Butterfly motif
- Pinch off a small amount of clay and roll it to 2 mm thickness.
- Cut a rounded upper wing shape freehand: 15 mm wide, 12 mm tall, with a scalloped lower edge. Cut two, mirrored.
- Cut a smaller lower wing for each side: 10 mm wide, 8 mm tall, with a slightly pointed outer edge. Cut two, mirrored.
- Roll a slim body log 12 mm long and 3 mm wide, tapered at both ends.
- Press all four wings against the body log, upper wings first, angling them outward at 40 degrees, lower wings at 60 degrees. Press each join firmly.
- Roll two antennae strands 10 mm long and 1 mm wide. Press one end of each against the top of the body and curl the tips gently outward.
- Set the assembled butterfly on the tile without moving it.
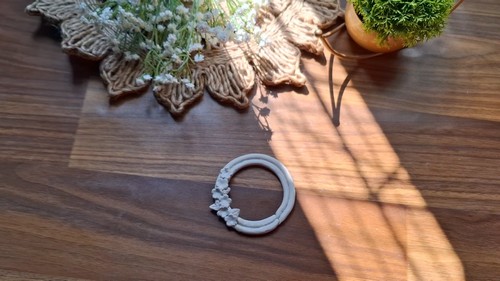
Flowers and leaves
- Press small portions of clay into the silicone flower mould and flex the mould to release. Make five flowers for the pendant and two for each earring.
- Cut six leaf shapes freehand from clay rolled to 2 mm, each 10 mm long and 5 mm wide, pointed at both ends.
- Score a centre vein line on each leaf with the toothpick.
Piercing hardware holes
- Pierce a hole through the top of the pendant ring frame, 2 mm in from the outer edge, using the needle tool. Rotate the tool to widen to 2 mm.
- Pierce a hole through the top of each earring ring frame in the same manner.
- Do not pierce the butterfly, flowers, or leaves. These will be glued after cure.
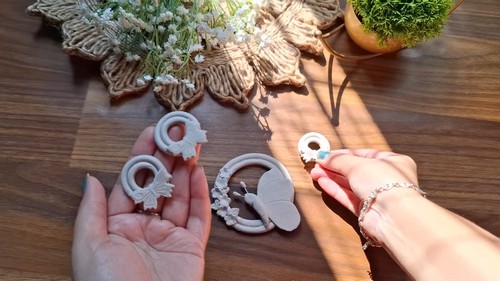
Drying
- Leave all pieces flat on the tile at room temperature for 24 hours, then turn each piece over for a further 12 hours.
Assembling the motifs on the frames
- Once fully dry, position the butterfly at the centre of the pendant ring frame and press to check fit. Apply a thin layer of E6000 to the back of the butterfly body and press it to the ring. Hold for 60 seconds.
- Arrange three flowers around the butterfly on the pendant frame and glue each with a small dot of E6000.
- Glue one leaf on each side of the flower cluster.
- Glue two flowers and one leaf to each earring ring frame.
- Leave all glue joints for 24 hours before painting.
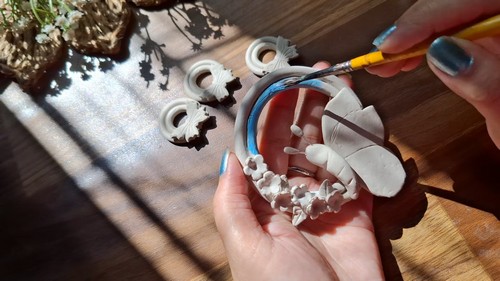
Painting the base colours
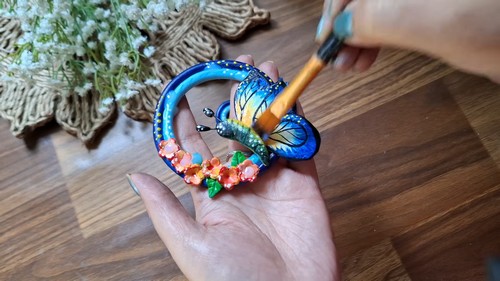
- Brush one thin coat of ultramarine blue over the butterfly wings, front only.
- Brush cadmium yellow over each flower face.
- Brush mars black over the butterfly body and antennae.
- Leave for 30 minutes, then apply a second coat of blue to the wings.
- Paint the ring frames in any single colour, or leave them white.
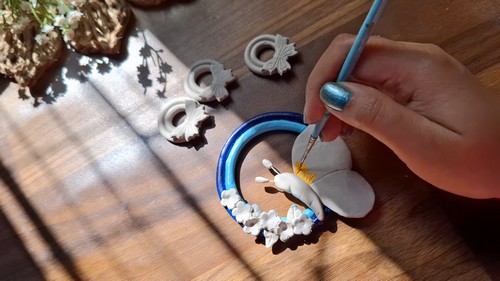
Painting the wing details
- Load the size 0 liner with mars black and draw three to four curved vein lines from the wing body outward on each wing panel.
- Add small black dots along the outer wing edges.
- Load the liner with orange and fill the outer wing sections between the veins.
- Add a small orange dot at the wing tip of each upper wing.
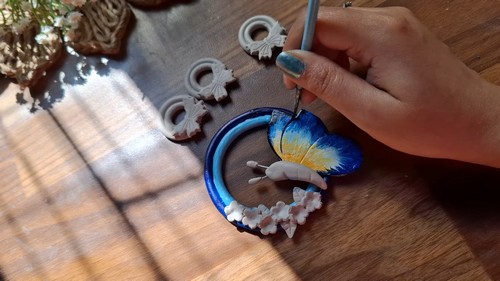
Sealing
- Brush one thin coat of acrylic decor gloss varnish over all painted surfaces, including the back and edges of every piece.
- Leave for 1 hour, then apply a second coat.
- Leave for 2 hours before assembly.
Drying and Sealing
- Air-dry clay cures by evaporation, not heat. Do not put these pieces in an oven or near a heat source. Direct heat causes uneven shrinkage and cracks the surface before the core has dried, which is not visible until the paint goes on.
- Thin flat pieces like these ring frames dry in 24 to 36 hours. Turn each piece halfway through so both faces dry at the same rate. Pieces dried on one side only will curl at the edges.
- Sealing is not optional. Air-dry clay is porous and absorbs moisture from the air and from skin contact, which softens it over time and eventually cracks it. The acrylic decor varnish called for in this build provides good protection for a worn piece. Two thin coats cover every surface, including the back and the inner ring edges. Sealed air-dry clay is water-resistant, not waterproof. Remove before swimming or showering.
Finishing
- Sand any rough edges with 320 grit dry sandpaper before painting. Air-dry clay sands easily and can be sanded too far: one or two light passes is enough. Do not sand after sealing.
- The gloss varnish finish gives the painted butterfly wings the depth the design needs. A matte varnish flattens the orange and the yellow reads as dull in market lighting. Stick with gloss across the whole set for consistency when pieces are displayed together.
Hardware and Assembly
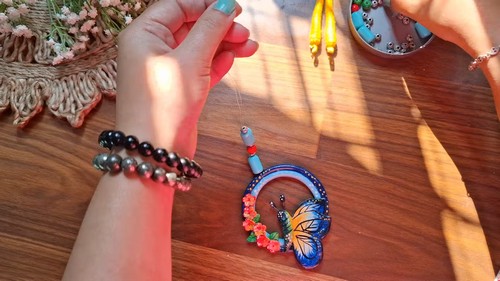
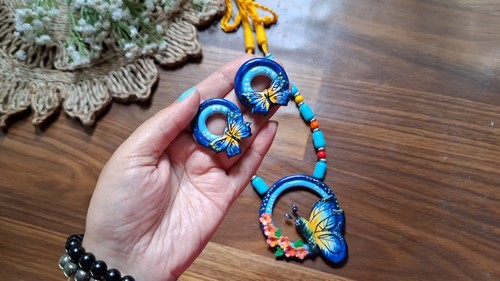
- Open each jump ring by twisting the ends sideways, not by pulling them apart. Thread one open jump ring through the pendant hole and close it flush. Thread the yellow or black waxed cord through the pendant ring and tie at the desired length, 45 to 50 cm, with a surgeon’s knot at the back. Trim the cord tails to 5 mm.
- Thread one open jump ring through each earring frame hole, then attach the surgical steel earring hook to that ring and close it. Check that the hook faces forward on both earrings before closing the ring.
- The pendant frame with butterfly weighs under 6 g. The earrings weigh under 3 g each. Both hang straight on standard findings without a counterweight.
Presentation
- Card the earrings on a 70 x 50 mm kraft earring card with two punched holes, one per earring hook. The pendant necklace coils behind a 90 x 65 mm folded card with the pendant face showing through a punched oval window, secured with a strip of double-sided tape on the cord at the back.
- Sell the two cards together as a set in a 4 x 5 inch clear cello bag. Label the clasp area with the clay type and care note: “Handmade air-dry clay. Remove before contact with water.” Buyers who understand the material handle it correctly, which reduces returns at markets.
Where Makers Go Wrong
- The butterfly antennae snap during painting. Antennae at 1 mm diameter are the narrowest element in the set and the most vulnerable once dry. They break cleanest at the join to the head. Once broken, re-attaching with glue gives a visible repair. The prevention is to paint the butterfly body and antennae with a very small amount of paint on the brush, applying almost no lateral pressure.
- The ring frame inner edge chips when the cutter is removed. The inner cutter compresses the clay slightly as it cuts, and the compressed ring springs back unevenly when the cutter lifts. Cut the inner circle before the clay has sat and firmed, within five minutes of rolling the sheet, while the clay still has give.
- The varnish clouds over the orange sections. Some acrylic varnishes react with cadmium-based pigments, including orange, and turn milky as they dry. Test the varnish on a painted scrap before using it on the finished set. Daler-Rowney System3 gloss medium and Golden Polymer Varnish both perform reliably over orange acrylics.
Variations
Monochrome set. Paint all clay elements, frames included, in flat white with fine black liner detail on the butterfly wings only. The yellow cord replaced with natural linen. Sells to a different buyer from the original coloured version and photographs cleanly on light backgrounds.
Night butterfly. Use navy or deep teal as the wing base, replace the orange accent with metallic gold liner detail, and use a black cord. The frame can be painted to match the wing base or left white for contrast.
Care
The butterfly antennae are the first thing to catch on clothing and the most likely to snap, so store the necklace flat in its box rather than hung. Remove before pulling anything over your head. The gloss varnish holds well against normal skin contact but softens under perfume and hand cream applied directly to the piece. If a flower or leaf lifts from the frame, reglue with E6000 and leave for 24 hours before wearing again.
Quick Answers
- Can I use polymer clay instead of air-dry clay for this set? Yes. Roll to the same 3 mm thickness, cut and shape as described, bake at 275°F / 130°C for 30 minutes on a ceramic tile, and proceed from the finishing step. Polymer gives a harder finished piece and the antennae will be more durable.
- The flowers fell off the frame before I could paint them. Can I reattach them? Yes, if they fell off before sealing. Re-glue with E6000 and leave 24 hours before painting. If they fell off after sealing, sand the contact area lightly on both pieces before regluing so the adhesive has a surface to key into.
- Can I replace the waxed cord with a metal chain? A jump ring through the pendant hole accepts any chain up to 3 mm link width. A gold or silver chain changes the market positioning of the set considerably.