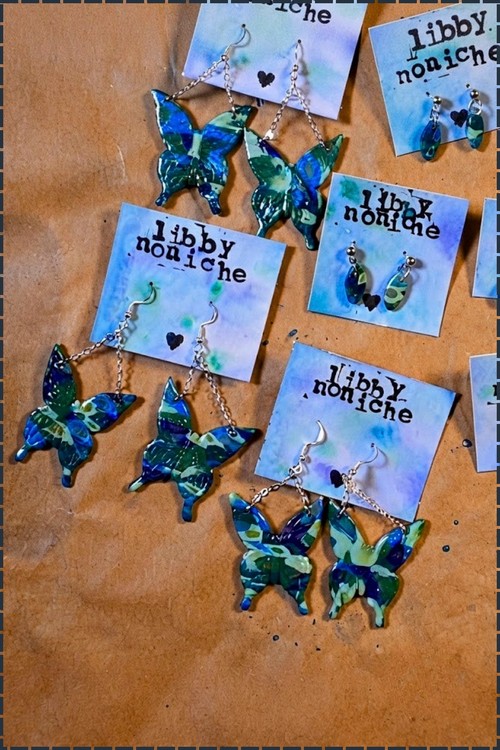
Polymer Clay Necklace Ideas Air-Dry Clay Necklaces To Make and Sell
Selling changes what you make, so these polymer clay necklace ideas favour thick shapes and pierced holes over anything that snaps at a market table. Each design repeats cleanly in a batch rather than needing individual attention.
Anything you plan to sell has to survive being handled by strangers at a market table, which rules out thin pendants that snap and findings glued rather than set. These polymer clay necklace ideas are chosen for durability first: shapes thick enough to take a knock, holes pierced rather than drilled after curing, and findings that sit through the clay instead of on top of it. Air dry and polymer both work here. Each design scales to a batch without becoming tedious.
Polymer Clay Necklace

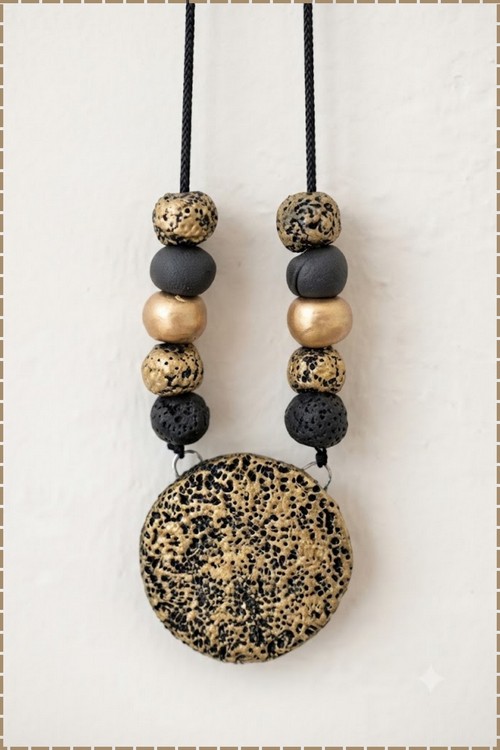
Textured beads and a single bold pendant are all it takes to turn a block of polymer clay into jewelry that looks like it came from a boutique. This clay necklace comes together with basic tools most crafters already own, and the finish is what does the heavy lifting. Metallic paint over a pressed texture gives the beads that speckled stone look, so nothing here depends on expensive clay colors. Roll, texture, pierce, bake, then string everything on cord and the whole piece reads far more expensive than it is.
At a Glance
- Clay type: Air-dry clay, white. DAS Modelling Clay or Crayola Air-Dry.
- Clay quantity: 400 g for all three necklaces
- Tools: Acrylic roller, craft blade, 5 mm drinking straw, quarter-teaspoon and tablespoon measures, 40 mm jar lid, fine-tooth comb, cotton swabs, sponge brush
- Cure method: Air drying at room temperature. 24 to 36 hours for flat pendants, 48 to 72 hours for solid beads. No baking at any stage.
- Finished size: Beads 14 mm, leaf beads 30 mm, pendants 40 mm across
- Hands-on time: 2 hours 15 minutes across all three
- Total time: 4 days including drying and two sealer coats
- Difficulty: Easy to moderate
Materials and Tools
Essential
- White air-dry clay, 400 g
- Acrylic craft paint in red, black, yellow and gold
- Water-based polyurethane sealer, satin
- Nylon beading thread, 0.8 mm, clear
- Waxed cotton cord, 1 mm, black
- Floral wire, 0.8 mm
- PVA white glue
- Clear jewellery glue for knots
- Acrylic roller
- Craft blade
- 5 mm drinking straw
- Quarter-teaspoon and tablespoon measuring spoons
- 40 mm jar lid or circle cutter
- Fine-tooth comb
- Cotton swabs
- Sponge brush
- Parchment paper
- Textured rubber oven mitt or silicone trivet
- 400 and 800 grit sandpaper
Nice to have
- Digital kitchen scale
- Bamboo skewers for drying painted beads
- Small acrylic clay roller with depth guides
- Nickel-free lobster clasps and 6 mm jump rings
- Flat-nose pliers, two pairs
Making a Set That Sells
Consistency is what separates a table of stock from a table of samples. Weigh every bead rather than eyeing it, since a 3 g bead and a 4 g bead read as a mistake once they sit next to each other on a strand. Mix the full colour batch for all three necklaces in one sitting. On pricing, count the hands-on time honestly at 45 minutes a necklace, add materials at well under a pound per piece, and price the drying days into the number even though your hands are free. Makers who price only the making time end up funding their own stall.
Colour Recipes
Ratios are a starting point. Knead each batch until no streaks show when you cut it with a blade.
- Mid grey: 50 g white clay plus 1/8 teaspoon black acrylic
- Light grey: 1 part mid grey clay to 2 parts plain white clay
- Deep red: 50 g white clay plus 1/2 teaspoon red acrylic. Red needs more pigment than any other colour in this set.
- Sage green: 50 g white clay plus 1/4 teaspoon green acrylic and a pinpoint of black
- Mustard: 50 g white clay plus 1/4 teaspoon yellow acrylic and a pinpoint of brown
The Build
Design 1: Multi-Coloured Bead Necklace
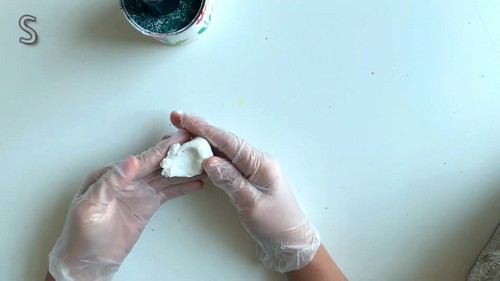
- Condition 150 g of white clay by kneading and pressing until it is soft and free of crumbs.
- Divide the clay into three 50 g portions.
- Knead paint into each portion following the colour recipes, using mid grey, light grey and mustard.
- Roll 21 balls at 3 g each, 14 mm across.
- Press each ball lightly between finger and thumb to flatten it to 10 mm thick.
- Push the 5 mm straw through the centre of each bead, twisting as you pull it back out.
- Clear the clay plug from the straw after every third bead.
- Rest the beads on parchment with 20 mm of space between them.
- Dry the beads as set out in Drying and Sealing, then continue.
- Dip a cotton swab in yellow acrylic and press five dots onto each mid grey bead.
- Leave the dots for 30 minutes to skin over.
- Cut 700 mm of 0.8 mm nylon beading thread.
- String the beads in a repeating mustard, light grey, mid grey sequence.
- Tie the ends with a surgeon’s knot, add a drop of clear jewellery glue, and trim the tails to 3 mm.
Design 2: Leaf-Shaped Pendant Necklace
- Condition 110 g of white clay.
- Tint 65 g deep red and 45 g sage green.
- Roll a 40 g ball of red clay, about 40 mm across.
- Press the ball firmly onto a textured rubber oven mitt until it sits 6 mm thick.
- Lift it away and trim to a 40 mm circle with the jar lid.
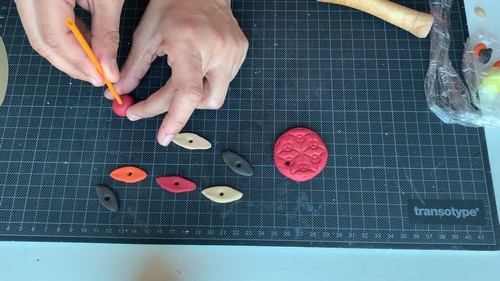
- Pierce a 5 mm hole 5 mm below the top edge with the straw.
- Roll six sage green balls at 6 g each.
- Roll each ball under one finger on your palm into a 30 mm cylinder.
- Flatten each cylinder with the roller to 4 mm thick and 15 mm wide.
- Taper both ends between finger and thumb into a leaf point.
- Score a centre vein and two side veins into each leaf with the back of the blade.
- Pierce a 5 mm hole through the centre of each leaf.
- Roll one 15 mm red round bead and pierce it through the middle.
- Roll one 18 mm red sliding bead and pierce it with a 6 mm hole.
- Dry every piece as set out in Drying and Sealing, then continue.
- Cut 900 mm of 1 mm black waxed cotton cord.
- Pass both cord ends through the pendant hole from the front and pull them level.
- Thread three leaf beads onto each side, alternating the direction of the points.
- Bring both ends up through the 15 mm red bead and knot beneath it.
- Pass both cords through the 18 mm sliding bead to make the length adjustable.

Design 3: Gold-Painted Statement Necklace
- Condition 140 g of white clay and leave it untinted.
- Portion ten beads with a level quarter-teaspoon measure, about 3 g each.
- Roll each portion into a 14 mm ball and pierce it with the 5 mm straw.
- Take a level tablespoon of clay, about 15 g, and roll it to 5 mm thick.
- Cut a 40 mm circle with the jar lid.
- Dab the teeth of the comb across the surface in overlapping passes to build texture.
- Cut two 40 mm lengths of 0.8 mm floral wire and bend each into a U.

- Bend the last 5 mm of each leg into a small hook.
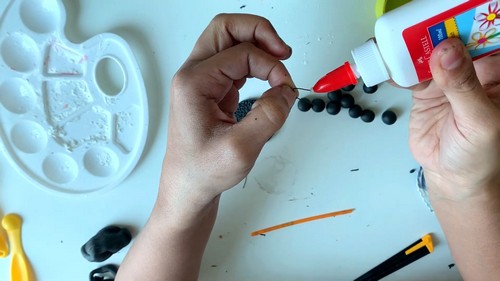
- Coat the hooked ends with PVA and push them into the top edge of the pendant to a depth of 10 mm, set 15 mm apart.
- Smooth the clay closed over both entry points with a damp fingertip.
- Dry every piece as set out in Drying and Sealing, then continue.
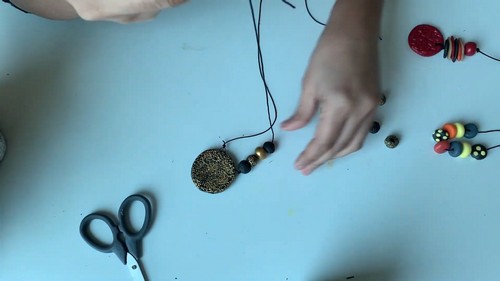
- Load the sponge brush with gold acrylic, tap the excess onto scrap paper, then dab the pendant so the recesses stay dark.
- Roll the ten beads in gold paint for full coverage and thread them onto a skewer to dry.
- Cut two 600 mm lengths of 1 mm black waxed cotton cord.
- Attach one cord to each wire loop with a lark’s head knot.
- String five gold beads onto each side.
- Join the cords behind the neck with a sliding knot or a clasp.
Drying and Sealing
- Lay everything flat on parchment in a warm, well-lit room. Keep it out of direct sun and away from radiators, since fast surface drying is what curls a flat pendant and splits a thick bead. Turn each piece after the first eight hours. Flat pendants need 24 to 36 hours. Solid 14 mm beads need 48 to 72 hours and must be bone dry before anything else happens.
- Sealing is structural on air-dry clay, not decorative. Unsealed pieces pull moisture from the air and from skin, soften, then crack along the stress lines. Use water-based polyurethane for jewellery worn against skin, or acrylic varnish for pieces that stay in a display box. Skip PVA and Mod Podge as a final coat, since both yellow inside a year. Sealed air-dry clay is water-resistant, never waterproof.
Finishing
- Sand dry, never wet. Water softens air-dry clay and lifts the surface into a paste that dries chalky. Start at 400 grit to knock back the seam left by rolling, then move to 800 for a smooth face. Air-dry clay sands far faster than polymer, so a few passes is usually all a piece needs. Push past that and you will thin a pendant edge to translucency without noticing.
- Brush the sealer on in two thin coats rather than one heavy one, and cover the back and the edges as well as the front. Roll a twist of paper into each pierce hole and wick sealer into the inner wall. That inner wall is where a bead actually fails, because thread saws at bare clay every time the necklace moves.

Assembly and Hardware
- Use nickel-free or surgical steel findings for anything sitting against the neck. If you prefer a clasp to a sliding knot, add a 6 mm jump ring to each cord end and a lobster clasp to one side. Open jump rings by twisting the ends past each other sideways, never by pulling them apart, which leaves a gap that never closes cleanly.
- Where a finding needs glue rather than a knot, use E6000 or two-part epoxy and give it a full 24 hours to cure before the piece is worn or boxed. PVA holds clay to clay only.
- Check balance before you finish the knot. The gold strand carries ten beads and a pendant, and if the bead count is uneven by even one, the pendant rides off centre every time it is worn. Keep total necklace weight under 60 g.
Where Makers Go Wrong
- Shade drift between mixing sessions. Tinted air-dry clay dries several shades lighter than it looks wet, and the shift is not identical across two batches mixed days apart. Mix the entire run in one session and keep a dried chip of each colour as your reference for next time.
- Flat spots on the beads. A soft bead resting on one face slumps where it touches the parchment, and the flat is invisible until the strand is worn and the beads rotate. Move each bead a quarter turn every few hours through the first day, or dry them threaded loosely on a skewer.
- Trusting the clock instead of the clay. In a humid workshop the shell reads dry while the core is still wet, and sealing over that trapped moisture pushes the coating off weeks later. Weigh one test bead each morning and start sealing only once the weight stops falling.
- Wear at the contact points. The beads sitting at the collarbone rub against clothing constantly, so painted dots and gold surfaces dull there first while the rest of the strand stays bright. Place the painted or gold beads higher on the strand, nearer the clasp.
Variations
Swap the round beads in Design 1 for tube beads rolled around a skewer, which drops the weight of a long strand by nearly half and lets you run 30 beads instead of 21. Turn Design 2 into a bib by making nine graduated leaves rather than six and stringing them on memory wire so they sit in a fixed fan. For Design 3, press dried flowers or a scrap of lace into the pendant before drying instead of combing it, then leave the clay bare and let the sealer alone do the finishing.
Care
Take the necklace off before showering or swimming. Store it flat in a box rather than hanging, so the cord does not stretch under the bead weight. Keep perfume and hairspray away from the painted beads, since both soften acrylic. Re-coat the pendant back with sealer if it ever starts to feel chalky.
Quick Answers
- Can I make these in polymer clay instead? Yes, but the process changes. Skip the paint-kneading and use coloured polymer, then bake at the brand temperature. Sculpey Premo goes 30 minutes per 6 mm of thickness at 275°F, 130°C. Polymer needs no sealer for strength.
- A bead cracked while drying. Can I save it? If the crack is on the surface, fill it with a paste of the same clay mixed with a little water, dry it again, then sand at 400 grit. A crack running through the pierce hole is structural, so remake that bead.
- Can I drill holes after the clay has dried? Not with a hand drill, which chips the surface and blows out the far side. Support the piece on a wood block and use a rotary tool at the lowest speed if you must.
Presentation and Packaging
Card each necklace on kraft stock cut to 90 by 130 mm with two punched slits for the cord, which stops tangling in a market bin and photographs cleanly. Print the colour name and the clay type on the card face, since buyers ask what air-dry clay is and a card answers before you do. Add a small tag with one care line about keeping the piece dry. Box the gold statement necklace rather than carding it, because the pendant is the piece people pick up and a flat box protects the painted surface from every other item on the table.