Polymer Clay Earrings For Beginners – Blue Mosaic Cane Polymer Clay Teardrop Earrings
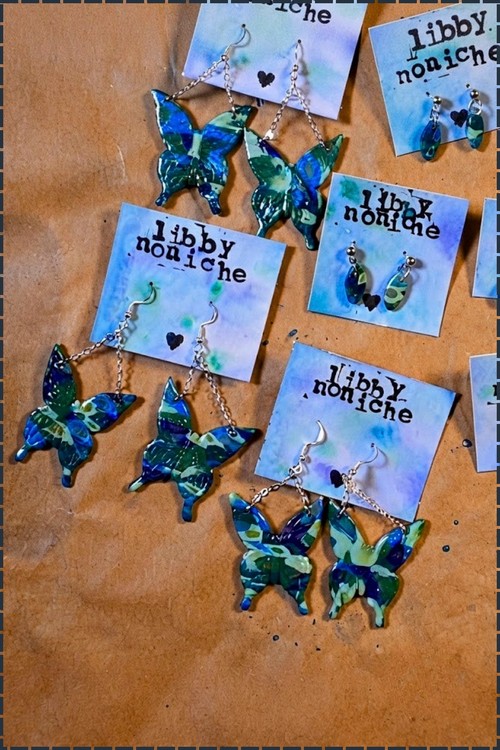
Mosaic looks like a hundred tiny pieces placed by hand, and it is really one cane sliced thin. These blue mosaic teardrop earrings are the project that teaches you cane work, small enough to wear anywhere once they are done. A good first pair to be proud of.
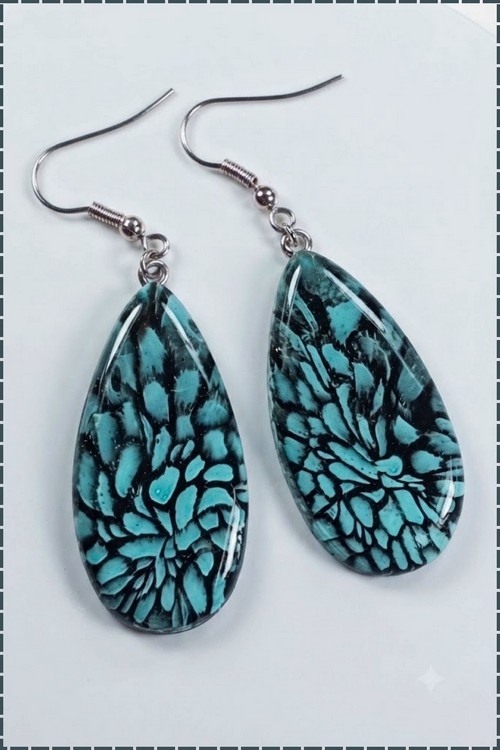
Small blue tiles sit packed together across the teardrop, each one a slice off the same cane, so the pattern repeats without ever lining up exactly. The drop shape keeps them light and easy to wear. You build the cane first, reduce it down, slice, then lay the pieces onto your base before cutting and curing. Cane work sounds advanced. It is mostly rolling and patience.
Polymer Clay Earrings

At a Glance
- Clay type and brand: Polymer. Premo Sculpey in Ultramarine Blue, Cobalt Blue, and Black
- Tools: Acrylic roller, tissue blade, two sheets of plastic or baking parchment, teardrop cutter 30 mm, ceramic tile
- Cure method: Oven, 275°F / 130°C, 30 minutes
- Finished size: 30 mm tall, 18 mm wide (teardrop), total drop with hook 48 mm
- Hands-on time: 90 minutes
- Total time: 3 hours including bake, cool, and resin cure
- Difficulty: Intermediate
Styling and Wear
These earrings sit at 30 mm, well within the comfortable range for a hook, and the resin surface means the pattern stays sharp against clothing rather than picking up fibres. The blue-on-black palette reads as both casual and dressed up, which is the honest reason these are worth making over a simpler design. A collarless shirt or a dark crew neck puts the pattern front and centre. A high neckline competes with it. For pierced ears, a standard 20-gauge surgical steel hook keeps the weight balanced; the finished earring is light enough at 3 g that a thicker wire is not needed. Keep them away from oil-based serums and moisturiser applied near the ears, since UV resin softens slowly under prolonged oil exposure.
Materials and Tools
Essential
- Sculpey Premo: Ultramarine Blue, Cobalt Blue, Black
- Acrylic roller or rolling pin
- Tissue blade
- Two sheets of baking parchment or plastic sleeves
- 30 mm teardrop cutter
- Ceramic tile
- Aluminium foil
- Oven thermometer
- UV resin (hard formula, any brand rated to 40°C minimum)
- UV lamp or direct sunlight
- Two 4 mm nickel-free jump rings
- Two 20-gauge surgical steel earring hooks
- Flat-nose and round-nose pliers
Nice to Have
- Pasta machine
- Digital scale
- Needle tool for piercing hang hole
- Wet/dry sandpaper, 400 and 800 grit
- Soft brush for resin application
Colour Recipe
The blue mix is a starting point. Both clay colours are from the Premo range, so bake temperature is consistent.
- Cane core blue: 3 parts Ultramarine Blue : 1 part Cobalt Blue, kneaded until fully uniform
- Outer wrap: Black, unmodified
The core reads as a deep mid-blue in natural light, shifting slightly purple indoors under warm lamps. For a cooler blue, drop the ratio to 4 parts Cobalt : 1 part Ultramarine.
The Build
Conditioning the Clay
- Condition 30 g of Ultramarine Blue and 10 g of Cobalt Blue separately by folding and pressing each for two minutes until the clay takes a fold without cracking at the edges.
- Combine the conditioned blues and knead for two minutes until the colour is fully uniform with no streaking at the cut face.
- Condition 40 g of Black clay for two minutes.
Building the Core Cane
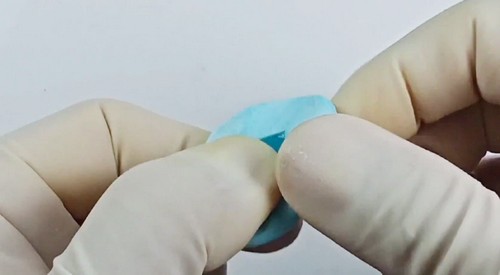
- Roll the blended blue clay into a cylinder 15 mm in diameter and 40 mm long.
- Roll 10 g of Black out to 1 mm thick.
- Wrap the black sheet tightly around the blue cylinder, trimming the overlap so the seam sits flat.
- Roll the wrapped cylinder gently between your palms to seal the seam, keeping the diameter even.
- Roll and pull the cylinder from the centre outward until it reaches 8 mm in diameter and 100 mm long.
- Cut the log into five equal segments, each 20 mm long.

Bundling and Compressing
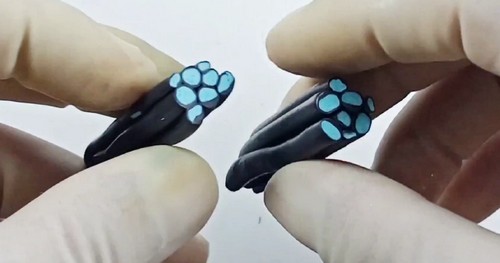
- Arrange the five segments in a tight cluster: one central, four surrounding, all ends flush.
- Press the cluster firmly from all four sides with flat palms until the segments bond and the bundle holds its shape.
- Roll the bundle gently to consolidate, keeping the cross-section circular.
- Pull and roll the bundle until it reaches 10 mm in diameter and 80 mm long.
- Cut the log into six equal segments, each 13 mm long.
- Bundle and press these six segments into a second composite block.
- Compress from all sides again until the cane is solid and no gaps show between segments.

Reducing and Wrapping the Final Cane
- Roll the composite block into a cylinder 12 mm in diameter and 60 mm long.
- Roll 15 g of Black out to 1 mm thick.
- Wrap the black sheet around the reduced cylinder, trim the overlap, and seal the seam as before.
- Roll the wrapped cane to 14 mm in diameter, keeping the ends square.
- Cut the cane into four equal sections, each 15 mm long.

Building the Pattern Sheet
- Stand the four sections upright on the ceramic tile in a two-by-two grid, pattern faces up.
- Press the sections firmly together at the sides until they bond into a single block.
- Place the block between two sheets of baking parchment.
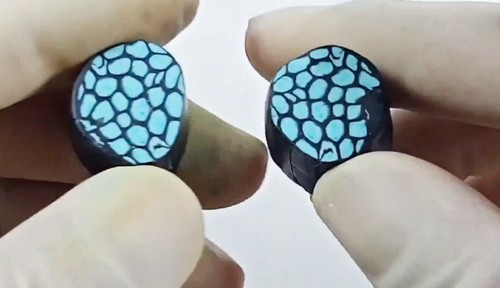
- Roll from the centre outward with even pressure until the block flattens to 3 mm thick.
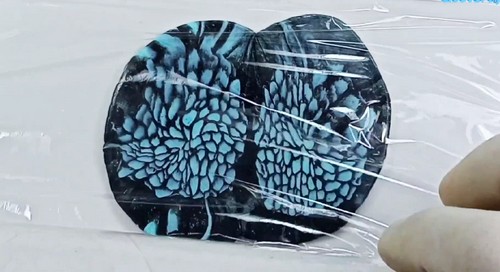
- Peel away the top sheet of parchment and check the surface: the pattern should be fully visible with clean black lines between the blue segments.
Cutting the Earring Shapes
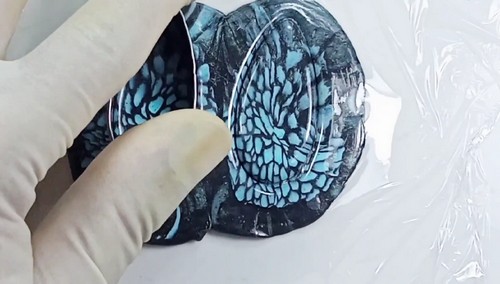
- Press the 30 mm teardrop cutter firmly through the sheet in one clean motion, keeping the cutter perpendicular to the surface.
- Cut a second teardrop from the sheet, matching the pattern orientation to the first as closely as the sheet allows.
- Use a needle tool to pierce a 1.5 mm hang hole 3 mm from the narrow point of each teardrop, pushing straight through without twisting.
- Transfer the pieces on parchment to the ceramic tile.
Baking
Preheat the oven to 275°F / 130°C and confirm the temperature with an oven thermometer before placing the tray inside. Bake on a ceramic tile with the pieces on baking parchment, tented with a loose foil dome to prevent surface browning. Bake for 30 minutes. Premo at 3 mm thickness requires the full 30-minute minimum regardless of the small piece size. Cool completely on the tile before handling. The clay reaches full hardness as it cools, not while it is still warm.
Finishing
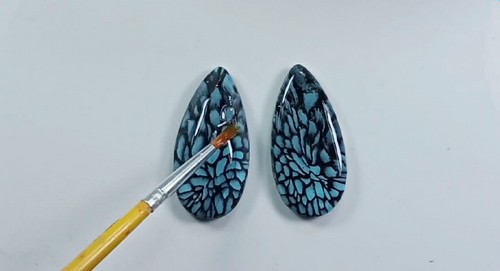
Wet sand each earring under a running tap with 400-grit wet/dry paper, working in short circular strokes. Move to 800 grit. Pat dry and buff on a scrap of denim until the surface shows a low sheen. Apply UV resin to the face of each earring with a soft brush in a single thin coat, pulling the resin to the edges without letting it pool at the hang hole. Cure under a UV lamp for 60 seconds, or in direct sunlight for two minutes. Flip each piece and apply a second thin coat to the reverse. Cure again. Two coats on both faces is the minimum for a surface that will resist daily handling.
Hardware and Assembly
- Open a 4 mm jump ring sideways with flat-nose and round-nose pliers, never by pulling the ends apart.
- Thread the ring through the hang hole of one earring and onto an earring hook, then close the ring sideways until the ends meet flush with no gap.
- Repeat for the second earring.
- Check that both teardrops hang at the same angle. If one rotates forward, re-open the jump ring, rotate the earring 90 degrees in the ring before closing.
At 3 g per earring, the pair sits comfortably on a standard 20-gauge hook for a full day. Heavier wear or a thicker resin coat will not push this past the comfortable limit for most wearers.
Where Makers Go Wrong
The black lines blur into the blue after rolling the sheet. This happens when the cane is reduced too fast: pulling from one end rather than working from the centre outward drags one side thinner than the other, and the colour boundaries shift. Once a cane is reduced unevenly, the pattern is distorted permanently in that section. Work the reduction from the centre, alternating which end you pull from, and check the cross-section on a sacrificial slice before cutting the sheet sections.
The pattern disappears at the earring edge. The teardrop cutter compresses the clay at its rim as it cuts, and any pattern detail within 2 mm of the cutter edge gets pushed slightly inward. Cut from a section of the sheet where the pattern runs at least 3 mm inside the cutter line. The compressed edge is not visible after resin is applied, but the lost pattern is.
The resin coat yellows within three months. Low-cost UV resins without UV stabilisers yellow noticeably under daylight exposure. The earrings hang near the face and catch light constantly. Use a hard-formula UV resin with a stated UV inhibitor, or apply a second layer of UV-stable varnish over the cured resin.
The hang hole cracks at the rim under the jump ring. A hole pierced immediately before baking can develop a hairline at the rim during cure as the clay around it tightens. Pierce the hole after baking instead: drill through the cooled cured piece with a 1.5 mm drill bit at low speed, keeping the drill perpendicular. The cured Premo will not chip if the drill is sharp and the pressure is steady.
Variations
| Variation | Change | Note |
|---|---|---|
| Warm mosaic | Replace the blue mix with Premo Cadmium Red Hue and Zinc Yellow | Check the cut face for uniform colour before bundling; these two colours mix to orange fast |
| Negative space | Skip the outer black wrap on the final cane | The pattern segments read as floating on white clay; cut a white sheet base and press the unwrapped sections directly onto it before rolling |
| Circle cut | Substitute a 25 mm round cutter for the teardrop | Sits closer to the lobe; drop the jump ring and set a flat pad earring post instead |
Care
UV resin softens under prolonged contact with oil-based products: put earrings on after moisturiser has fully absorbed. The hang hole is the thinnest point; clip the hook closed rather than pulling the earring off by the clay body. Store flat in a small box rather than in a tangle, since the resin surface scratches against metal findings. If the resin surface loses its gloss after a year of wear, apply one fresh thin coat under UV and cure for 60 seconds.
Quick Answers
Can I use Fimo instead of Premo for this cane? Yes, and Fimo Professional holds fine detail slightly better during reduction because it is firmer. Bake at 230°F / 110°C for 30 minutes rather than the Premo spec. Do not mix the two brands in one cane and then try to reconcile the bake temperatures: pick one and stay with it.
My cane segments gapped when I bundled them. Can I fix it? Press the bundle firmly from all sides before any rolling. If gaps are still visible on a sacrificial slice, knead the whole bundle back into a ball, re-roll into a cylinder, and start the reduction again. The pattern will blur, but the result is a new usable cane rather than a wasted one.
Can I skip the UV resin and use a brush-on varnish instead? Yes. Two coats of Varathane Crystal Clear water-based polyurethane give a comparable gloss without a UV lamp. Cure time is one hour between coats and 24 hours before wear. The surface will not be quite as thick or as glass-like as UV resin, but it protects the pattern equally well.