Polymer Clay Beads DIY – Make Clay Bead Bracelets in Batches
Polymer clay beads made in batches, because one bracelet’s worth takes the same oven run as forty. Roll the whole log, cut it down, pierce and bake everything at once. The bracelet is the quick part. Making enough beads to stop rationing them is the point.
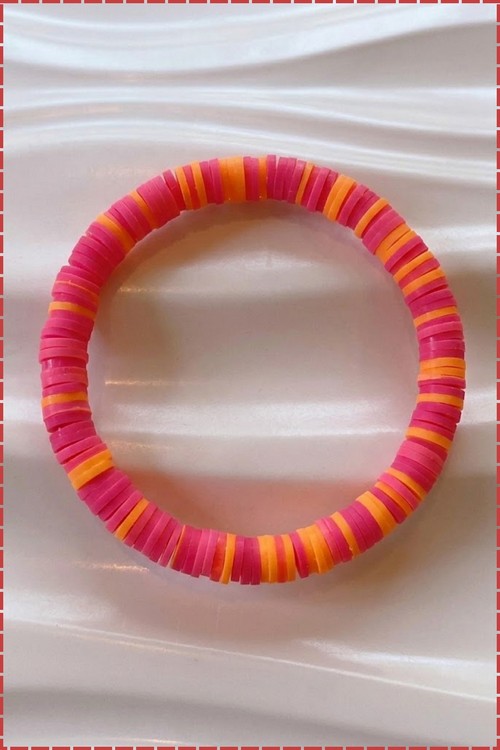
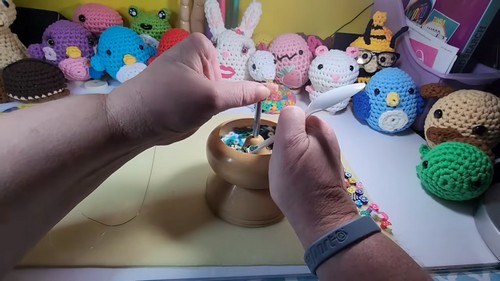
Flat disc polymer clay beads stacked by color create a striped effect that looks more intentional than most beginner jewelry projects. The bead spinner visible throughout this tutorial cuts the threading time down significantly, which makes batch-making multiple bracelets in one sitting very doable.
Polymer Clay Beads DIY

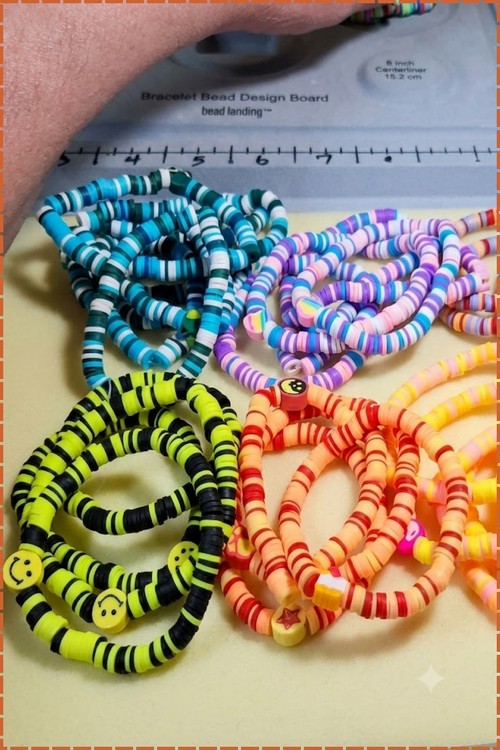
Each colorway shown here, teal and white, pastel rainbow, yellow and black, and red and orange, uses the same disc bead format but reads as a completely different piece. Accent beads like smiley faces and stars are the easiest way to break up the pattern without overcomplicating the design.
At a Glance
- Clay type: Polymer, oven cured
- Brand: Sculpey Premo
- Tools: Pasta machine or acrylic roller, tissue blade, 1.5 mm piercing needle, ceramic tile, bead spinner, big-eye beading needle, craft clips
- Cure: 275°F / 130°C for 30 minutes
- Finished size: Beads 6 mm across and 2 mm thick, charms 14 mm, bracelet 16.5 cm (6.5 in) child or 19 cm (7.5 in) adult
- Hands-on time: 2 hours for a batch of 300 beads, plus 15 minutes per bracelet
- Total time: 3 hours including bake and cool
- Difficulty: Easy, with one fiddly knot
Materials and Tools
Essential
- Sculpey Premo in white, black, green, blue, red, orange, yellow, grey
- 0.5 mm Stretch Magic clear elastic cord
- Big-eye or flexible beading needle
- 1.5 mm piercing needle or bamboo skewer point
- Tissue blade
- Pasta machine or acrylic roller
- Glazed ceramic tile, 20 cm
- Aluminium foil
- Oven thermometer
- Wet/dry sandpaper in 600 and 800 grit
- GS Hypo Cement
- Scissors
- Ruler or bracelet sizing board
Nice to Have
- Bead spinner bowl
- Craft clips or stitching clips
- Rock tumbler with plastic tumbling pellets
- Divided storage box
- Bamboo skewers for sanding stacks
- Denim scrap or cotton buffing wheel
Colour Recipes
Ratios are by equal-sized balls of conditioned clay, adjusted by eye.
- Sage green: 8 white, 1 green, a pinhead of black
- Dusty blue: 6 white, 1 blue, 1 grey
- Terracotta: 4 white, 2 orange, 1 red, a pinhead of black
- Butter yellow: 10 white, 1 yellow
- Soft lilac: 8 white, 1 blue, 1 red
Premo reads about a shade deeper after baking, so mix slightly lighter than your target.
The Build
Conditioning and Colour Mixing
- Cut each block into eight slabs and run every slab through the pasta machine at 3 mm, folding and passing ten times.
- Mix each colour recipe to a single even shade with no streaks or marbling visible.
- Rest the conditioned colours 15 minutes under a sheet of paper.

Rolling the Bead Logs
- Roll each colour into a log 6 mm in diameter and 12 to 15 cm long.
- Roll on the tile, not in your palms, keeping the pressure even from end to end.
- Check the diameter against a ruler at three points along the log and re-roll any thick section.
- Rest the finished logs flat for 20 minutes, or 10 minutes in the fridge.
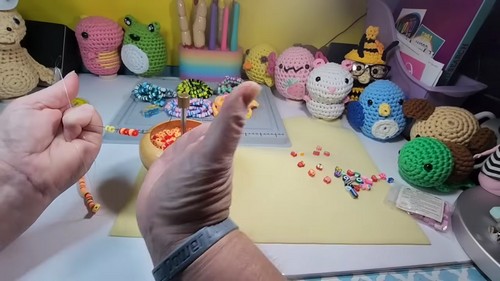
Slicing the Beads
- Hold the tissue blade at 90 degrees to the log and cut discs 2 mm thick.
- Rotate the log a quarter turn every five cuts.
- Move each disc off the tile as you cut it so the stack does not press flat.
- Discard any disc that has gone oval instead of round.
Piercing
- Lay the discs flat on the tile with 5 mm of clearance between them.
- Push the 1.5 mm needle through the centre of each disc from the top face, straight down onto the tile.
- Twist the needle a half turn as you withdraw it.
- Press the raised rim on the underside flat with a fingertip.

Shaping the Focal Charms
- Roll a 14 mm ball of clay and flatten it to 5 mm thick on the tile.
- Cut or shape the outline of the charm: a frog face, mushroom cap, heart, or paw.
- Add facial features and detail as separate flattened pieces, pressing each firmly into the base.
- Pierce a 1.5 mm hole horizontally through the charm, 3 mm below the top edge.
- Check the hole runs parallel to the front face so the charm hangs flat against the wrist.
Baking
- Bake at 275°F / 130°C for 30 minutes. That is the Premo minimum, and it applies to a 2 mm disc exactly as it applies to a 5 mm charm. Calculate from the thickest item on the tray, never from how many pieces are on it.
- Bake on the same ceramic tile you sliced on, or on plain cardstock. Never bare metal.
- Tent the tray with a folded sheet of aluminium foil, edges pressed down against the tile. Sit an oven thermometer beside it and read the actual temperature before the beads go in. Home oven dials run 25 to 50 degrees out in either direction, and that gap is the difference between a bead that flexes and one that shatters at the hole.
- Cool completely on the tile before handling. Polymer reaches full strength cold.
Finishing
- Polymer needs no sealer. Skip it. Glaze on a bracelet bead chips around the hole within a month and looks worse than bare clay does.
- The hole is what needs the attention. Thread twenty baked beads onto a bamboo skewer, press the stack tight, and run wet 600 grit around the outside edge while rolling the skewer. Then fold a scrap of wet 800 grit and work it against each end of the stack to take the sharp lip off the hole rims.
- For a full batch, a rock tumbler loaded with warm soapy water and plastic pellets does the same job in three hours.
- Buff the dried beads against a denim scrap, or on a cotton wheel at low speed.

Stringing and Knotting
- Cut 30 cm of 0.5 mm Stretch Magic.
- Stretch the cord firmly along its length, then release it.
- Thread one end through the beading needle, leaving a 10 cm tail.
- Clip a craft clip onto the far end.
- Half fill the bead spinner bowl with sorted beads.
- Spin the bowl and hold the needle tip angled into the moving beads to load them.
- Slide beads down to the clip until you reach half your target length.
- Add the focal charm with a white or contrasting bead directly on each side of it.
- Load the second half to a strung length of 16.5 cm for a child or 19 cm for an adult.
- Remove the needle and the clip, then tie a surgeon’s knot under light tension.
- Touch a pinhead of GS Hypo Cement to the knot and leave it 10 minutes.
- Draw an adjacent bead over the knot so it seats inside the hole.
- Trim both tails to 2 mm.
Batch Running Order
Work in stages. Never one bracelet at a time.
- Condition and mix every colour in a single sitting.
- Roll all logs to 6 mm, then rest the whole set together for 20 minutes.
- Slice one log at a time, straight into piercing, before starting the next.
- Fill a whole tile before you begin the second one.
- Bake trays back to back while the oven is already up to temperature.
- Sort cooled beads into a divided box by colour before stringing anything.
A 20 cm tile holds roughly 300 discs at 6 mm with clearance, which is about one and a half blocks of Premo. Two tiles fit one rack in most home ovens.
Where Makers Go Wrong
- Sharp hole rims cut the elastic. A freshly pierced bead leaves a raised lip around the hole that works like a blade against 0.5 mm cord. The bracelet holds for six weeks, then fails at a bead nobody suspected.
- The knot creeps. A surgeon’s knot in elastic is secure the day it is tied and loose two months later, because the cord relaxes every time it is stretched over a hand. Glue is what holds that knot long term, not the knot itself.
- Thin discs underbake invisibly. A 2 mm disc pulled at 15 minutes looks and feels identical to one that got the full 30. The difference only shows the first time the bracelet rolls over a knuckle in a cold room.
- Slice thickness drifts. Your first ten discs come off at 2 mm and your fiftieth at nearly 3 mm as the log warms in your hand, so a fixed bead count stops meaning a fixed length. Measure strung length against a ruler, never by counting beads.
Variations
| Variation | What changes |
|---|---|
| Marbled slice beads | Stack three conditioned colours, twist the stack into one 6 mm log, then slice as normal. No two discs come out the same, and a single log covers a whole bracelet. |
| Anklet or necklace | Same beads, 0.7 mm cord for the extra weight, strung to 24 cm for an anklet or 45 cm for a necklace. Add a second charm at the halfway point on necklace lengths. |
Care
Take the bracelet off before applying sunscreen or hand sanitiser, both of which degrade the elastic fast. Roll it over the hand rather than pulling it open. Store it flat in a drawer, not hooked over a peg where it sits stretched. Chlorine will not hurt the clay but it shortens the cord’s life. Re-string on fresh elastic once a year for a bracelet worn daily.
Quick Answers
- Can I mix shop-bought clay beads with my own? Yes, though commercial heishi usually have a 1 mm hole against your 1.5 mm. String a test length first, because the knot needs to hide inside one of the larger holes.
- My bracelet snapped and the beads scattered. Are they ruined? No. Baked polymer survives a drop onto a hard floor without damage, so rinse them, dry them, and re-string on new cord.
- Does this work with air-dry clay? Not at this size. A 2 mm air-dry disc crumbles at the hole under elastic tension, and it needs sealing before it ever touches skin.
- Do I need a bead spinner? No. Tip the beads into a shallow dish and drag the curved needle through them, which is slower but works the same.