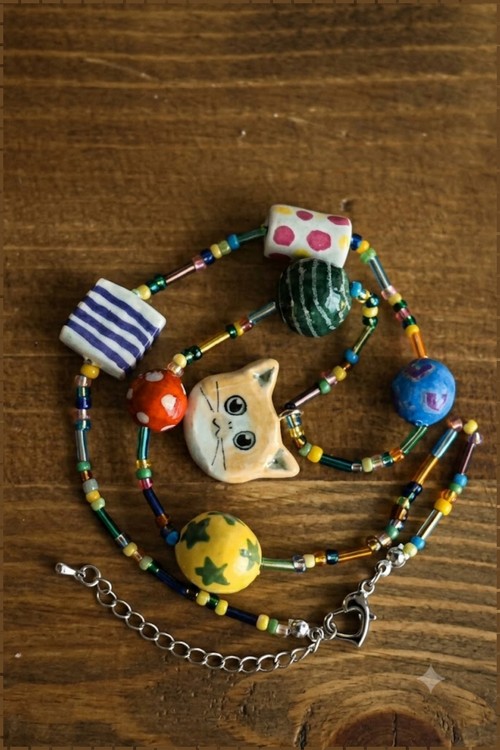
Polymer Clay and Glass Bead Bracelets Ideas
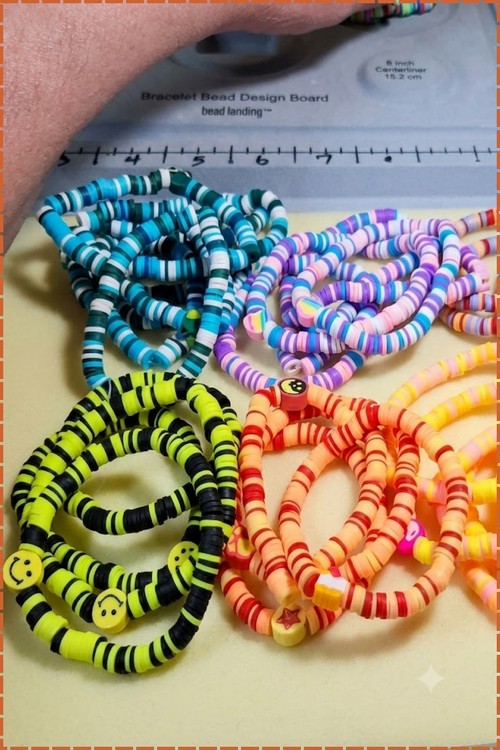
Polymer clay and glass bead bracelets work because the two materials behave differently in light. Clay stays matte and holds colour flat, glass catches and throws it back. Alternate them and the bracelet has depth that a single material never gets.
A bracelet made entirely of clay beads reads soft and flat, and one made entirely of glass reads busy. Putting them together is what fixes both. The clay absorbs light and holds the colour steady, the glass picks it up and moves it, and the eye keeps travelling around the wrist instead of settling. Space the glass evenly and it reads deliberate. Cluster it and it reads handmade in the good way.
Polymer Clay and Glass Bead Bracelets
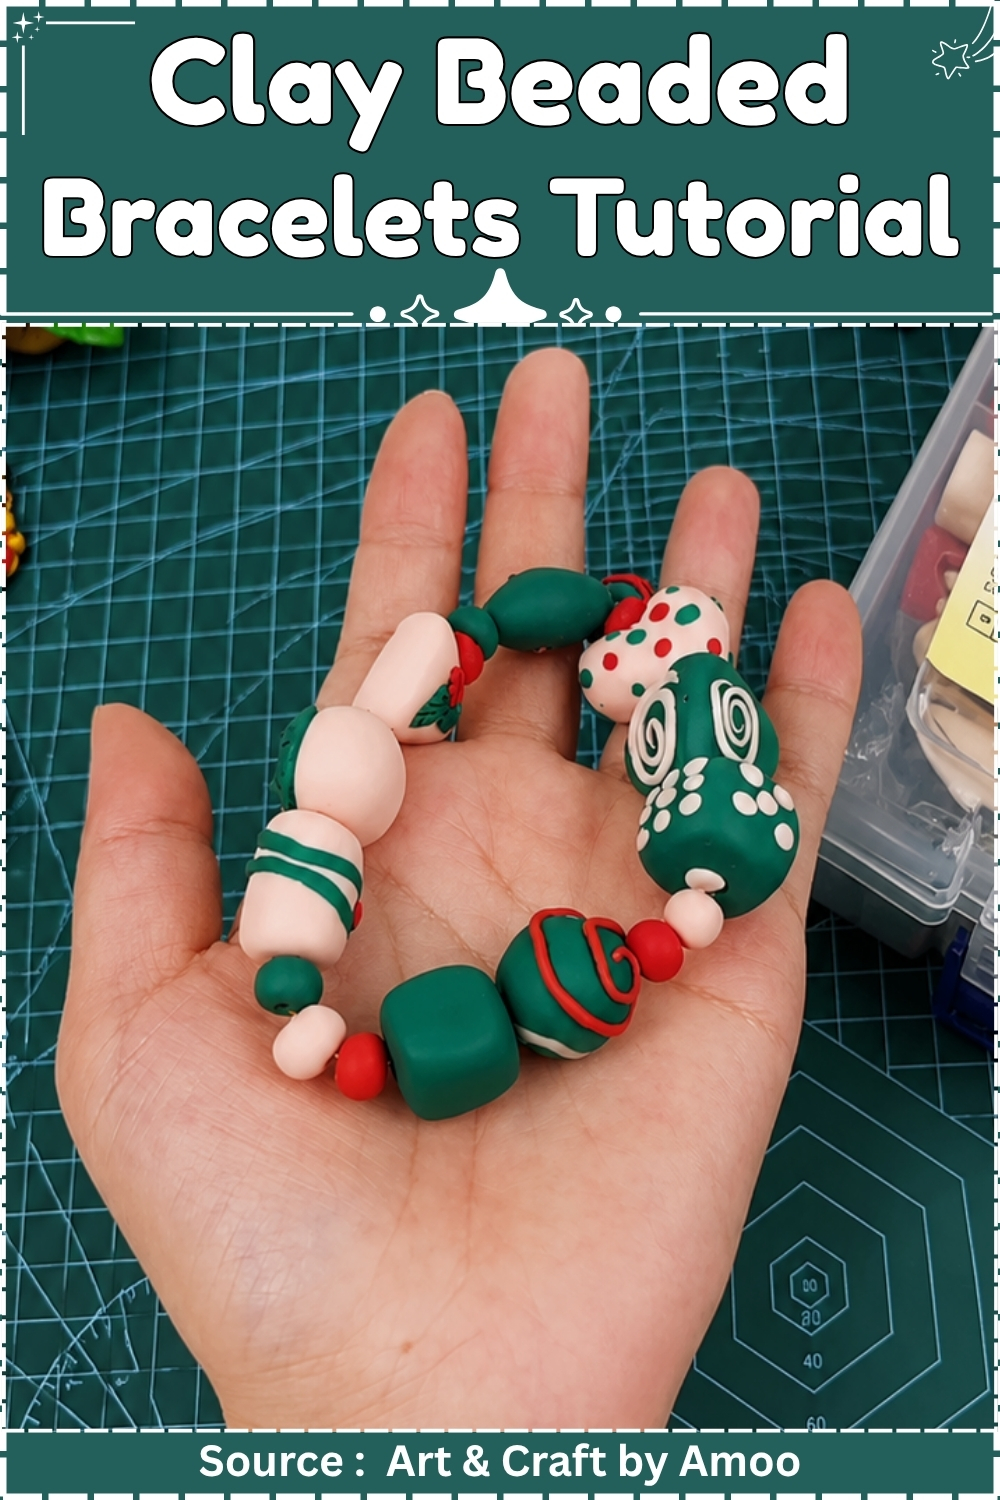
Wear this bracelet against bare skin rather than over a sleeve, where the stretchy cord bunches and the beads sit unevenly. It stacks cleanly with a plain gold bangle on one side and a single seed bead bracelet on the other, since both complement the scale without competing. Solid-colour days are where it reads best: a bracelet with decorated beads gets lost against a patterned print. On the wrist, the clay beads should sit face up in a natural resting position. If they spin constantly, the hole is slightly too wide for the cord, and re-stringing on a thicker elastic fixes it in five minutes.
At a Glance
- Clay type: Polymer clay, oven-cured
- Brand: Any standard polymer clay (Sculpey Original, Premo, or Fimo Soft all work)
- Tools: needle tool or eye pin, acrylic roller, toaster oven, oven thermometer
- Cure method: 275°F / 130°C, 30 minutes
- Finished bead size: 10 to 14 mm statement beads, 6 to 8 mm spacers
- Finished bracelet length: 170 to 180 mm (standard adult wrist)
- Hands-on time: 60 minutes
- Total time: 2.5 hours including cure and cool
- Difficulty: Beginner
Materials and Tools
Essential
- Polymer clay in your chosen base colours
- Small contrasting clay pieces for surface decoration
- Needle tool or an eye pin
- Acrylic roller
- Toaster oven and oven thermometer
- Baking tray lined with cardstock
- Aluminium foil for tenting
- 0.8 mm clear elastic stretchy cord
- Glass seed beads or small glass spacer beads in a complementary colour
- Scissors
- Clear nail-free super glue (for the knot)
Nice to Have
- Pasta machine for fast conditioning
- Round-nose burnishing tool for smoothing bead surfaces before baking
- 400 grit and 800 grit wet sanding sponges
- Polymer-compatible gloss varnish
The Build
Condition and Prepare the Clay
- Cut a 20 g piece of polymer clay into small cubes.
- Knead the cubes together for 5 to 7 minutes until the clay is warm and shows no cracking when bent sharply.
- Roll the conditioned clay into a smooth log between your palms.
- Pinch off equal portions for each bead. For 10 mm statement beads, each portion is roughly the size of a pea.
v
Shape the Statement Beads
- Roll each clay portion between your palms in a circular motion until a smooth sphere forms.
- Set the sphere on the work surface and press it lightly downward to create a rounded cube profile, keeping all six faces even.
- Smooth any finger creases by rolling the bead gently between one fingertip and the flat surface.
- Repeat until you have 12 to 14 statement beads, adjusting quantity to your wrist measurement as you go.

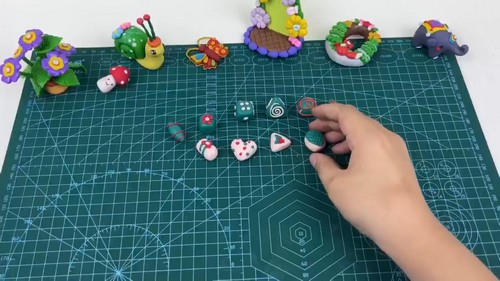
Add Surface Decoration
- Pinch a very small amount of contrasting clay and roll it into a ball 2 mm across.
- Press the dot flat against the bead face with a fingertip.
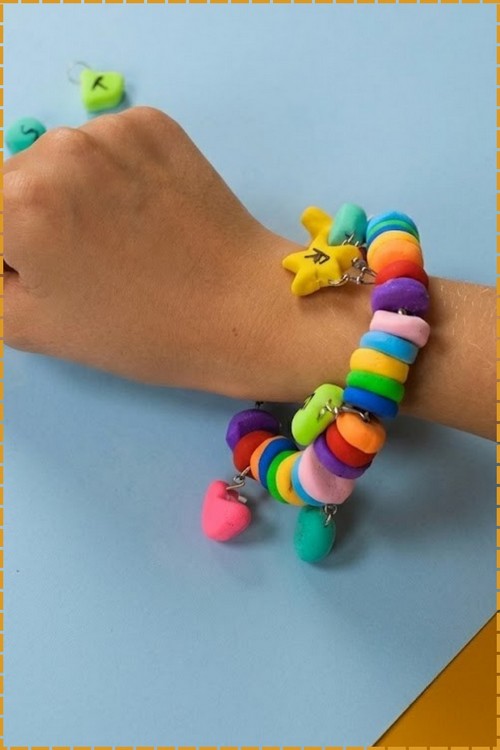
- For a flower: place five 2 mm dots in a circle, then press a differently coloured 1.5 mm dot into the centre.
- For a stripe: roll a thin snake of contrasting clay and press it along the bead face, then roll the bead lightly to embed it flush.
- For a heart: shape a tiny teardrop, press the flat edge in, then pinch the top two lobes.
- Work on one motif style per bead so each reads clearly at bracelet size.
Pierce the Beads
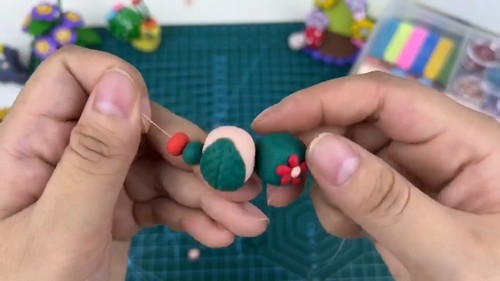
- Hold each bead between your index finger and thumb.
- Push the needle tool straight through the centre of the bead in one steady motion, keeping the tool perpendicular to the face you want facing outward.
- Widen the hole slightly by rotating the tool 45 degrees and withdrawing.
- Check that 0.8 mm elastic cord passes through with light resistance. If it catches, widen with one more rotation.
- Set the pierced beads on cardstock with the holes facing up so they keep their shape while you work.
Transfer and Arrange for Baking
- Line the baking tray with a sheet of cardstock.
- Stand each bead on cardstock with the pierced hole running side to side, not top to bottom, so the base does not flatten.
- Leave 10 mm between beads.
- Tent the tray loosely with aluminium foil, folding the edges under the tray rim.
Cure Block
- Preheat the oven to 275°F / 130°C. Let it run for 20 minutes before the beads go in, then check the actual internal temperature with an oven thermometer sitting on the tray. Small ovens spike on the way up and many settle 25 to 40 degrees above the dial reading.
- Bake for 30 minutes. Base the time on the thickest bead, not the number on the tray. A 12 mm rounded cube bead qualifies as over 6 mm at its widest cross-section, which puts it in the 30-minute category regardless of what the video suggests for thinner pieces. Polymer does not degrade until close to 350°F, so an extra 5 minutes at the correct temperature is always safer than pulling them early.
- Cool the beads on the tray for 30 minutes without handling. Polymer reaches full strength cold and lifting warm beads can distort the pierced hole.

Finishing
These beads do not need sanding if the surface was smooth before baking and no fingerprints baked in. If you do have rough patches, wet sand with a 400 grit sponge using small circles and light pressure, then move to 800 grit. Work wet, rinse the sponge frequently, and dry the bead completely before inspecting under a lamp. Skip sealing unless you want a gloss finish: polymer is inherently durable without a topcoat. If you want gloss, one thin coat of polymer-compatible gloss varnish is enough. Do not use nail polish: it stays chemically active against polymer and goes tacky within weeks.
Hardware and Assembly
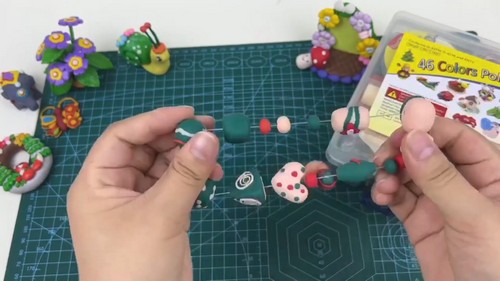
- Cut a 280 mm length of 0.8 mm clear elastic cord.
- Tie a loose overhand knot at one end so the beads do not slide off while stringing.
- Thread the beads in your planned sequence: one statement clay bead, then two or three glass spacer beads, repeating across the full length.
- Hold the bracelet against your wrist to check the fit before tying. The strung length should measure 170 mm for a close fit, 180 mm for a relaxed fit.
- Remove or add one spacer unit to adjust.
- Hold both cord ends together and tie a surgeon’s knot: cross right over left once, then left over right twice, and pull firmly.
- Put one drop of super glue on the knot, let it cure for 3 minutes, then trim the tails to 2 mm.
- Ease the knot inside the hole of the nearest clay bead so it sits hidden.

Where Makers Go Wrong
- Holes that shift off-centre during baking. The needle leaves a channel, not a rigid tube. When the bead stands on cardstock with the hole running vertically, the clay slumps very slightly over 30 minutes and the hole exits the side at a slight angle. It is invisible when the bead is strung but means the design faces slightly downward. Stand beads with holes horizontal across the tray to avoid it, and if you only notice after baking, sand the exit point down gently.
- Knots that work loose after a month. A single overhand knot, even pulled tight, creeps on elastic cord because the cord itself has memory. It keeps trying to return to its original diameter and loosens the knot incrementally. The surgeon’s knot plus super glue stops this. A knot tied without glue on this cord type usually fails within six weeks of regular wear.
- Decoration that lifts at the edges after baking. Thin applied clay pieces need to be fully pressed in, not just resting on the surface. If a flower petal or stripe has a raised edge before baking, it will lift more in the oven as the clay softens slightly and relaxes. Roll the decoration flat against the base bead with a fingertip before piercing, not after.
Variations
- A monochrome version using one clay colour plus metallic gold glass spacers reads as far more finished than the materials suggest. The clay beads need no surface decoration: the contrast between matte clay and glass does the work.
- For a chunky summer bracelet, scale the statement beads up to 16 mm and drop the glass spacers entirely. Every bead is clay. This means more weight, so keep the bead count to ten rather than twelve and use a wrist measurement that is slightly looser than usual.
- A gradient bracelet uses five clay colours mixed from dark to light across the strand, with a single colour of glass spacer running through. Mix each colour in a 30-minute session and condition separately so they do not blend before you want them to.
Care
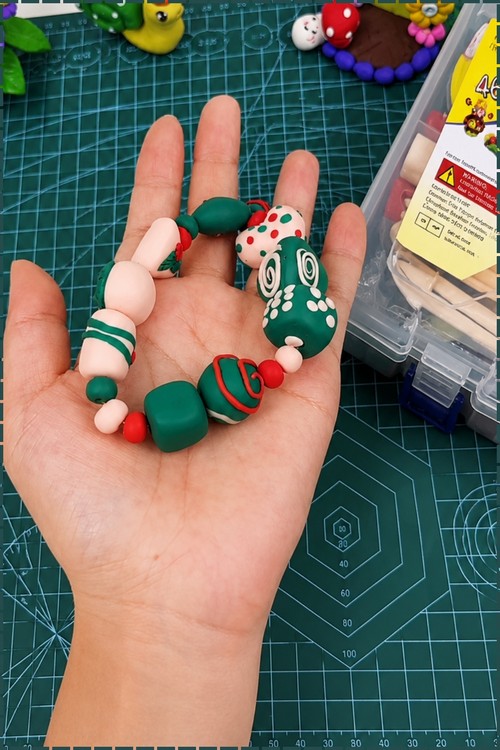
Re-tie the bracelet at the first sign of the elastic going slack rather than waiting for it to snap while on the wrist. Take it off before washing dishes or swimming, since prolonged water exposure breaks down the knot’s super glue faster than the cord itself. The cord degrades with sun exposure over months, so store it in a drawer rather than on a surface by a window. Avoid acetone and alcohol-based hand sanitiser directly on the clay beads if they are varnished, as both strip polymer-compatible gloss. If a clay bead cracks, the cord is the culprit: the knot is sitting too tight inside the hole and forcing the bead apart. Re-string with the knot on the outside before it damages more beads.
Quick Answers
- Can I use air-dry clay for these beads? You can shape and pierce them the same way, but air-dry beads on a stretchy bracelet will eventually absorb moisture from skin and soften enough to lose their shape. Polymer is the right material where beads touch the wrist daily.
- My bead cracked in the oven. What happened? There was an air bubble trapped inside. Polymer clay with an unsealed pocket of air expands in the oven and the surface splits. Condition more thoroughly next time and press each ball firmly before rolling to push air out from the centre.
- Can I use regular thread instead of elastic? Thread does not stretch enough to slide over most people’s hands, so you need a clasp. A lobster clasp on a thread-strung bracelet works, but it requires crimping tools and crimp beads. Elastic is the simpler and more comfortable choice for a design with this many beads.
- How many beads do I need? A 170 mm bracelet with alternating 12 mm clay beads and three 6 mm glass spacers between each takes roughly 12 clay beads and 33 glass spacers. Lay them out before stringing to confirm the count for your specific wrist size.