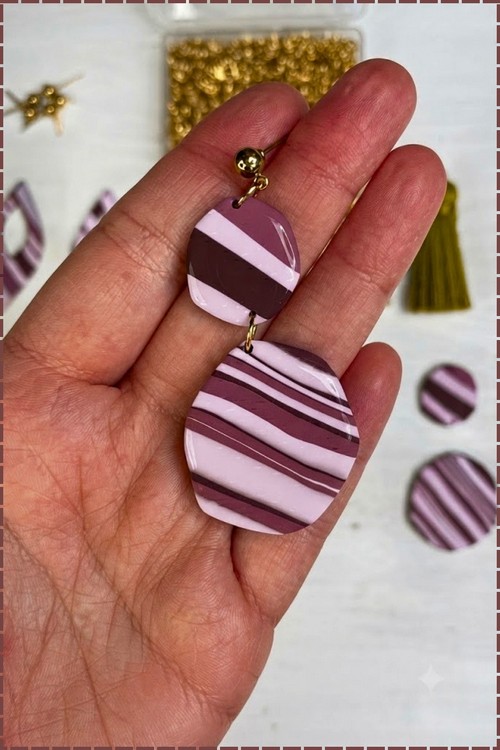
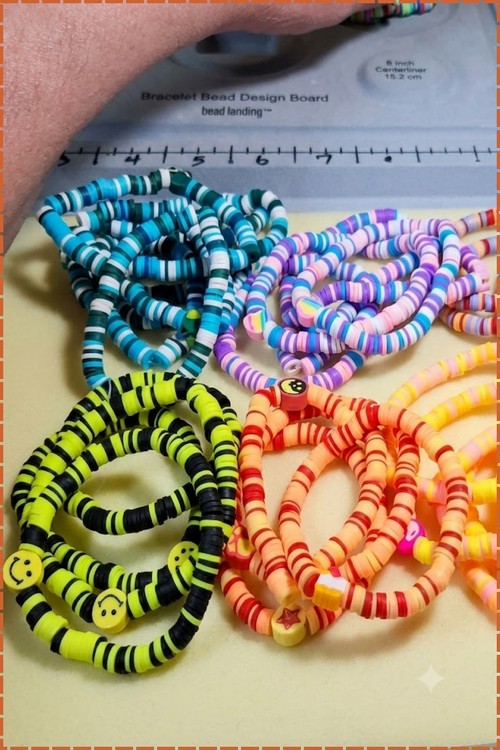
Easy Stripes Design Clay Beads Ideas – Stack-and-Cut Technique
Striped clay beads made by stacking sheets of clay, pressing them into a block, then slicing across the layers so every bead carries the same stripe. One stack gives you a whole bracelet’s worth. Easier than rolling stripes onto beads one at a time.
Painting a stripe onto a finished bead is fiddly and never lines up twice. Stacking is the shortcut. You layer flat sheets of clay in the colour order you want, press the stack solid, then cut across it, and the stripes are already inside every slice you take. Roll each slice into a bead and the pattern holds. One stack, one afternoon, a full set that matches.
Stripes Design Clay Beads
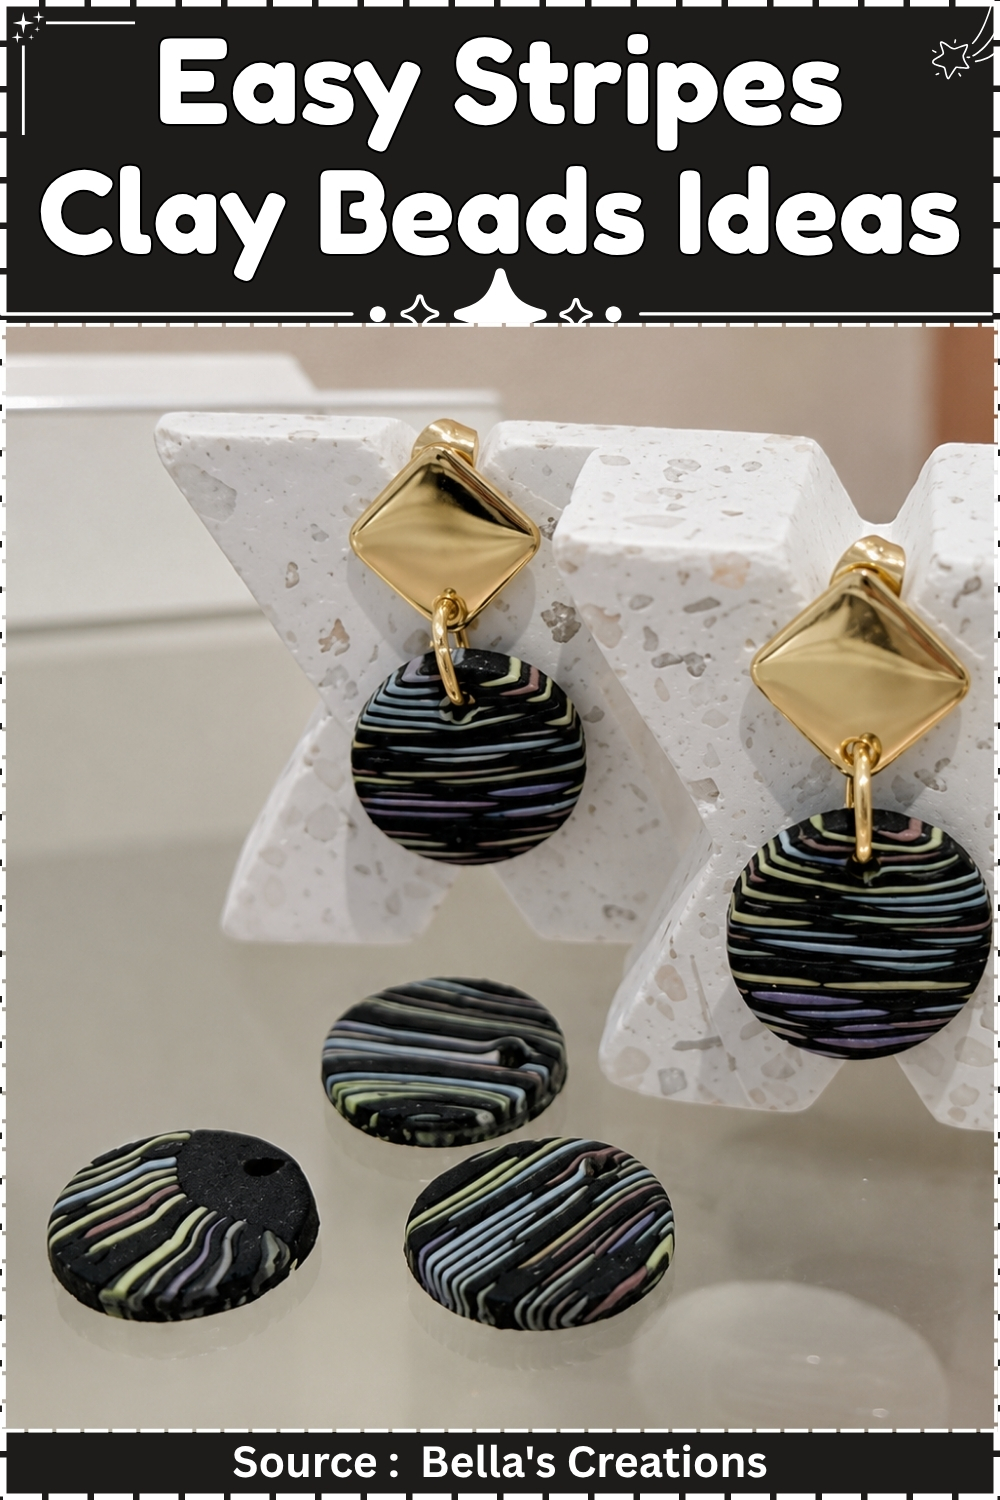
- Clay type: Polymer, oven cured
- Brand: Sculpey Premo
- Tools: Acrylic roller or pasta machine, sharp tissue blade, ceramic tile
- Cure: 275°F / 130°C for 30 minutes
- Finished size: Cane slices 2 to 3 mm thick, 20 to 35 mm across for earring use, 8 to 15 mm across for beads
- Hands-on time: 45 minutes for the cane, plus 15 minutes for slicing and piercing beads
- Total time: 2 hours including bake and cool
- Difficulty: Intermediate
Materials and Tools
Essential
- Sculpey Premo in black plus four to six accent colours
- Acrylic roller
- Sharp tissue blade
- Glazed ceramic tile, 20 cm minimum
- Aluminium foil
- Oven thermometer
- Wet/dry sandpaper in 400, 600, and 800 grit
- 1.5 mm piercing needle (for beads)
- Ruler
Nice to Have
- Pasta machine
- Brayer or soft rubber roller for the initial sheet
- Craft knife for trimming cane edges
- Calipers for checking cane width consistency
- Denim scrap for buffing
What Makes the Stripe Pattern Work
The stripe cane in this technique is a stack cane, not a log cane. The distinction matters. In a log cane, you lay colour strips side by side and reduce. In a stack cane, you build a colour mosaic on a base sheet, then fold the whole sheet on itself repeatedly. Each fold multiplies the layers. The black base is not a background colour in the decorative sense: it is the separator that keeps each stripe legible at high layer counts. Without it, adjacent colours at the forty-eighth repetition merge into muddy blends rather than clean lines. The more times you fold, the finer and more precise the final stripe, but the more each fold must be aligned exactly. A 5 mm offset between layers produces a stripe that angles rather than runs straight.
The Build
Conditioning
- Cut each block of Premo into eight pieces and run every piece through the pasta machine at 3 mm, folding and passing ten times.
- Run the black clay through last and keep it on a separate tile to avoid contaminating lighter colours.
Building the Base Sheet
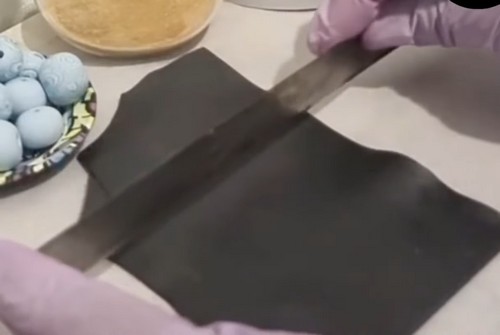
- Roll the black clay to 2 mm thick on the ceramic tile: pasta machine setting 3 mm, then one pass at 2 mm, or roll by hand to 2 mm using two 2 mm guide strips alongside the clay.
- Trim the black sheet to a rectangle 10 cm wide and 14 cm long with the tissue blade.
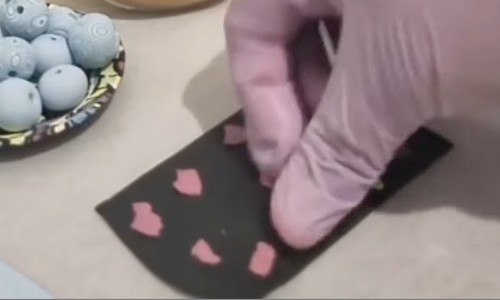
Adding Colour Strips
- Roll each accent colour to 1 mm thick.
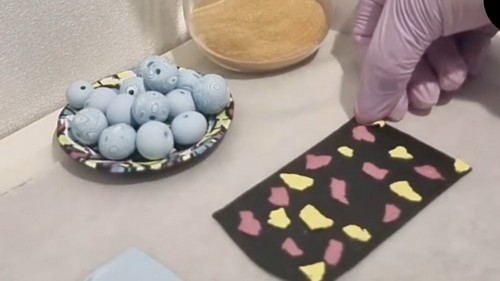
- Tear or cut strips of each colour 8 mm wide and 10 cm long. The edges do not need to be clean.
- Lay the colour strips across the black sheet horizontally, parallel to the short edge, pressing each strip flat against the black surface.
- Leave 3 mm of black visible between each strip.
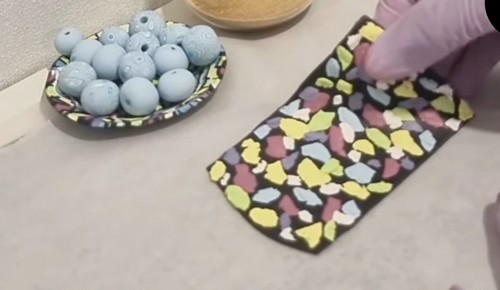
- Cover the full 14 cm length of the black sheet with strips, alternating colours in whatever order you want.
- Roll over the entire surface once with the acrylic roller at light pressure to bond the strips to the black base without distorting them.
First Stack
- Trim the assembled sheet to an even rectangle using the tissue blade.
- Cut the sheet in half perpendicular to the stripes, so each half is 10 cm wide and 7 cm long.
- Lift the top half and flip it face-down onto the lower half, aligning all four edges.
- Press across the surface with the acrylic roller using even pressure from the centre out to the edges.
- Check the edge alignment on all four sides and press any offset edge back into place before the clay firms.
Second Stack
- Cut the doubled sheet in half again, perpendicular to the stripes.
- Flip one half face-down onto the other and align all edges.
- Roll across the surface to bond, pressing from the centre outward.
- Trim any uneven edges with the tissue blade.
Third Stack
- Cut the four-layer block in half once more, perpendicular to the stripes.
- Flip and stack as above.
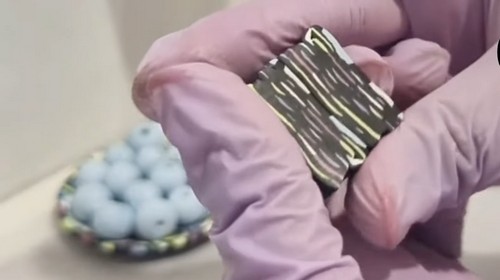
- Roll firmly across the surface, then stand the block on its edge and press down evenly to square up the sides.
- Trim.
Shaping the Cane
- Decide on the final cane profile: square, rectangular, or round.
- For a square cane: press all four sides against the tile surface in turn, squaring each face without distorting the internal pattern.
- For a round cane: roll the block between your palms with very light pressure, rotating continuously, until the profile rounds.
- Refrigerate the finished cane for 20 minutes.
Slicing
- Remove the cane from the refrigerator and let it rest 2 minutes.
- Hold the cane on the tile and cut a test slice 3 mm thick from one end.
- Inspect the test slice for stripe clarity. If the stripes look blurred, the cane is still too warm: refrigerate a further 10 minutes.
- Slice the remaining cane to 2 mm thick for earring pieces and 6 mm thick for bead blanks, keeping the blade perpendicular to the cane face.
Piercing Bead Blanks
- Lay the 6 mm slices flat on the tile.
- Roll each slice lightly between the palms to a round or oval shape, pressing to 12 to 15 mm across.
- Push the 1.5 mm needle straight through the centre from the top face, rotating a half turn as you withdraw.
- Press the raised lip on the underside flat with a fingertip.
Baking
- Bake at 275°F / 130°C for 30 minutes. Calculate from the thickest piece on the tray: the 6 mm bead blanks, not the 2 mm earring slices.
- Bake on the ceramic tile. Lay earring slices flat with 5 mm clearance between them. Stand bead blanks vertically on a folded strip of cardstock to keep them upright without flattening the face.
- Tent with aluminium foil. Sit the oven thermometer beside the tile. Polymer with this many thin layers of different colours will show any heat unevenness as stripe distortion if the oven runs hot on one side. Rotate the tile halfway through the bake if your oven is known to run unevenly.
- Cool completely on the tile before slicing any further or handling.
Finishing
- Cane slices for earrings need sanding before any finding is attached. The cut face has a slight drag mark from the blade that catches light unevenly.
- Start with wet 400 grit, sanding each slice in a circular motion against the paper held flat on the tile. Ten strokes per face. Move to wet 600 grit, same motion, ten strokes. Finish on wet 800 grit.
- Buff each slice against a denim scrap for five seconds per face. The colour saturation increases noticeably. Earring slices do not need sealing. A polymer resin glaze is a personal choice, not a structural requirement, and it adds a finish some makers do not want.
- Bead blanks: thread onto a bamboo skewer, twenty at a time, and sand the barrel on wet 600 then 800 grit while rolling the skewer. Take the hole rim edges with folded 800 grit.
Hardware and Assembly
- For stud earrings: attach nickel-free flat-pad posts using Sculpey Bake & Bond and a second bake at 275°F / 130°C for 30 minutes, or GS Hypo Cement with a 24-hour cure. Rough the post pad with 220 grit before either method.
- For dangle earrings: drill a 1.5 mm hole 3 mm from the top edge of the baked slice using a pin vice and a 1.5 mm drill bit. Open a 5 mm nickel-free jump ring sideways, pass it through the hole, and close with flat pliers. Attach an earring hook through the jump ring.
- For beads on a bracelet or necklace: string on 0.5 mm Stretch Magic. Tie a surgeon’s knot under light tension, touch a drop of GS Hypo Cement to the knot, and draw the adjacent bead over the knot to seat it inside the hole.
Where Makers Go Wrong
- Misaligned stacking shifts the stripe angle. Each fold must place all four edges exactly over the layer below. An offset as small as 4 mm across a 10 cm wide sheet produces a stripe that visibly angles by the third fold, and there is no correcting it once the block has been compressed. The fix is to align edges before pressing, not after.
- Warm clay smears the stripe edge on slicing. The boundary between black and colour is a physical interface only a few tenths of a millimetre wide at the eighth-fold stage. A blade dragged through warm clay pulls the interface slightly, so the stripe reads as a gradient rather than a clean line. Cold clay cuts that boundary cleanly. The 20-minute refrigerator rest before slicing is what keeps the edge sharp, not the blade sharpness.
- Pressure on rolling bonds the strips but flattens the colour thickness. One firm rolling pass is what bonds strips to the black base. Two or three passes compress the colour strips from 1 mm to 0.5 mm or less, and thinner colour layers disappear against the black in the final slice at high fold counts. Roll once, check the bond by pressing a fingernail lightly at the edge, and stop.
- The cane looks sharp until it cools, then looks blurred. Polymer under a tile lamp or in a warm room is at a slightly different viscosity than fully cooled clay. A slice cut from a room-temperature cane that has been sitting on the work surface for an hour will look crisper than one cut immediately after refrigerating, because the cold clay contracts very slightly and tightens the stripe interface. The difference is most visible at the thirty-fold-plus stage.
- Rounding the cane distorts the end stripes. Rolling a square stack cane round works for log canes, which are symmetrical. A stack cane has a specific orientation: the stripes run parallel to the long axis. Rolling round under palm pressure pushes the outer stripes toward the ends of the cane and stretches them, so the end slices show wider stripes than the centre slices. Use the square or rectangular profile and cut beads with a straight-edged blade rather than rounding the cane.
Variations
- A white base instead of black produces a softer, more vintage-toned stripe. The colour saturation is lower, but pastels that disappear against black read clearly against white. The technique is identical; only the base colour changes.
- Curved stripes rather than straight ones: before the first stack, run a finger along the colour strip nearest one edge of the black sheet to bow it slightly inward. Every subsequent fold reproduces the curve, and the slice shows a striped arc rather than parallel lines.

Care
Do not soak cane-slice earrings: the drilled hole in a thin slice is the weak point, and prolonged water exposure can stress the clay around it. Store flat in a padded tray rather than in a box where pieces press against each other, since the stripe face scratches easily before any resin coat is applied. For bracelets, re-string annually on fresh elastic if worn more than three times a week. The black base colour is the most lightfast Premo colour available; the accent colours hold their saturation better away from prolonged direct sun.
Quick Answers
- Can I do more than three folds? Yes. Four folds give ninety-six stripe layers. Past the fourth fold the individual stripes become visible only under a loupe, so the finished slice reads as a fine texture rather than distinct stripes. Whether that is the effect you want is a design decision.
- My test slice looks muddy rather than striped. What went wrong? One of two things: the colour strips were touching each other rather than separated by visible black, or the clay was too warm when sliced. Check your strip spacing on the base sheet and refrigerate the cane for a further 15 minutes before the next slice.
- Can I use Fimo instead of Premo? Yes. Fimo holds a sharper cane edge than Premo because it is slightly firmer at room temperature. Bake at 230°F / 110°C for 30 minutes. Do not mix Fimo and Premo in the same cane: bake at 275°F for the mixed piece and check that no scorching occurs on the Fimo portions.
- The slices curl up at the edges during baking. How do I fix it? Place a second ceramic tile directly on top of the slices during the bake. The weight keeps them flat without affecting the cure.