How to make polymer clay smooth charms without a single sanding session, by getting the surface right before it ever goes in the oven. Fingerprints and dust set permanently once baked, so the fix is a clean work surface and a light pass with alcohol beforehand. Sanding after is a rescue job, not the plan.
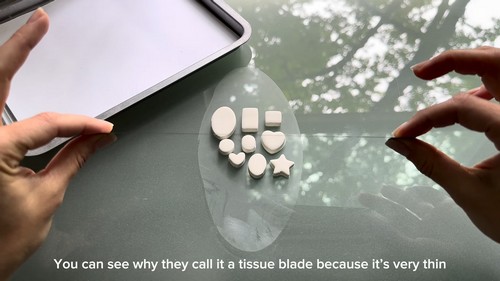
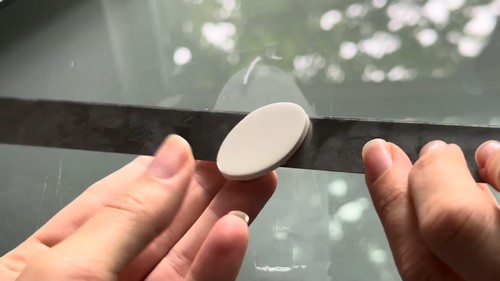
Painted clay charms with a smooth porcelain like finish sit in a different category from textured or patterned polymer clay work because the surface preparation is doing as much as the painting itself. Getting that clean white base requires sanding baked pieces through several grits before any color goes on, and the tissue blade shown early in this process is what makes the initial flat edges possible before baking even starts. The folk art motifs here, birds, strawberries, flowers, and fish, are small enough to fit on a charm but detailed enough that each one reads as its own little illustration.
Polymer Clay Smooth Charms For Earrings

- Clay type: Polymer clay, oven-cured
- Brand used: Sculpey Original
Tools: acrylic roller, playing cards, tissue blade, metal charm cutters, needle tool, sanding sponges, paintbrushes or acrylic markers, UV resin and UV lamp, pin vise or micro drill, pliers
- Cure method: 275°F / 130°C for 15 minutes
- Sheet thickness: 3 mm
- Finished size: 20 to 30 mm per charm
- Hands-on time: 90 minutes for a batch of 30
- Total time: about 3 hours including cure, cool, and resin curing
- Difficulty: Beginner friendly, patient work
Materials and Tools
Essential
- Sculpey Original polymer clay
- Glass or ceramic tile work surface
- 70% isopropyl alcohol and lint-free cloth
- Two stacks of 13 playing cards
- Acrylic roller
- Needle tool or toothpick
- Small metal charm cutters
- Sharp flexible tissue blade
- Cardstock
- Toaster oven and oven thermometer
- Aluminium foil
- 180 grit and 600 grit sanding sponges
- Spray bottle of water
- Acrylic paint with liner and spotter brushes, or fine-tip acrylic markers
- Low-odour UV resin and UV nail lamp
- Pin vise or micro drill with a 1.5 mm bit
- Screw eye pins, 4 mm
- Cyanoacrylate super glue
- 5 mm nickel-free or surgical steel jump rings
- Two pairs of flat-nose pliers
Nice to have
- Plastic stamper cutters for shaped charms
- Dedicated pasta machine for conditioning
- Acrylic sheet with sticky-tack bumper rails, or air-dry clay charm trays
- Lighter for popping resin bubbles
- Damp hand towel for wiping between grits
The Build
Prepare the Surface and Clay
- Wipe the glass or tile surface with 70% isopropyl alcohol and let it flash off.
- Cut a 60 g block of Sculpey Original into small cubes.
- Knead the cubes together for 5 to 8 minutes until the clay is warm, soft, and shows no crumbling when folded.
- Roll the conditioned clay into a smooth ball, then press it into a rounded pillow about 15 mm thick.
Roll the Sheet
- Stack 13 playing cards on each side of the clay, giving a 3 mm sheet.
- Roll the acrylic roller across the clay with both ends riding on the card stacks.
- Rotate the sheet 90 degrees and roll again until the roller runs on the cards with no resistance.
- Pierce any visible air bubble with the needle tool at a shallow angle, then press the hole closed with a fingertip.
- Run the roller vertically over the sheet in light passes to erase horizontal roller marks, keeping the ends on the cards.
Cut the Charms
- Rest the sheet for 5 minutes so it firms slightly.
- Place a metal cutter on a flat, bubble-free area of the sheet.
- Press straight down until the cutter meets the tile, then lift without twisting.
- Space each cut 3 mm from the last and work inward from the sheet edges.
- Peel the excess background clay away from the cutouts in one continuous piece.
- Press any distorted cutout back into the scrap and re-roll rather than reshaping it by hand.
Transfer to the Tray
- Line the toaster oven tray with a sheet of cardstock trimmed to fit.
- Slide the tissue blade flat along the tile and under a charm in one quick motion.
- Lift the charm on the blade and set it flat on the cardstock, painted side up.
- Leave 10 mm between charms across the tray.
Cure Block
- Preheat the toaster oven to 275°F / 130°C and give it 20 minutes to settle before anything goes in. Confirm the temperature with a standalone oven thermometer sitting on the tray, not the dial on the front, because small ovens routinely overshoot by 25 to 50 degrees on the way up and that spike is what scorches thin charms.
- Bake at 275°F / 130°C for 15 minutes. Time the batch from the thickest piece on the tray, not from the number of pieces. A 3 mm charm still gets the full 15 minutes: this is a minimum, not a scaled figure, and underbaked polymer snaps at the screw eye months later.
- Tent the tray loosely with aluminium foil, edges folded down, so no foil touches the clay. Cool the charms on the tray, undisturbed, for 30 minutes. Polymer reaches full strength cold, not hot, and lifting warm charms curls them.
Finishing
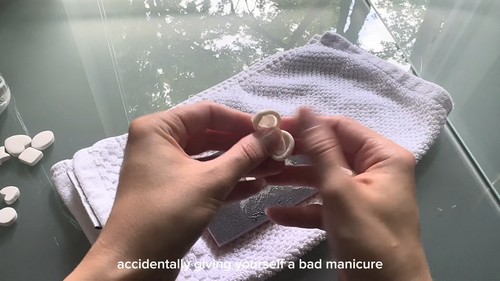
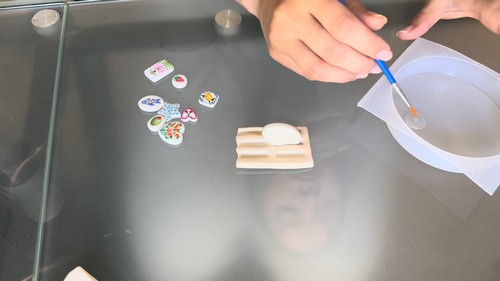
Sand wet. Mist the 180 grit sponge and work each charm in small circles, keeping the sponge flat against the face so you flatten bumps rather than round the outline. Rinse the sponge when it loads up. Move to 600 grit and repeat until the surface reads matte and even under a lamp. Dry each charm on the towel and check the edge profile against a straight edge before painting. Paint with acrylics for blended colour, or fine-tip acrylic markers for flat, controlled line work. If a painted line goes wrong, a damp 600 grit sponge lifts it without touching the clay beneath. Seal with two thin coats of low-odour UV resin, edges first, cured 30 seconds under the lamp, then each face for 30 seconds. Pop surface bubbles with a quick pass of a lighter flame before curing. Work away from windows: daylight starts curing resin on the brush.
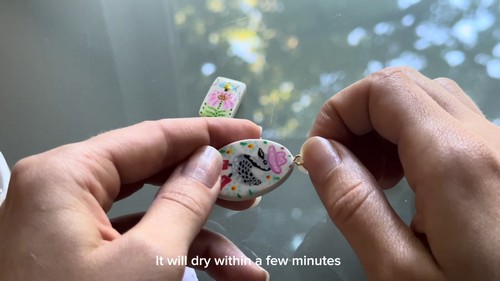
Hardware and Assembly
- Wrap the charm in a scrap of cotton cloth, leaving only the top edge exposed.
- Hold the charm vertically and drill straight down into the top centre with a 1.5 mm bit, going 4 mm deep.
- Blow the dust clear and test-fit the screw eye without glue.
- Put a drop of super glue on scrap paper, dip only the tip of the screw eye, and twist it into the hole until the loop sits flush.
- Leave the glue 10 minutes before handling.
- Open a 5 mm jump ring by twisting the ends sideways past each other with two pliers, never pulling them apart.
- Thread the charm and the ear wire, then twist the ring closed until the ends grind past each other and meet.
Use nickel-free or surgical steel findings for anything worn on the ear. A 25 mm solid charm at 3 mm thick sits comfortably; past 35 mm the weight starts pulling on the lobe and the piece wants a hollow back or a thinner sheet.
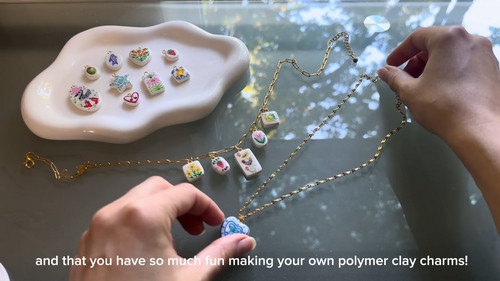
Batch Running Order
Working one charm at a time triples the clock. Run it as stations instead.
- Condition the full block in one session, 120 g at a time, and keep it in a sealed bag.
- Roll two full sheets before cutting anything. One tile holds roughly a 150 mm square sheet.
- Cut the full sheet in a grid, largest cutter first, then fit smaller cutters into the gaps. Cutting large to small takes the same clay from 18 charms to about 26.
- Peel the scrap in one piece and re-roll it immediately while it is still warm.
- Load the whole tray before preheating. A standard toaster oven tray takes 24 to 30 charms at 25 mm with correct spacing.
- Sand the entire batch at 180 grit before anyone touches 600 grit. Changing grit costs more time than changing charms.
- Paint by colour, not by charm. Every white base, then every black line, across the whole tray.
- Resin in rows of six on the bumper rail sheet, since a UV lamp only cures what fits under it.
- Drill and glue all charms, then walk away for 10 minutes before any jump rings go on.
Where Makers Go Wrong
- Resting the sheet unevenly before cutting. Clay that has sat 20 minutes cuts with a crisp wall, while fresh warm clay compresses along the cutter edge and springs back slightly domed. Cut a whole sheet in one sitting or you will get two different edge profiles in the same batch and only notice at the sanding stage.
- Sanding at the same pressure on the second grit. The 600 grit sponge is fine enough that most people lean harder to feel it working, which rounds the crisp outline the cutter gave you. Charms sanded this way look softer and slightly smaller than their neighbours, and there is no way back.
- Sealing over trapped sanding dust. Wet sanding leaves a fine slurry that dries invisible in the surface texture and only shows once resin goes over it as a cloudy patch. Rinse and fully dry every charm between sanding and sealing, not just wipe it.
- Screw eyes set at an angle. A hole drilled even five degrees off vertical makes the charm hang crooked once it swings free, and the tilt is invisible while the charm lies flat on the bench. Hold it vertical in the cloth and check by eye from the front before drilling.
Variations
| Variation | What changes | Notes |
|---|---|---|
| Translucent layered charm | Back the shape with a 1 mm translucent sheet before cutting | Bake time unchanged; translucent scorches faster, so tent carefully |
| Textured back | Press lace or sandpaper into the sheet before cutting | Skip sanding on the textured face and resin that side lightly |
Care
Keep finished charms off leather and vinyl surfaces, since plasticiser migration leaves a permanent sticky mark on both. Take resin-glazed charms off before swimming; chlorine dulls the gloss to a haze within a few exposures. Store charms flat rather than hanging, so the screw eye is not carrying weight for months. Wipe painted areas with a dry cloth only, as alcohol lifts acrylic straight off the glaze. If a charm yellows, the resin is the culprit, not the clay, and it can be sanded back and reglazed.

Quick Answers
- Can I use air-dry clay instead? No, not for this method. Air-dry clay cannot be cut this thin without curling as it dries, and it will not take a drilled hole without chipping.
- My charms came out bendy. Are they ruined? No. Rebake at 275°F for another 15 minutes. Polymer only degrades near 350°F, so a second bake fixes underbaking with no downside.
- Can I skip the resin and use nail polish topcoat? Skip it. Nail polish stays chemically active against polymer and will go tacky against the surface within weeks.
- How do I stop scrap clay going grey? Re-roll scrap by colour family only, and wipe your hands and roller with alcohol before switching from dark to light. Grey scrap is fingerprint transfer, not clay breakdown.
Leave a Reply