How To Attach Earring Posts To Polymer Clay The Right Way
How to attach earring posts to polymer clay so they stay put through actual wear. Posts go on after baking, onto a fully cooled piece, and the surface needs roughing up first so the glue has something to grip. A smooth baked back is why studs pop off, and it is fixable in about ten seconds with sandpaper.
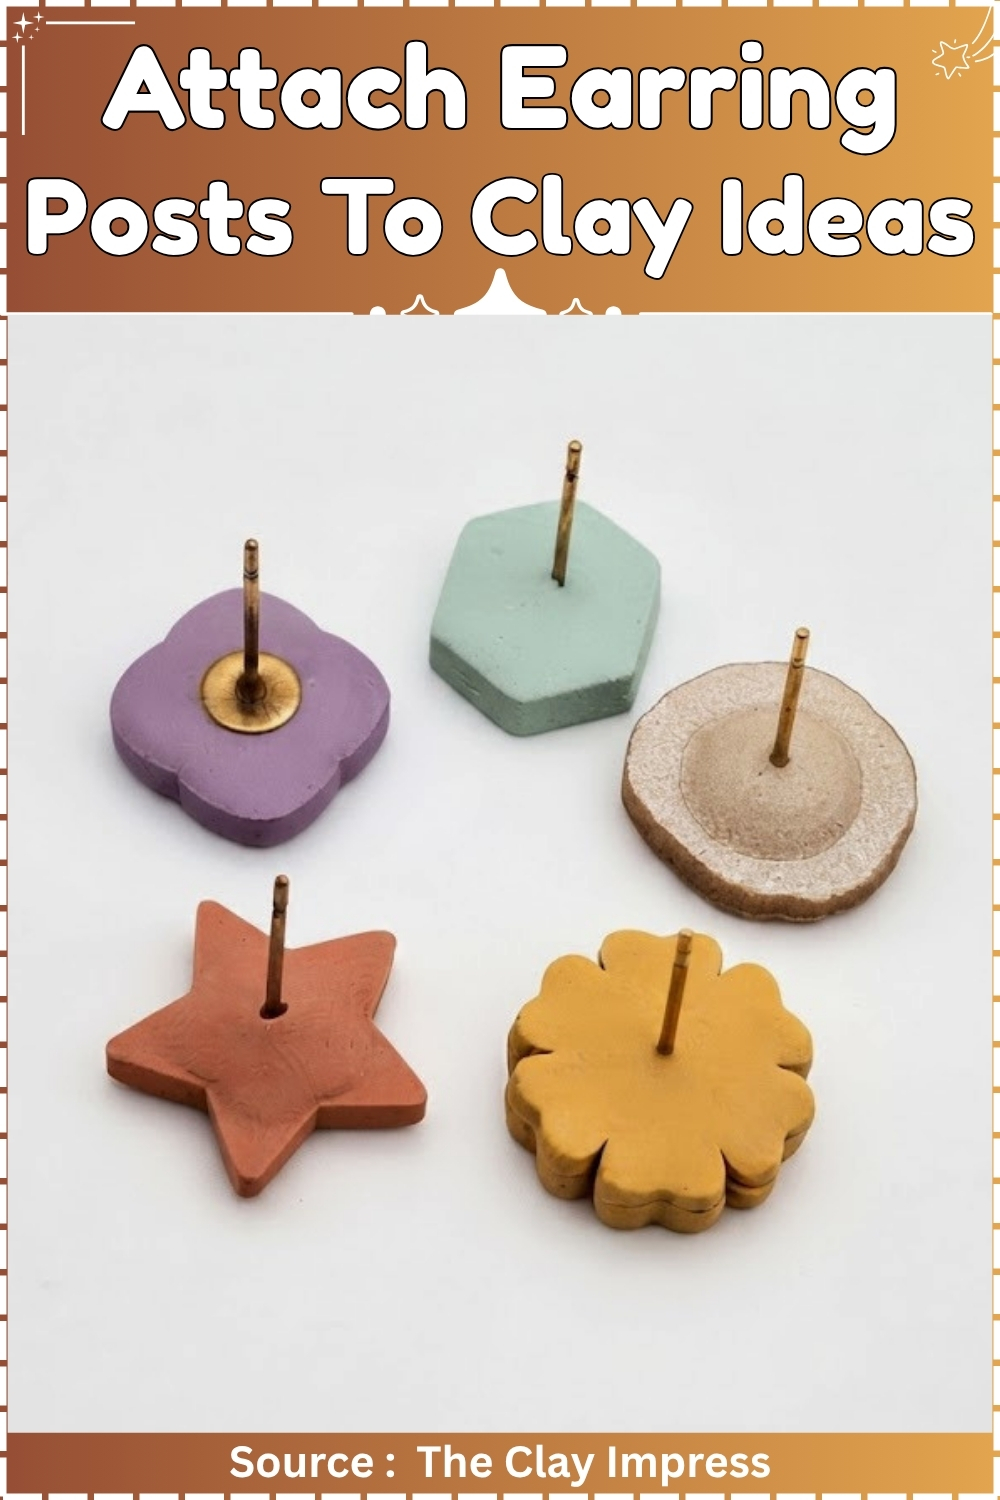
Getting earring posts to stay put in polymer clay comes down to when and how you set them, and there are two different points in the process where it can work. Pressing the post pad directly into unbaked clay before it goes into the oven creates a mechanical bond as the clay cures around the metal, while gluing onto a baked piece with strong adhesive is the alternative for anyone who prefers to finish the clay first. Both methods appear in this tutorial, which makes it useful for understanding where each approach has an advantage.
Attach Earring Posts To Polymer Clay
- These terms appear throughout all five methods. Read them once, then go straight to the build.
- Liquid clay is a bottled, pourable form of polymer clay, sold under names like Sculpey Translucent Liquid or Kato Liquid Polyclay. It flows into gaps and bonds cured clay to raw clay when baked. It does not dry out, so the lid goes back on the bottle between uses.
- Conditioning means kneading raw polymer clay until it is warm, soft, and shows no cracks when folded. Unconditioned clay crumbles and will not bond properly to a baked surface. For small pieces used in these methods, condition by hand for 3 to 5 minutes until the clay is smooth and stretchy.
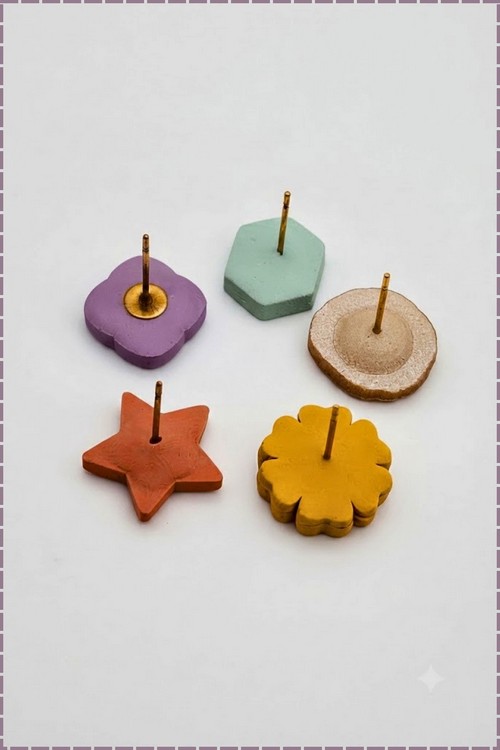
- A flat-pad earring post has a small round disc on its back end, called the pad, which is what the clay grips around. The post pin extends out from the disc. The pad is what you cover, never the pin.
- Tenting means placing a loose aluminium foil cover over the baking tray so no foil touches the clay surface, but heat can still circulate. It prevents scorching on anything baked longer than the standard minimum.
- Clay softener is a liquid product such as Sculpey Clay Softener that makes stiff or crumbly raw clay workable without changing how it bakes. A drop or two worked into the clay by hand is enough.
At a Glance
- Clay type: Polymer clay, oven-cured
- Suitable brands: Sculpey Premo, Sculpey Original, Fimo Professional, Cernit
- Tools: acrylic roller, tissue blade or sharp cutter, toaster oven, oven thermometer, tweezers
- Cure method: 275°F / 130°C, 60 minutes for all five methods
- Finished stud size: 10 to 14 mm
- Post pad size: 5 mm flat pad
- Hands-on time: 15 to 30 minutes per method
- Total time: 2 hours including cure and cool
- Difficulty: Beginner
Materials and Tools
Essential
- Polymer clay in your chosen colour
- Liquid clay (Sculpey Translucent Liquid or Kato Liquid Polyclay)
- Nickel-free or surgical steel flat-pad earring posts, 5 mm pad
- Cyanoacrylate superglue (for temporary hold only)
- Tweezers
- Acrylic roller
- Tissue blade or sharp metal cutter
- Cardstock for lining the tray
- Aluminium foil for tenting
- Toaster oven and oven thermometer
- Cornstarch
Nice to Have
- Clay softener (Sculpey Clay Softener)
- Ball tool or silicone-tipped sculpting tool
- Post alignment tool or small ruler
- Specialised dome cutter and dome press tool
- 1.5 mm thickness guides
The Build
Method 1: Liquid Clay Encapsulation
This method works on a fully baked earring base. You are bonding the post to a finished piece rather than building the post in from raw.
- Bake the earring base following your brand’s standard time and temperature. Let it cool completely before continuing.
- Place one drop of superglue on a scrap piece of paper.
- Dip only the flat pad of the earring post into the superglue drop, coating the pad lightly.
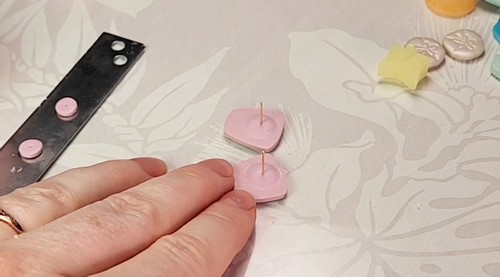
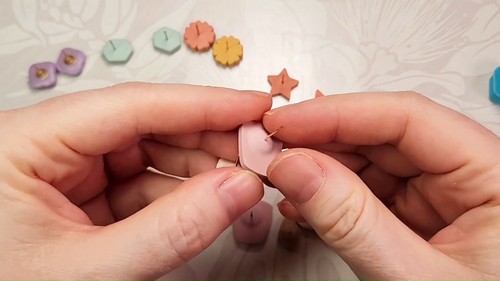
- Pick up the post with tweezers and press the pad flat against the centre back of the baked earring.
- Hold for 30 seconds, then set aside for 3 minutes to let the superglue set.
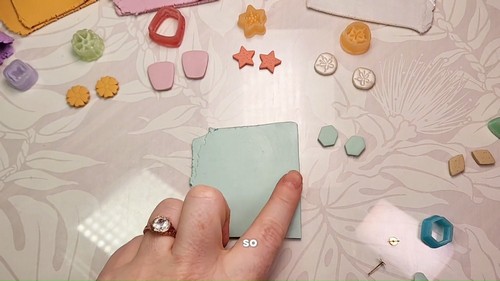
- Apply liquid clay over the flat pad in a generous layer, covering the entire metal surface and extending 2 mm beyond the pad edge onto the clay.
- Transfer the earring to a cardstock-lined baking tray, post side up.
- Tent with foil and bake at 275°F / 130°C for 60 minutes.
- Cool on the tray for 30 minutes before handling.
Method 2: Raw Clay Sandwich
This method builds the post in from the start and is best for plain, untextured studs made entirely from raw clay. The post never touches a baked surface.
- Condition a portion of clay for 4 minutes until smooth and soft.
- Roll the clay out to 2 mm thick using an acrylic roller and thickness guides or two stacks of playing cards as spacers.
- Cut a second sheet at 1 mm thick from the same or a contrasting clay.
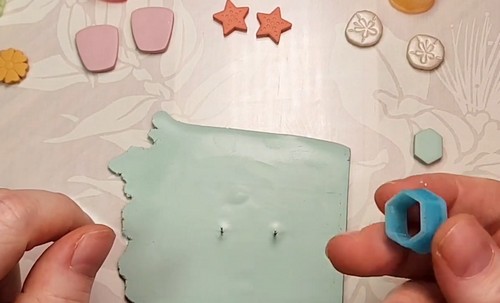
- Place earring posts flat-pad-down directly onto the surface of the 2 mm sheet, spacing them at least 15 mm apart.
- Lay the 1 mm sheet flat on top of the posts, covering the pads completely.
- Press the two layers together firmly from the centre outward, working out any air pockets.
- Flip the sandwiched slab so the post pins face downward.
- Press a sharp metal cutter straight down over the post location from the back side, cutting through both layers in one firm motion.
- Lift the cut shape on a tissue blade, keeping it flat, and set it front-side down on a cardstock-lined tray.
- Tent with foil and bake at 275°F / 130°C for 60 minutes.
Method 3: Textured Layered Sandwich
This method works on either a baked or a raw earring shape. It adds a contrasting backing layer that encases the post and creates a visible colour stripe around the edge.
- Start with a baked or raw earring shape in your main colour.
- Dip the post pad in a superglue drop and press it to the back centre of the earring shape. Hold for 30 seconds.
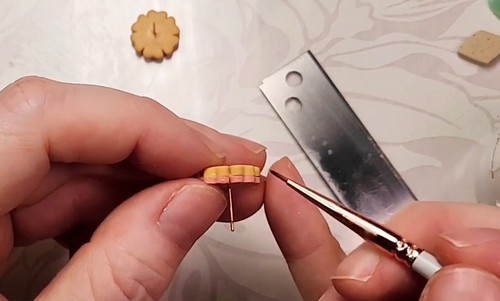
- Apply a thin ring of liquid clay around the base of the post pad, covering the pad edges.
- Condition a small amount of contrasting clay and roll it to 1 mm thick.
- Cut a shape from the contrasting sheet that matches or slightly overhangs the earring outline.
- Press the cut contrasting piece face-down over the post, covering the pad and the liquid clay completely.
- Run a flat blade across the back surface to remove air pockets, pressing from the centre outward.
- Trim any overhanging edge with the blade so both layers align.
- Place the earring front-side up on a cardstock-lined tray, tent with foil, and bake at 275°F / 130°C for 60 minutes.
Method 4: Hand-Smoothed Clay Dome
This method places a small clay dome over the post rather than covering the whole back. It works on baked earring bases and keeps weight low.
- Bake the earring base and cool it fully.
- Dip the post pad in a superglue drop and press it to the centre back of the baked earring. Hold for 30 seconds.
- Condition a small amount of clay for 3 minutes. If the clay is stiff, add one drop of clay softener and knead it in.
- Roll the clay to 2 mm thick and cut a disc 12 mm across using a round cutter or the rim of a bottle cap.
- Place the clay disc over the post, centred over the pad.
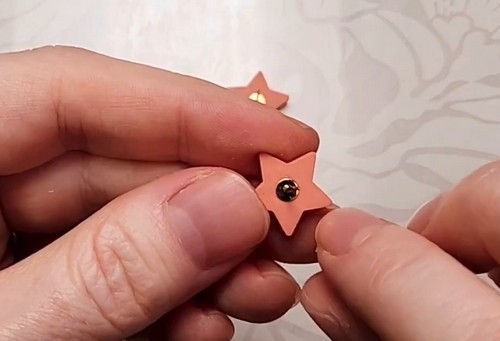
- Press the disc down with a fingertip directly over the post pin to seat the pad into the clay.
- Work outward from the centre with a ball tool or fingertip, feathering and blending the edges of the disc so they taper smoothly against the earring back rather than sitting as a raised ring.
- The finished dome should extend 3 mm past the pad edge on all sides with no sharp seam.
- Place front-side up on a cardstock-lined tray, tent with foil, and bake at 275°F / 130°C for 60 minutes.
Method 5: Dome Tool Embedding
This method produces a uniform, professional-looking dome using a specialised cutter and press tool. The result is identical across a whole batch. It is the fastest method once you have the tools.
- Bake the earring base and cool it fully.
- Hold a post alignment ruler or small ruler against the edge of the earring and mark the centre back with a needle tool, keeping the post at least 4 mm from the nearest edge.
- Dip the post pad in a superglue drop and press it to the marked point. Hold for 30 seconds.
- Condition clay until sticky and warm, about 4 minutes of firm kneading.
- Roll the conditioned clay to 1.5 mm thick using 1.5 mm thickness guides and an acrylic roller.
- Dust the dome cutter with a small pinch of cornstarch on a fingertip, tapping the excess off.
- Press the dome cutter into the clay sheet and lift out a uniform disc with a central dimple.
- Lay the disc over the post, dimple side down toward the pad.
- Align the dome press tool over the disc, centred on the post pin.
- Press the tool down firmly and steadily until it meets the earring back.
- Lift the tool straight up without twisting.
- Place the earring front-side up on a cardstock-lined tray, tent with foil, and bake at 275°F / 130°C for 60 minutes.
Cure Block
- All five methods use the same cure: 275°F / 130°C for 60 minutes. This is longer than a standard first bake because you are bonding raw or liquid clay to an already-cured surface, and that interface needs full heat penetration to fuse properly.
- Preheat the oven for 20 minutes before anything goes in. Use a standalone oven thermometer sitting on the tray to verify the actual temperature, not the dial reading. Small ovens overshoot the dial by 25 to 50 degrees on the way up, which scorches thin edges before settling. Tent every tray loosely with aluminium foil, folded edges tucked under the rim. The foil never touches the clay surface.
- Cool the earrings on the tray for 30 minutes. The bond between new clay and the baked base reaches full strength cold. Lifting warm earrings can separate the layers before the cure has set.
Finishing
- These methods produce backs that require no sanding. If the dome or backing layer has a visible seam, wet sand with a 400 grit sponge using light circular pressure, then move to 800 grit. Work wet throughout and rinse the sponge when it loads up. The front face of the earring follows its own finishing schedule from the original make: wet sand, buff, and seal as needed before attaching the post, since sanding around a protruding post pin is difficult.
- Do not seal the dome or backing clay with nail polish or alcohol-based lacquers. Neither is compatible with polymer clay and both go tacky over time. A water-based polymer varnish or no sealer at all is the right call for the back.
Where Makers Go Wrong
- Post placed too close to the edge. Even 3 mm of clay between the post pad and the earring edge looks fine before baking. After wear, the thin wall flexes and the dome lifts from one side. There is no repair: the bond at the thin edge is gone. Keep the post pad at least 4 mm from the nearest edge, measured from the pad perimeter, not the pin.
- Skipping the temporary superglue step and losing the post alignment mid-bake. Raw clay softens slightly as the oven heats before it begins curing, and a post sitting only in friction contact can shift or lean. By the time you notice on the cooled earring, the dome has baked crooked and the earring hangs at an angle. The superglue dot costs nothing and takes 30 seconds.
- Underbaking the bond between new clay and the cured base. A 30-minute bake looks and feels fine when the earring comes out warm. The failure shows up two weeks later as a dome that peels cleanly from the back of the earring when the post is loaded sideways by earring backs or hair. The 60-minute time is for the bond, not just the clay, and it is not optional.
- Air pockets under the backing layer in methods 2 and 3. A trapped bubble bakes into a rigid dome that cracks the backing layer from inside, usually at the point nearest the post pad where the metal prevents full compression. Press from the centre outward before trimming, not around the edges first.
Variations
- Method 1 with Kato Liquid Polyclay rather than Sculpey liquid gives a thinner, stiffer dome that sits more discreetly on small studs under 12 mm. Kato runs more viscous and needs no spreading: apply it directly from a toothpick and it self-levels over the pad.
- Method 4 on a raw rather than baked base means you condition, shape, texture, and dome-attach all in one session, baking once rather than twice. This only works if the earring front has no delicate applied decoration that would be disturbed by pressing the dome from behind.
Care
Check the dome bond every few months by pressing the post sideways gently: any movement means a re-bake with fresh liquid clay is needed before the post detaches completely. Store stud earrings post-up rather than face-down so the dome does not bear the earring’s weight over months on a hard surface. Take earrings off before hair styling: heat-spray compounds penetrate the earring back joint faster than the front. If the dome chip-cracks at the edge rather than lifting cleanly, the clay was underconditioned and can be replaced without losing the post. Avoid bending or flexing large earrings with embedded posts, since the post pad has a fixed edge that concentrates stress at the bond line.
Quick Answers
- Can I skip the superglue and just press the post into the clay? You can for methods 4 and 5 if you work quickly and the post does not shift, but any movement before the clay goes in the oven compromises alignment. The superglue dot is a positioning tool, not a structural one, and it makes no difference to the finished bond.
- My post baked slightly crooked. Can I straighten it? No. Once the clay is cured, the dome is rigid and the post is set at that angle permanently. Cut the dome away carefully with a tissue blade, clean the pad with acetone on a cotton bud, and re-attach using method 1 or 4.
- Can I use this on air-dry clay earrings? No. Air-dry clay cannot go in an oven, and none of these methods work without baking. For air-dry, the only structural option is two-part epoxy adhesive applied to a roughed-up pad surface and left 24 hours, accepting that it will eventually detach with wear.
- Which method works on large earrings over 40 mm? Method 4 or 5. Large earrings flex more at the post point than small studs, so you need a wide dome that distributes the load. Method 1 liquid clay blob is too localised for a piece that size, and the sandwich methods add too much weight to the back of an already large form.