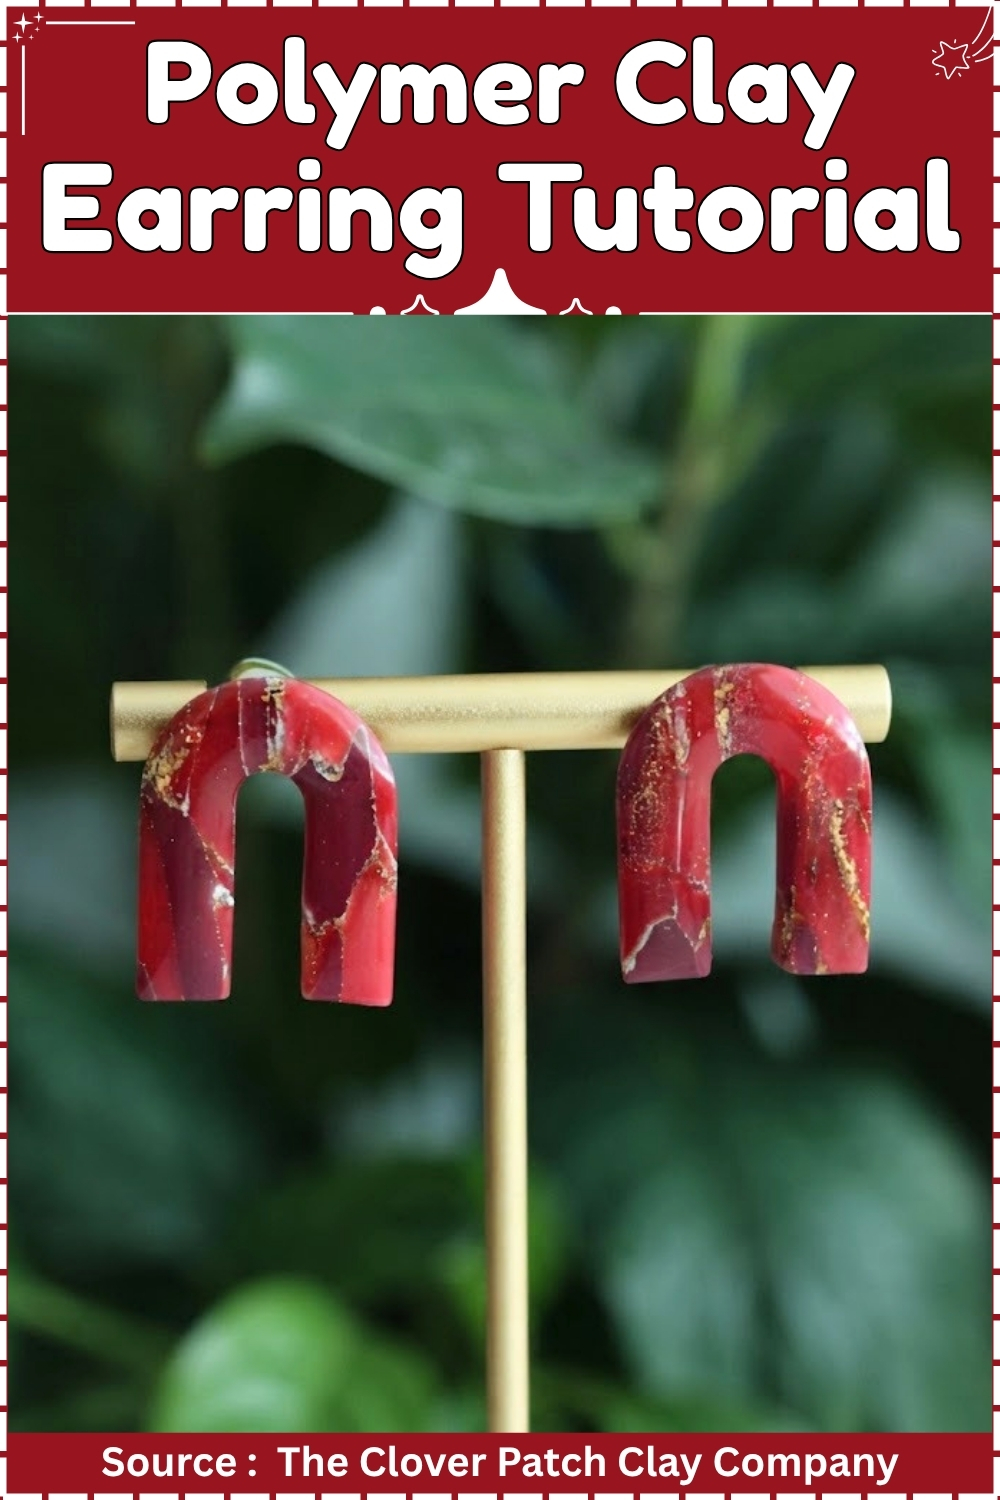
Marbling looks like the hard part until you learn it takes about four folds. This polymer clay earrings tutorial walks you through red and gold faux stone from conditioning to finish, and every slice you cut comes out different. Start here if you are new to clay.
Deep red runs through gold in thin veins, the way it does in real stone, and no two cuts through the block come out the same. The shape stays simple so the marbling carries it. You condition the two colours, twist and fold until the veining reads fine rather than muddy, slice, cut your shapes, then cure and finish. This is the tutorial to start on if you have never marbled before.
Polymer Clay Earrings
At a Glance
- Clay type and brand: polymer clay, three shades of red (Sculpey Premo or Fimo Professional recommended)
- Tools: pasta machine, long clay blade, earring cutters, Dremel with sanding drum, UV lamp, soft brush
- Cure method: oven, 275°F / 130°C, 30 minutes
- Finished size: 38 mm statement earring
- Hands-on time: 60 to 75 minutes active, plus 30 to 60 minutes drying between stages
- Total time: approximately 3 hours including cure and resin set
- Difficulty: intermediate
Materials and Tools
Essential
- Polymer clay, three shades of red (deep crimson, brick red, burgundy), 2 oz each
- White acrylic paint
- Gold mica powder
- Gold leaf sheets or flakes
- Liquid polymer clay (Bake and Bond or Sculpey Bake and Bond)
- Pasta machine
- Long clay blade
- Statement earring cutters, 35 to 40 mm
- Oven thermometer
- Ceramic tile or parchment for the baking tray
- Aluminium foil for tenting
- Dremel with a fine sanding or buffing drum
- UV resin (VLVOO or Padico recommended)
- UV lamp, 36 watt minimum
- Lighter or butane torch
- E6000 adhesive
- Earring posts or lever backs, nickel-free or surgical steel
- Flat pad earring posts, 6 mm, nickel-free
Nice to have
- Translucent polymer clay as a base sheet under the cane slices
- Fine-tip silicone brush for spreading resin
- Craft mat or silicone mat
- Alcohol ink in red or gold for additional veining
Colour Recipe
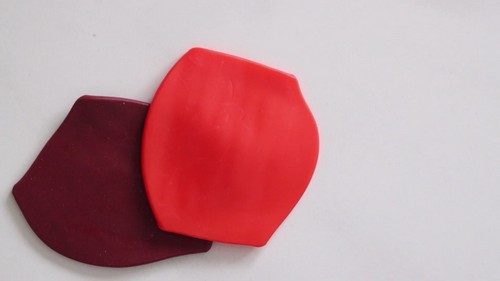
The three-red combination aims for the tonal variation inside natural carnelian: a bright fire red, a deeper brick with brown in it, and a burgundy that reads almost purple-black in shadow. Start with equal weights of each, roughly 20 g per colour, then add white acrylic paint to taste once the clay is cut. The paint sits on the clay surfaces, so it does not dilute the colour the way mixing white clay would. The result is a dusty, mineral-like opacity. Too much white reads chalky, not stony. Begin with a small amount on a fingertip and coat the pieces lightly before committing to a larger addition.
Build the Faux Stone Slab
Condition and Cut the Clay
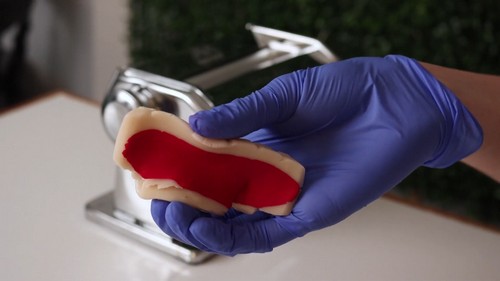
- Condition each of the three red clays separately by folding and passing through the pasta machine at the thickest setting, 3 mm, six to eight times per colour until the clay is smooth and pliable.
- Stack the three conditioned sheets and cut through all layers together with the long blade, making cuts in random directions to produce a mixed pile of irregular chunks approximately 10 to 15 mm across.
- Mix the chunks together loosely with your hands until the colours are distributed but not blended.
Add Paint and Dry
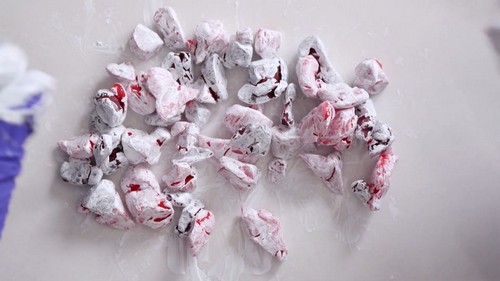
- Pour a small amount of white acrylic paint, about half a teaspoon, into a shallow container.
- Drop the clay pieces into the paint a few at a time and turn them to coat all surfaces.
- Spread the coated pieces onto a piece of baking parchment in a single layer with space between them.
- Leave to dry completely at room temperature for 30 to 45 minutes, until every piece is fully matte and no longer tacky to a light touch.
If you’re still learning how to read crochet patterns, no stress! Follow the video tutorial below and use the written pattern below as you get more comfortable!
Build the Cane
- Dust the dried clay pieces generously with gold mica powder, turning them so the powder sits in every crease and flat surface.
- Lay gold leaf over the top of the pile, tearing it into irregular pieces 5 to 20 mm across.
- Add a line of liquid polymer clay across the pile, roughly 5 ml total.
- Press and squeeze the pile together with both hands into a rough cylinder 40 to 50 mm long, keeping the compression uneven so the colour layers stay distinct inside rather than fully homogenising.
Slice and Sheet the Slab
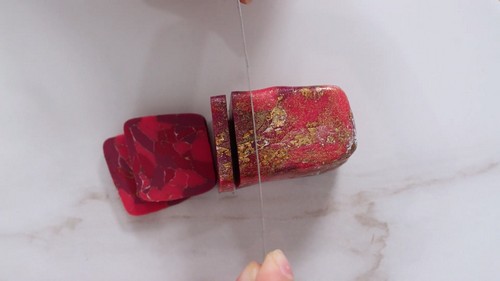
- Cut the cane into slices 3 mm thick with the long blade.
- Lay the slices onto a sheet of translucent polymer clay rolled to 1 mm, overlapping slice edges by 1 to 2 mm, until the sheet is covered.
- Pass the covered sheet through the pasta machine at 2 mm, turning it 90 degrees and passing again once if needed to close any gaps.
- Lay the finished slab on a clean tile and examine it at an angle under a good light to find the sections with the strongest gold streaking.
Cut the Shapes
- Mark the best areas on the slab with a fingernail before picking up a cutter.
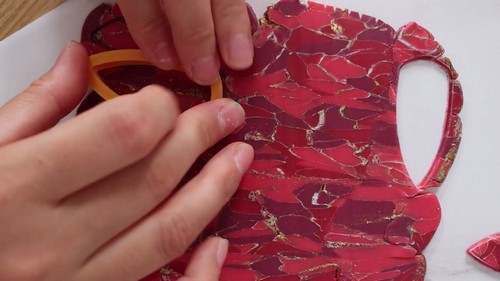
- Press the earring cutter straight down through the slab in a single firm stroke and lift cleanly, without twisting, to keep the cut edge crisp.
- Cut two matching shapes as close in pattern as the slab allows.
- Transfer the cut pieces to the baking tile on parchment, spaced at least 10 mm apart.
Curing
- Preheat the oven with an oven thermometer in place and wait for a full 15 minutes after it reaches temperature before putting anything in. The oven thermometer reading is the one that matters, not the dial. Place the baking tile on the middle rack. Tent a loose piece of foil over the earrings without pressing it against them: the tent stops surface scorch and the radiant heat from the element catching the mica powder.
- Bake at 275°F / 130°C for 30 minutes. The slab is 3 mm at its thickest, and 30 minutes is the Sculpey Premo minimum for that thickness, which the video’s stated time matches exactly. Do not reduce the time. Underbaked polymer clay at this thickness flexes and snaps at the post finding within weeks of being worn. Pull the tile and leave the pieces on it to cool to room temperature, which takes roughly 20 minutes. Do not move them while warm.
Finishing
- Sand with 400 grit wet-dry sandpaper, used wet, working in small circles across the face of each earring. Move through 600 and then 800 grit in the same way, rinsing between grits and keeping the sandpaper wet throughout. Buff on a piece of denim or a dedicated clay buffing cloth to bring the clay surface to a low sheen before the resin goes on.
- Use the Dremel with a fine sanding drum at low speed, under 10,000 rpm, to clean any rough edges at the cut perimeter. Work around the edge rather than across the face. Hold the piece against a firm surface rather than in your hand.
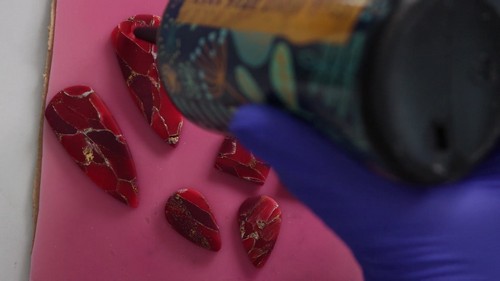
- Apply UV resin in a thin, even coat across the face and edges using a silicone brush. Tip the earring to let the resin flow to any dry patches before curing. Pass a lighter flame quickly across the surface, 50 to 70 mm above it and moving, to burst any bubbles: one or two passes is enough. Cure under a 36 watt UV lamp for 3 minutes. Let the piece sit for a further 5 minutes before handling it, since freshly cured resin is still warm and slightly soft.
Hardware and Assembly
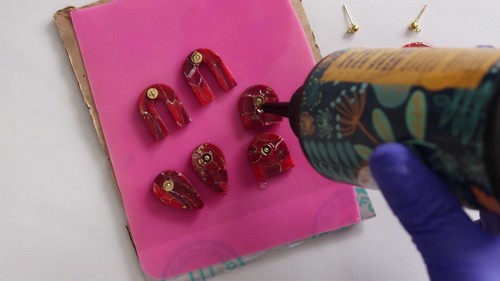
- Apply a thin, even layer of E6000 to the flat pad of a nickel-free post finding and press it firmly onto the back centre of the earring. Hold it in place for 60 seconds. Leave flat, post-side up, for 24 hours before moving. E6000 reaches handling strength in an hour but full bond at 24 hours, and a finding pulled before full cure almost always fails at the adhesive rather than the clay.
- Once cured, add a thin second coat of UV resin over the post pad and about 2 mm onto the back of the clay around it. Cure under the lamp for 3 minutes. This mechanical lock around the pad edge is what stops the finding rotating or peeling after months of wear. Check that the two posts are parallel before the resin cures so the earrings sit level when worn.
Where Makers Go Wrong
- The paint stage is treated as optional. Every other step in this build is compressible, but the acrylic paint step is the one that produces the faux stone effect. The paint coats each clay piece individually before compression, which means it survives the pasta machine as surface texture rather than disappearing into the blend. A maker who skips the drying time and works tacky clay will find the paint incorporates into the clay body instead and the result is a muddier, more uniform red with no mineral character.
- The gold leaf disappears. Gold leaf is fragile in a cane. If the clay is compressed too hard or too fast in the cane-building stage, the leaf tears into such small fragments that it reads as overall warmth rather than the distinct veining that makes the faux stone convincing. Compress the cane with your palms in a slow squeeze rather than kneading, and stop as soon as the cane holds its shape.
- The slab warps on the tile during baking. A thin slab rolled to 2 mm wants to curl as the clay softens in the oven. Transfer to the tile immediately before it goes in rather than leaving it to sit on parchment, since paper under the slab lets it move. If a piece curls, bake it weighted under a second tile for the first ten minutes.
- The resin coat yellows within three months. UV resin that is under-cured or applied too thickly continues to react with ambient light and yellows. A thin coat cured for the full three minutes under an adequate lamp holds clarity indefinitely. A thick coat that gels on top but stays soft underneath will amber, and there is no reversing it without stripping the resin, which means re-sanding the surface.
- The E6000 joint fails under heat. E6000 softens above roughly 60°C, which a car parked in direct sun exceeds. A post finding that felt solid in winter can rotate freely by July. The UV resin mechanical lock over the pad is what compensates for this, and skipping it leaves the bond relying on adhesion alone.
Variations
- Three directions worth the effort, none of which is simply a colour swap:
- A green and silver version using three shades of green clay, silver mica, and silver leaf produces something closer to malachite. The technique is identical, and the striped character of malachite emerges naturally from the cane compression.
- Cut the same slab into bead blanks, drill through with a hand drill at 1.5 mm before baking, and you have matching statement beads for a necklace. Use a cocktail stick through the hole as a bead holder during baking.
- Leave out the resin topcoat and wet-sand to 2000 grit, then buff to a glass finish on a denim wheel. The resulting surface reads like polished hematite rather than oiled stone, and the gold sits under the surface rather than on it.
Care
- Store in a box rather than a drawer, since a resin face pressed against another surface for weeks can micro-scratch.
- The resin coat scratches on abrasive surfaces, so put these on last when applying hairspray or perfume, not first.
- If the post pad lifts at an edge, add a new ring of UV resin around it and re-cure before wearing again.
- E6000 loses its bond if soaked in acetone, so keep these away from nail polish remover.
- The resin surface picks up fingerprints on humid days. Wipe with a dry microfibre cloth, not a damp one.

Quick Answers
- Can this technique work without a pasta machine? The pasta machine is what produces a uniform 2 mm slab and closes the gaps between cane slices. A roller and guides made from two equal thickness strips of card will do the job, but expect to spend longer closing gaps by hand before the sheet is consistent enough to cut from.
- The paint dried unevenly and some pieces are still tacky. Can I keep going? No. Tacky paint incorporates into the clay body during the compression stage and turns the finished slab gummy and difficult to cut. Leave the pieces a further 20 minutes and check again. If a piece stays tacky after an hour, the paint layer was too thick and that piece should be set aside.
- My resin coat has a sticky surface after curing. What went wrong? Oxygen inhibition: the top surface of UV resin stays uncured in contact with air. Cure under the lamp for a further two minutes with the piece covered by a glass sheet or a piece of lamination film, which cuts off the oxygen layer. Alternatively, add a second thin coat and cure again immediately.
- Can I use nail polish instead of UV resin? No. Solvent-based lacquers including nail polish can react with polymer clay over time, causing a sticky surface that cannot be reversed. They also yellow faster than resin under UV exposure. Stick to UV resin or a dedicated polymer clay glaze such as Sculpey Gloss Glaze if resin equipment is not available.
Leave a Reply