How To Make Heishi Beads Polymer Clay
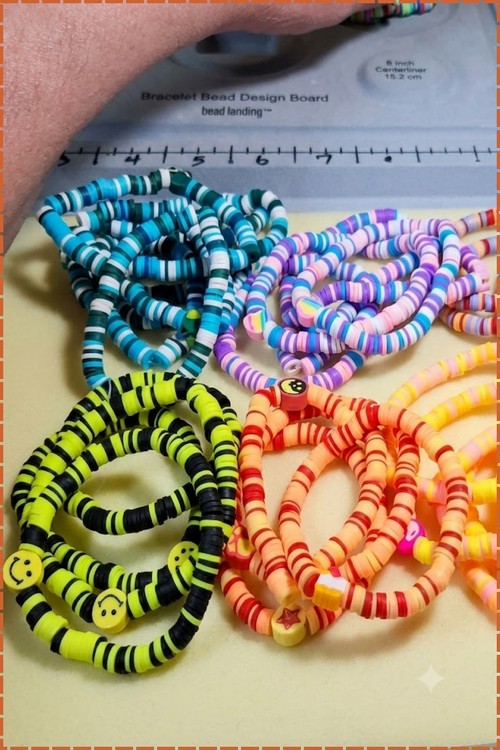
Rolling one even log and slicing it is how heishi beads polymer clay makers produce hundreds without shaping a single bead by hand. Chill the log before cutting or the slices squash flat under the blade.
Heishi beads are cut from a rolled log, not shaped individually, which is the only reason making hundreds of them by hand is realistic. This how to make heishi beads polymer clay guide covers rolling the log to an even diameter, chilling it so the slices hold their shape, and cutting with a blade rather than a knife. The thickness of each slice is what decides whether they read as heishi or as plain discs. Everything below works with clay you already have and no specialist tool beyond a tissue blade.
Heishi Beads Polymer Clay
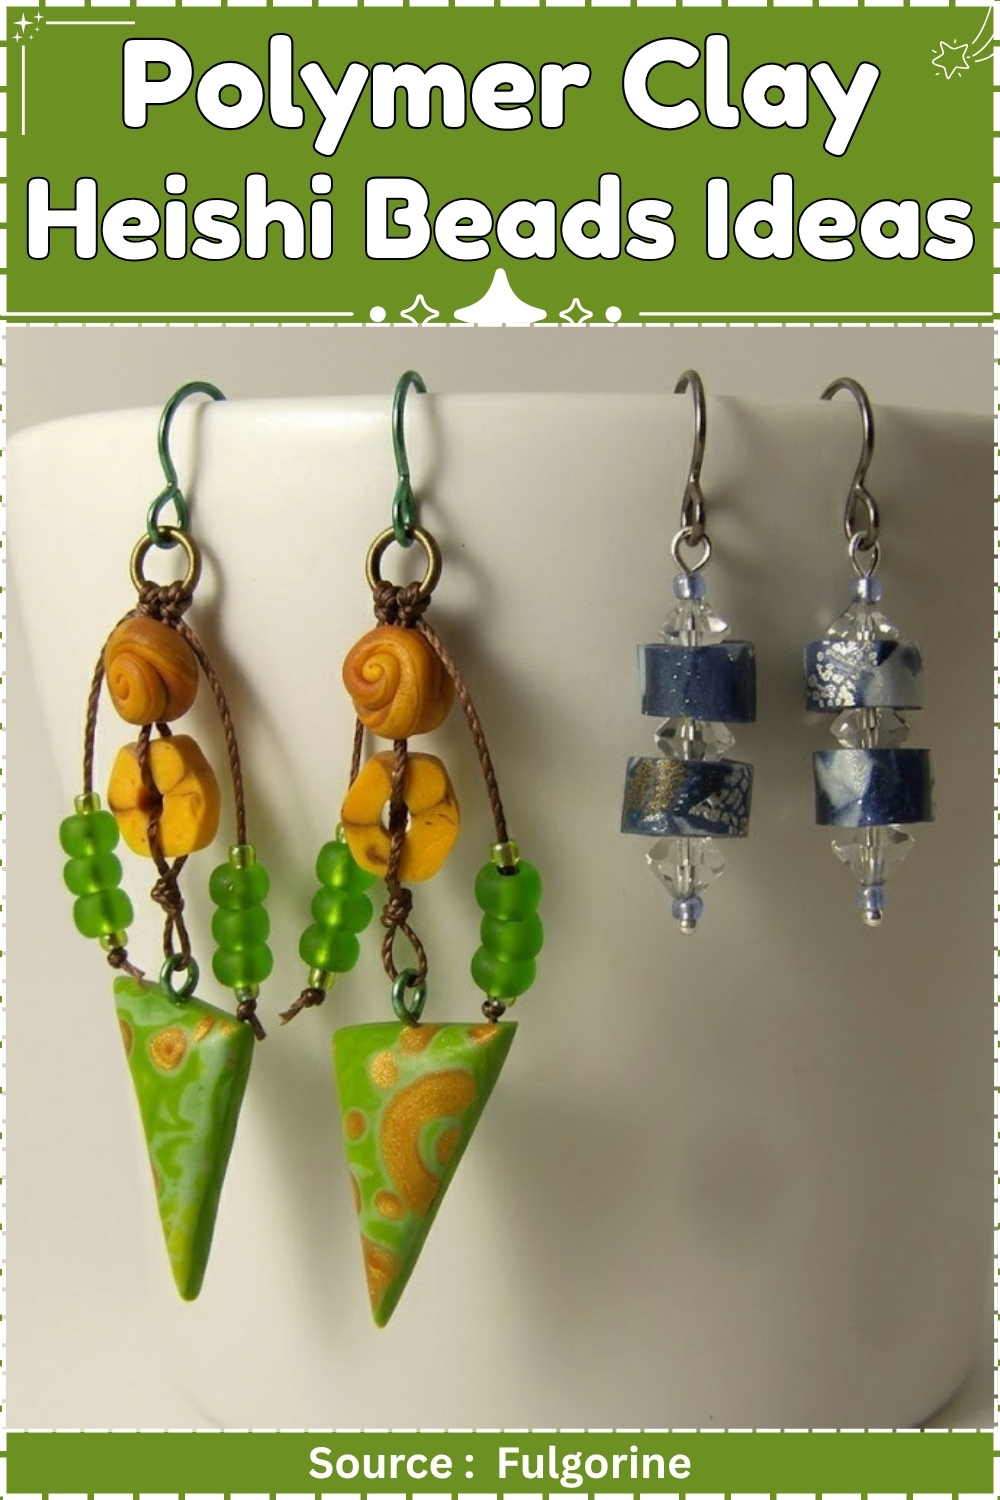
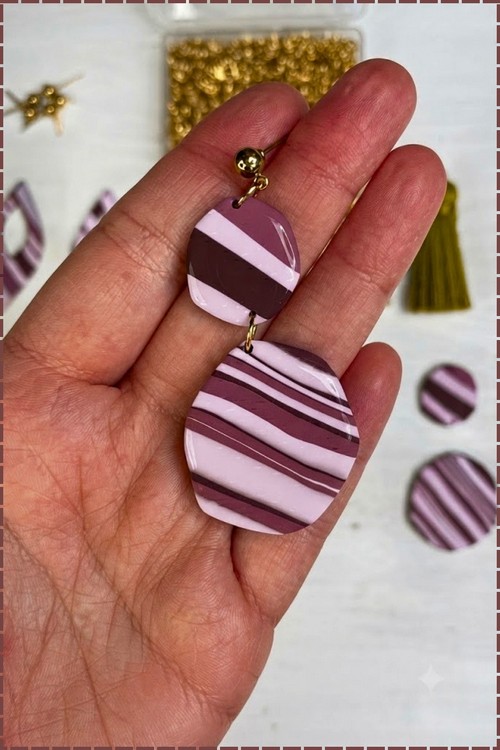
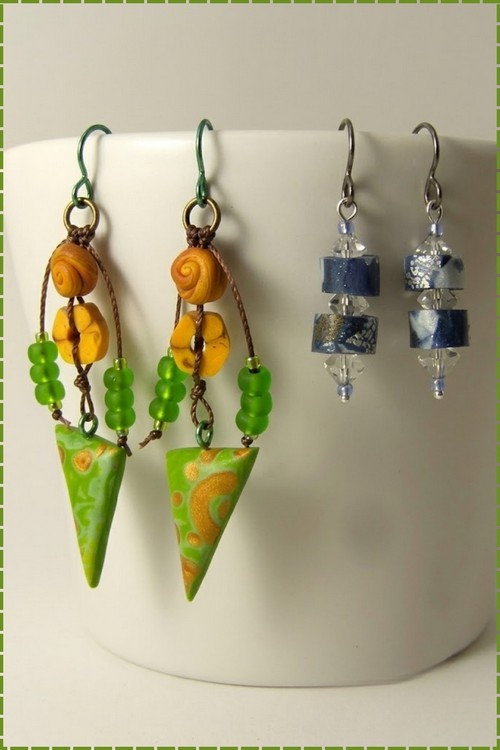
Building heishi beads from a patchwork clay slab gives each bead a slightly different pattern, so no two pieces in a finished pair of earrings ever look exactly the same. That natural variation is part of what makes this technique worth learning. The two earring styles shown here use the same heishi bead base but go in completely different directions once assembled. Stacked blue cylinders with crystal accents read as understated and modern while the green triangle drop with amber beads and cord wrapping leans more earthy and handcrafted.
At a Glance
- Clay type: Polymer clay, oven-cured
- Suitable brands: Sculpey Premo, Fimo Professional, Cernit
- Tools: clay extruder with hollow adapter, pasta machine, knitting needle or bamboo skewer 3 to 4 mm diameter, scalpel or sharp tissue blade, toaster oven, oven thermometer
- Cure method: 275°F / 130°C, 30 minutes
- Finished bead size: 8 to 12 mm disc diameter, 3 to 5 mm thick
- Hands-on time: 45 minutes per method
- Total time: 3 hours including cure, cool, and slicing
- Difficulty: Intermediate
What Makes These Worth Making
Two things separate a heishi bead strand from any other clay bead format. First, the surface-to-hole ratio: a heishi disc has more surface area relative to its volume than a round bead of the same diameter, which means a decoration applied to the face, whether a fleck of metal leaf, a patch of marbling, or a veined translucent skin, reads clearly at bracelet or necklace scale without the bead being oversized. Second, the post-bake slicing method using hot water is not common knowledge. Most makers try to slice cold or try to pierce raw beads before baking, and both approaches produce inconsistent results. Hot water softens the cured polymer just enough to allow a clean cut without any flexing or chipping. It is a specific technique and it is the reason a tray of fifty uniform beads is achievable in an afternoon.
Materials and Tools
Essential
- Polymer clay in assorted colours or scrap clay
- Clay extruder with hollow profile adapter and round or shaped profile die
- Pasta machine
- Bamboo skewer or knitting needle, 3 to 4 mm diameter
- Scalpel with fresh blade, or sharp flexible tissue blade
- Cardstock for lining the tray
- Aluminium foil for tenting
- Toaster oven and oven thermometer
- Heatproof bowl or saucepan for hot water soaking
- Sellotape or masking tape for surface cleaning
Nice to Have
- Metal leaf sheets for surface decoration
- Decorative scrap clay veneer sheets
- Renaissance Wax or polymer-compatible buffing wax
- 400, 800, and 1200 grit wet sanding sponges
- Thickness guides or playing card stacks
The Build
Method 1: Extruder Hollow Beads
Prepare the Extruder
- Select a profile die: round produces a classic heishi cross-section; honeycomb or star produces a shaped face visible on the cut bead ends.
- Fit the hollow adapter into the barrel end. The adapter has a central pin that runs through the die hole to create the bead channel.
- Place the die against the adapter and hand-tighten the barrel cap until snug. Stop 3 mm before the cap is fully seated so the pin does not get crushed against the die face.
- Test the alignment by looking through the die from the front: the pin should sit centred in the die opening.
Load and Extrude
- Chop your scrap or gradient clay into rough 10 mm cubes.
- Press the cubes into the extruder barrel in random colour order, alternating colours without blending.
- Replace the barrel end cap and tighten until resistance is felt.
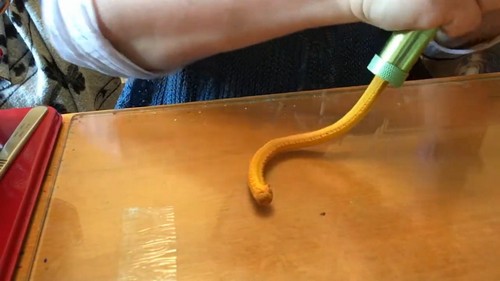
- Twist the extruder handle one full rotation, then stop and wait 10 seconds for the clay to ooze forward under pressure.
- Continue in one-rotation increments with 10-second pauses rather than forcing continuous extrusion.
- Allow the clay log to emerge 80 to 100 mm before cutting free with a blade.
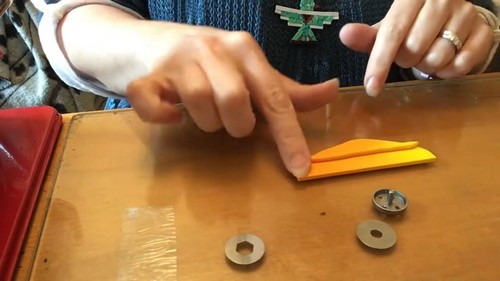
Straighten and Bake
- Lay the extruded hollow log on a cardstock-lined tray without pressing or bending it.
- If the log has a slight curve from the extrusion angle, gently coax it straight by rolling it lightly under a flat card, keeping the card parallel so the hollow channel is not collapsed.
- Tent with foil and bake at 275°F / 130°C for 30 minutes.
- Cool on the tray for 20 minutes before handling.

Method 2: Hand-Rolled Cylinder Beads
Clean the Surface and Prepare the Clay
- Tear a 150 mm strip of sellotape and press it flat against the work surface, sticky side down, then peel it off in one motion to lift surface dust and metal leaf fragments.
- Condition a 30 g block of clay for 4 minutes until smooth and warm.
- Run the conditioned clay through the pasta machine at 3 mm thickness.
- Cut one straight edge along the sheet using a blade against a ruler.
Wrap the Cylinder
- Hold the skewer horizontal above the straight-cut edge of the clay sheet.
- Roll the skewer forward onto the sheet edge so the clay begins to wrap around it.
- Continue rolling forward, keeping even pressure along the full length of the skewer, until the clay has wrapped one and a half times around.
- Press lightly along the wrapped length to mark where the clay overlaps.
- Unroll and cut the excess clay along the marked line with a blade.
- Re-wrap the trimmed sheet so the two cut edges meet without gap or overlap.

Seal the Seam
- Run a fingertip firmly along the seam line, pressing the edges together.
- Slide a double-ended knitting needle or a smooth pencil along the inside of the cylinder to press the inner seam walls together from inside.
- Roll the cylinder gently against the work surface using your fingers on the clay, not your palm on the skewer, until the seam disappears into the surface.
Add Surface Decoration
- Tear small pieces of scrap veneer sheet or metal leaf rather than cutting them, so the edges are irregular.
- Press the torn pieces onto the cylinder surface, covering 40 to 60 percent of the area and leaving clay showing between them.
- Roll the cylinder once more against the work surface to seat the decoration flush with the clay.
- For a marbled look: press thin strips of contrasting clay along the cylinder and roll smooth before wrapping, so the colours run lengthwise along the bead face when sliced.

Trim and Bake
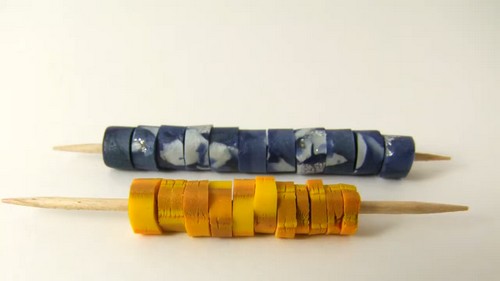
- Slide the clay cylinder to the centre of the skewer, leaving 20 mm of skewer exposed at each end.
- Use a blade to trim 5 mm from each end of the cylinder where the clay edges are uneven.
- Rest the skewer across the rim of a cardstock-lined tray so the clay hangs free without touching the tray surface.
- Tent with foil and bake at 275°F / 130°C for 30 minutes.
- Cool on the skewer for 20 minutes, then slide the cylinder off the skewer by twisting gently.
Cure Block
- Preheat the oven to 275°F / 130°C and let it run for 20 minutes before anything goes in. Check the actual tray temperature with a standalone oven thermometer, not the dial. Small toaster ovens overshoot by 30 to 50 degrees on the way up, and that spike scorches any metallic or translucent surface before the dial reading settles.
- Bake all cylinders at 275°F / 130°C for 30 minutes, timed from when the oven has stabilised at temperature. The cylinders are 3 to 4 mm wall thickness, so the 30-minute minimum covers any brand in the Premo and Fimo family. Do not shorten the bake to avoid colour shift: underbaked cylinders chip at the blade during slicing, producing crumbling bead edges rather than clean cuts.
- Cool on the tray for 20 minutes. Do not remove cylinders from the skewer while warm.

Finishing
Sand the cooled cylinders before slicing if you want a polished bead face, particularly for translucent or pearlescent clay where the cut surface will show at the bead edge. Sand wet: 400 grit along the length, 800 grit, then 1200 grit, rinsing between grits. Buff with a cotton cloth using firm circular strokes, then apply a thin coat of Renaissance Wax with a fingertip and buff again. For opaque matte clay with surface decoration, skip sanding: the texture is part of the finish, and sanding will flatten the decoration. After slicing, individual beads do not need further finishing unless the cut face is rough, in which case one pass on 800 grit wet, held flat, cleans it.

Slicing the Beads
- Bring a heatproof bowl of water to a full boil, then remove it from the heat.
- Submerge the baked clay cylinder in the hot water for 3 minutes.
- Remove the cylinder and begin slicing immediately: cut straight down with a scalpel using a single press-and-rock motion rather than a sawing stroke, spacing cuts 3 to 5 mm apart for standard heishi thickness.
- Return the cylinder to the hot water for 2 minutes whenever the cuts begin to feel resistant or the clay chips rather than shearing clean.
- Place sliced beads back in the hot water as you work so the cut faces do not shrink and distort as they cool.
- Lay finished beads on a dry cloth and allow them to cool completely before stringing.
Where Makers Go Wrong
- Crushing the extruder hollow adapter pin. Threading the barrel cap all the way down seats the die directly against the pin and deforms or snaps it. Once the pin is bent, the bead channel runs off-centre and every extruded log will have a lopsided hole that strings unevenly. Tighten the cap until snug, then back off half a turn. The clay will seal against the die face under extrusion pressure without the cap needing to be fully closed.
- Rolling the hand cylinder using palm pressure on the skewer. Rolling with the palm compresses the skewer against the clay from the outside rather than letting the clay move against the work surface. The result is a bead hole that enlarges from the skewer end inward, producing a cone-shaped channel rather than a uniform tube. Keep the palm off the skewer and use fingertips only on the clay itself.
- Slicing cold cylinders. Cold baked polymer is brittle along the cut line and the blade drags rather than shears, producing a bead edge that flakes and a cut face that is not flat. The flaking is irreversible without resanding the entire batch. The hot water step is not optional for consistent beads, and the window between removal from the water and the clay becoming hard again is 60 to 90 seconds.
- Bead faces that warp after slicing. Polymer clay has residual tension from rolling and wrapping, and once the cylinder wall is cut the tension releases across the cut face. A bead sliced thinner than 3 mm will curve noticeably within a minute of coming out of the water. Keep sliced beads in the hot water bowl until the batch is done, then lay them flat to cool in one layer on a cloth. Any that have already curved can be pressed flat against a tile while still warm and held for 30 seconds.
- Metal leaf decoration that lifts at the bead edge after slicing. Metal leaf sits on the clay surface rather than bonding into it, and the blade cuts through the leaf-to-clay interface at the slice point. A lifted leaf edge on the bead rim catches on thread when stringing and tears further, eventually leaving a bare patch. Press decoration at least 2 mm from each planned cut line, or seal the cylinder with a coat of liquid polymer clay before baking so the leaf is encapsulated rather than surface-applied.

Variations
- Gradient heishi beads start with a Skinner blend sheet rather than scrap clay. Run two colours through the pasta machine on the diagonal until a smooth gradient forms, then use that sheet for the hand-rolled method. Each bead will carry a cross-section of the blend and adjacent beads will step through the colour shift when strung in order.
- Extruder beads with a square die produce a bead that lies flat when strung rather than rotating, since the flat face of the square sits against adjacent beads. This is useful for bracelets where you want a fixed front face: string the square beads face-forward and they stay that way.
- A surface-applied cane slice technique for the hand-rolled method: press 1 mm thick cane slices onto the cylinder surface before the decoration rolling step, then roll smooth. The sliced face of each finished bead reveals the cane pattern as a repeating motif across the bead diameter.
Care
Thread heishi beads on beading wire rated for the bead weight rather than elastic, since the disc shape puts lateral stress on the stringing hole edge that elastic cannot support long-term. Avoid ultrasonic cleaners: the vibration loosens any surface decoration that was not fully embedded before baking. If a bead splits at the hole edge during stringing, the clay was underbaked and the wall is too brittle; the batch needs rebaking at temperature for a second 30-minute cycle. Metal leaf decoration on unbuffed surfaces can transfer onto skin with prolonged contact, particularly in heat: a thin coat of Renaissance Wax prevents this. Store strands coiled flat rather than hanging, since gravity over months stretches the stringing material at the bottom bead and the strand shortens unevenly.
Quick Answers
- Can I use a hand extruder instead of a dedicated clay gun? A hand caulk gun with a clay adapter works for solid extrusions but will not generate enough consistent pressure for a hollow adapter pin without bending the pin. Use a dedicated clay extruder with a screw mechanism for hollow beads.
- My extruded log keeps curling as it comes out. How do I fix it? The clay is being loaded unevenly and is denser on one side than the other, which makes one side extrude faster. Re-load the barrel by alternating scrap colours in even layers rather than random chunks, and tap the loaded barrel on the work surface twice before extruding to settle the clay against the die.
- Can I skip the pasta machine and roll the hand cylinder sheet by hand? You can, but the sheet thickness will vary across the length, and thicker sections mean uneven bead wall depth and inconsistent hole sizes after slicing. A pasta machine gives the sheet a uniform 3 mm thickness across the full length, which is what produces identical beads across a batch.
- Can these beads be made with air-dry clay? Not with this method. Air-dry clay cannot be baked, so the seam in the hand-rolled cylinder will not bond. The slices will also crack if cut while the clay is dry, since air-dry is more brittle than cured polymer. Air-dry heishi beads require a different construction method using a clay gun or bead roller, and they need to be strung with the holes pre-formed before drying.