How to Make Clay Beads at Home
How to make clay beads at home without a single specialist tool. A skewer for the holes, a baking tray, a kitchen oven. The only thing that actually matters is conditioning the clay properly first, and that is hands and time rather than equipment.
Clay bead tutorials tend to open with a list of tools nobody owns, and the honest version is much shorter. A wooden skewer makes the holes. A tile or a sheet of baking paper stops the beads flattening on one side. The kitchen oven does the rest. What actually decides whether the beads survive is conditioning, which means working the clay in your hands until it stops cracking at the edges when you bend it.
Make Clay Beads at Home

Materials and Tools
Essential
- Sculpey Premo in yellow, white, and any accent colours
- 0.5 mm Stretch Magic clear elastic cord
- Big-eye or flexible beading needle
- 1.5 mm piercing needle
- Acrylic roller
- Tissue blade
- Glazed ceramic tile
- Aluminium foil
- Oven thermometer
- Wet/dry sandpaper in 600 and 800 grit
- GS Hypo Cement
- Scissors
- Ruler
Nice to Have
- Pasta machine
- Tweezers with silicone tips
- Bead spinner bowl
- Craft clips or stitching clips
- Denim scrap for buffing
How to Wear It
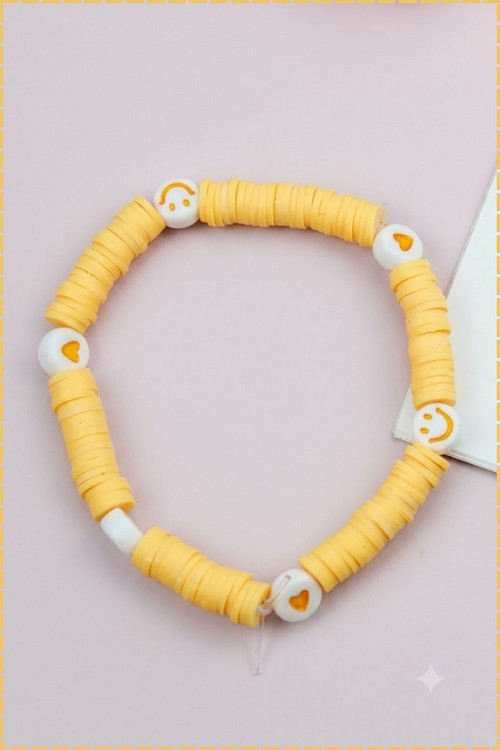
A single clay bead bracelet reads casual and young. Stack it with two plain metal bangles on the same wrist and the whole group looks more deliberate. The metal frames the clay without competing with it. Yellow beads pair with gold. Soft blue or grey pairs with silver. Keep the accent bead, whether a smiley face or a small heart, facing outward on the wrist when you tie off, so it sits on the visible side when your arm hangs naturally at your side.
For daily wear, choose your palette against your most-worn sleeve colour, not your skin tone. A yellow bracelet under a cream shirt disappears. Under a dark sleeve it shows cleanly. One bold accent bead among quieter colours reads better than two competing ones.
The Build
Conditioning and Rolling
- Cut a quarter block of Premo and slice it into six pieces.
- Warm the pieces briefly in your palms, then press them through the pasta machine at 3 mm, folding and passing ten times until the surface is smooth and the clay folds without cracking.
- Roll the conditioned clay into a log 8 mm in diameter and 12 cm long, working on the ceramic tile with even pressure from fingertip to fingertip.
- Check the diameter at three points along the log and re-roll any section that has gone thicker.
- Rest the log flat on the tile for 15 minutes.

Cutting and Piercing the Beads
- Hold the tissue blade at 90 degrees to the log and slice discs 6 mm thick.
- Rotate the log a quarter turn every four cuts.
- Roll each disc lightly between your palms to smooth the cut face into a rounder sphere, pressing to 8 to 10 mm across.
- Lay the beads on the tile with 5 mm clearance between them.
- Push the 1.5 mm needle straight through the centre of each bead from the top, onto the tile surface.
- Twist the needle a half turn as you withdraw it.
- Press the raised lip on the underside flat with a fingertip.

Shaping Accent Beads
- Roll a 12 mm ball of white Premo.
- Flatten it to 5 mm on the tile for a disc-shaped accent, or keep it as a sphere for a round one.
- Press a small dot of yellow into the face to create a smiley face, or a small indented heart shape using a toothpick tip.
- Pierce as above, checking the hole runs parallel to the front face so the accent hangs squarely on the cord.
Baking
- Bake at 275°F / 130°C for 30 minutes. That time applies to every bead on the tray, including the thinnest disc. Polymer does not break down until around 350°F, so a longer bake at the correct temperature is always safer than a shorter one.
- Bake on the ceramic tile you worked on, or on plain cardstock. Never on bare metal.
- Tent the tray with a folded sheet of aluminium foil, pressing the edges down against the tile. Place an oven thermometer next to the tray and read the actual temperature before putting the beads in. Home oven dials typically run 25 to 50 degrees off in either direction, and a bead underbaked at 250°F will snap at the hole within weeks of regular wear.
- Cool completely on the tile. Polymer is still soft at temperature and reaches full hardness cold.
Finishing
- Polymer beads do not need sealing. Skip any glaze. Glaze around a small hole chips and peels faster than bare clay dulls, and bare clay buffed on denim looks better than chipped glaze ever does.
- The hole rim is what needs work. Thread the baked beads onto a bamboo skewer twenty at a time, press the stack snug, and run wet 600 grit sandpaper around the barrel of the stack, rolling the skewer as you go. Move to wet 800 grit for a final pass. Fold a scrap of 800 grit and work it against each end of the stack to take the sharp edge off both hole lips.
- Dry the beads completely, then buff each one for five seconds against a denim scrap. The surface takes on a low sheen that catches light without looking plastic.

Stringing and Knotting
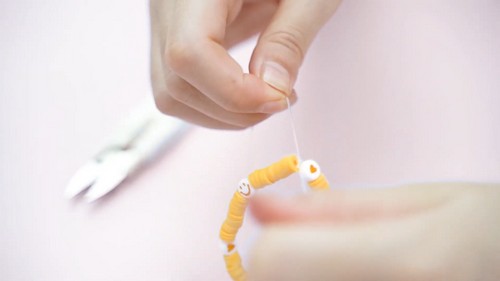
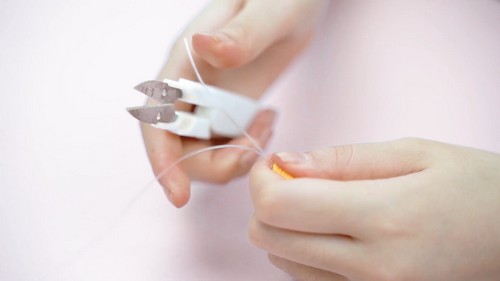
- Cut 30 cm of Stretch Magic.
- Pull the cord firmly along its full length to pre-stretch it, then release.
- Thread one end through the big-eye needle, leaving a 10 cm tail.
- Clip a craft clip onto the far end.
- Slide the yellow beads onto the cord to half your target length.
- Add the accent bead, with one contrasting colour on each side of it.
- Load the second half of the yellow beads until the strung length reaches 19 cm.
- Remove the needle and the clip.
- Tie a surgeon’s knot under light tension: right over left twice, then left over right twice.
- Touch a pinhead of GS Hypo Cement to the knot and leave it 10 minutes.
- Draw the adjacent bead over the knot so it seats inside the hole.
- Trim both tails to 2 mm with scissors.
Where Makers Go Wrong
- The cord fails at the hole, not the knot. A freshly pierced bead has a raised lip around the hole that acts like a blade against 0.5 mm elastic. The bracelet holds for six weeks, then snaps at a bead nobody suspected. Sanding the hole rim after baking is what stops this, and most makers skip it.
- The knot slips over months, not days. Elastic knots creep every time the bracelet is pulled over a hand. A knot tied without adhesive may still feel firm for the first month and then release without warning. The cement is not optional once the piece is being worn daily.
- Yellow picks up every colour around it. Conditioning yellow clay on a shared tile after a dark colour leaves grey streaks in the yellow that do not fully blend out. Condition pale colours first, or on a separate tile reserved for lights.
Variations
- Size up for a statement layer. Roll the log to 12 mm and slice 8 mm thick for larger, heavier beads. One strand at this size looks more substantial worn alone, or pairs with fine-chain bracelets rather than metal bangles.
- Two-colour striped bead. Stack a thin sheet of white and a thin sheet of a second colour, roll the combined sheet into a tight log, and slice. The cut face shows concentric rings in both colours. Works at any bead size.
- Mixed surface finish. Run half the beads through 600 grit only and polish the other half to 800 grit plus denim. The two sheen levels on one bracelet catch light differently as the wrist moves, without changing the colour or the form.
Care
Take the bracelet off before applying hand cream, sunscreen, or sanitiser. Roll it over the hand rather than pulling it open across the knuckles. Store it flat in a drawer, not coiled tight inside a box where the tension never releases. Pool water will not harm the clay, but repeated chlorine exposure shortens the cord’s life. Restring on fresh elastic once a year for a bracelet worn more than three times a week.
Quick Answers
- My bead cracked along the hole after a few weeks. What went wrong? The bake was likely too short. An underbaked bead looks identical to a correctly baked one until stress is applied. There is no fix once cracking starts: the bead needs to be replaced.
- Can I mix Premo with Fimo on the same bracelet? Yes, but bake at Premo’s temperature, 275°F, not Fimo’s lower 230°F. Premo needs the higher heat; Fimo handles it without problems.
- The accent bead is sitting crooked on the cord. How do I fix it? The hole ran through the bead at an angle rather than parallel to the face. Cut the bracelet open, replace the bead, and re-string. A crooked accent bead cannot be repositioned on elastic once the knot is set.
- Can I use regular thread instead of elastic? Regular thread requires a clasp, and a clasp needs a jump ring crimped onto the cord. That is a different bracelet, not a shortcut. For a no-clasp design, elastic is the correct choice.