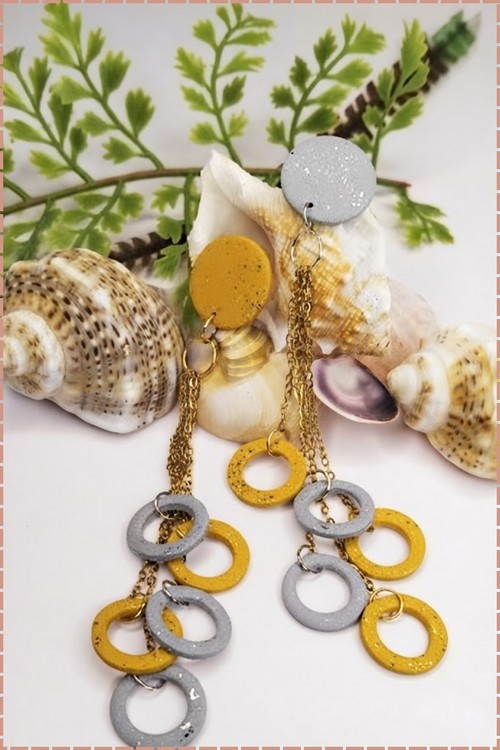
Clay Necklace Charms DIY Tutorial
Charms knock against each other on a chain, so keep them flat and pierce each one where it hangs level. This diy necklace charms method cures a whole batch in a single oven run, whether you are making three or twenty.
Charms sit differently from pendants because several hang together and knock against each other, so this clay necklace charms diy tutorial keeps each one small, flat enough not to twist on the chain, and pierced at a point where it hangs level. You shape and pierce before curing, then attach with jump rings once hard. Mixing sizes across one chain works better than matching them. Cure them all in one batch since the oven time is the same for one charm or twenty.
Clay Necklace Charms DIY

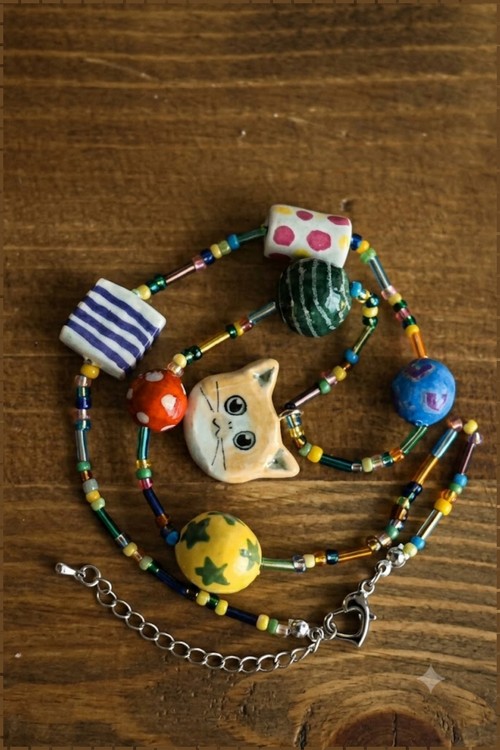
Painted clay charms turn a basic seed bead strand into something that looks genuinely one of a kind. Each charm on this necklace tells a slightly different story, from a cat face center piece to striped cubes and a watermelon ball, and none of them require molds or special tools. Air dry clay keeps the process accessible since there is no baking involved, and the painting stage is where the real personality comes through. A fine brush and a few acrylic colors are enough to get the same results shown here.
At a Glance
- Clay type: Air-dry clay (Crayola Air-Dry, DAS, or cold porcelain)
- Tools: Roller, guide sticks, craft blade or cutters, fine sandpaper, paintbrush
- Cure method: Air-dry, 24 to 72 hours, no oven
- Finished size: 20 to 30 mm charm
- Hands-on time: 35 minutes
- Total time: 2 to 3 days including drying and sealing
- Difficulty: Beginner
Materials and Tools
Essential
- Air-dry clay
- Roller
- Two guide sticks or rulers
- Craft blade or cookie cutters
- Fine sandpaper in 400 and 600 grit
- Acrylic craft paint
- Water-based gloss varnish
- Paintbrushes
- Nickel-free jump rings
- Chain or cord
Nice to Have
- Needle tool
- Dry used coffee grounds
- Small screw eyes or eye pins
- Tile or non-stick drying mat
Colour Recipes
Candy pastels come from white with a small amount of colour worked in.
- Cotton-candy pink: white acrylic with a pea-sized dot of magenta.
- Mint: white with a touch of green and a smaller touch of blue.
- Butter yellow: white with a small dot of yellow.
Add colour into white in tiny increments, since going the other way wastes paint. Mix a little more than you think you need. Matching a second batch by eye later is hard.
Techniques to Learn First
- Conditioning. Knead the clay for two minutes until it is soft and free of cracks. Cold, dry clay splits at the edges the moment you cut it.
- Even sheet without a machine. Lay a guide stick on each side of the clay and rest the roller across both. The roller cannot press below the height of the guides, so the sheet comes out level.
- Cutting. Press a cookie cutter straight down, or lay a paper template on the clay and trace it with the tip of your blade.
- Smoothing edges. Drag a barely damp fingertip along each cut edge. Too much water turns the edge to mush.
- Texturing. Knead a spoonful of dry used coffee grounds into the clay before rolling for a speckled surface.
The Build
The Charm
- Knead the clay for two minutes until soft and crack-free.
- Optional: knead in one spoonful of dry coffee grounds for a speckled texture.
- Roll the clay to an even 4 mm sheet using a guide stick on each side.
- Cut charm shapes 20 to 30 mm wide with a cutter or a traced template.
- Smooth every cut edge with a barely damp fingertip.
- Pierce a hanging hole 4 mm below the top edge now, while the clay is soft, since a hole drilled after drying chips the edge.

- Dry the charm flat on a tile for 24 to 72 hours, turning it once halfway through.
- Sand the bone-dry charm with 400 grit, then 600 grit.
- Wipe off all dust with a barely damp cloth and let it dry.
- Paint in candy colours with acrylic craft paint, letting each coat dry.
- Seal every surface with water-based gloss varnish, two coats minimum.
- Twist a jump ring sideways to open it and thread it through the hole.
- Close the ring and hang the charm on a chain or cord.
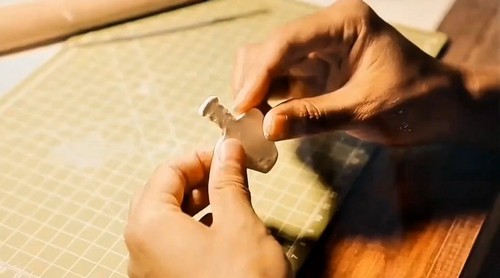
Drying and Sealing
Air-dry clay hardens in open air over 24 to 72 hours. Thin flat charms sit at the short end, thicker ones at the long end. Dry the pieces flat on a tile, turn them once halfway, and keep them off radiators and out of direct sun, since uneven drying is what curls a flat charm. Thick sections crack as they shrink, so keep charms even and no bulkier than 4 mm.
Sealing is structural here, not decorative. Bare air-dry clay pulls moisture from the air and from skin, which softens it over time. Use a water-based clay sealer or acrylic gloss varnish for everyday charms, or polyurethane for pieces handled daily. Skip solvent lacquers and nail polish, which can react with the paint. Two thin coats beat one thick coat, and every face needs covering, back and edges included. Sealed air-dry clay is water-resistant, not waterproof.

Finishing
Sand air-dry clay dry, never wet, and only once it is bone dry. Start with 400 grit to knock back high spots and tool marks, then move to 600 grit for a smooth face. Air-dry clay gives way far more easily than polymer, so a few light passes do more than you expect, and heavy sanding will thin a corner or round a crisp edge past saving. Check the piece often and stop early. Wipe every trace of dust off with a barely damp cloth before painting, because dust trapped under paint or gloss shows as cloudy patches later. Skip sanding only where you want a raw coffee-ground texture to stay rough. Buff lightly with a soft cloth after the final gloss coat has cured.

Hardware and Assembly
The hanging point goes in while the clay is still soft, either a pierced hole or a screw eye pushed into the top edge. Drilling a dried charm chips it, so this is not a step to leave for later. Once the charm is sealed, open a jump ring by twisting the ends sideways, never pulling them apart, thread it through the hole, and twist it closed so the seam sits tight. Use nickel-free or surgical steel findings for anything that touches skin. A charm at 20 to 30 mm and 4 mm thick sits light on a chain and hangs straight from a single top hole. If you add a second charm lower down, centre both holes so the piece does not twist as it hangs. For a heavier pendant, a glued-on bail set with two-part epoxy holds better than a jump ring.

Where Makers Go Wrong
- The charm goes tacky again after it dried hard. A piece that felt rock solid in a dry room can turn faintly sticky in a steamy bathroom, because air-dry clay keeps pulling moisture out of the air until it is sealed. Seal every face, back included, or it keeps happening.
- Cracks appear during drying. Even a thin charm dried against a warm surface dries faster on one side and can crack or curl. Dry flat, away from heat and windows, and turn it once so both faces lose moisture at the same rate.
- Cloudy patches show up under the gloss. Sanding dust left on the surface gets sealed in and shows weeks later as milky blooms that cannot be fixed without sanding back through the paint. Wipe the charm down and let it dry fully before any paint touches it.
- A crisp shape sands into a soft blob. Air-dry clay sands so quickly that a few extra strokes round off corners and thin edges before you notice. Once the shape is gone you are back to remaking it, so check the edge every few passes.

Variations
For a speckled stone look, knead dry coffee grounds through the clay and seal it matte rather than painting it. For a layered charm, press a smaller cut shape onto the base before it dries so the two fuse into one piece. For a faux-ceramic finish, paint a solid base colour, add thin line work once it dries, then build the gloss up over several coats for a glazed look. Skip anything that only changes the paint colour, since a new colour on the same shape is not a new charm.

Care
- Keep sealed charms out of the shower and off sweaty skin, since the seal resists water but is not waterproof.
- Take charms off before swimming or washing dishes.
- If the gloss coat picks up a scratch, brush a fresh layer over the mark.
- Store thin charms flat so they do not bow over time.
- Keep them out of long spells of direct sun, which yellows some varnishes.
Quick Answers
- Can I use polymer clay instead? Yes, but polymer has to be baked, not air-dried, and a polymer mistake will not soak back into reusable clay the way air-dry does.
- Do I need a pasta machine? No. A guide stick on each side of the clay and a plain roller give you an even sheet.
- What paint works on air-dry clay? Ordinary acrylic craft paint. It grips the sanded surface and dries fast.
- My charm cracked while drying. Can I save it? A hairline crack takes a little fresh clay smoothed in with a damp finger. A deep crack is quicker to soak down and re-roll.