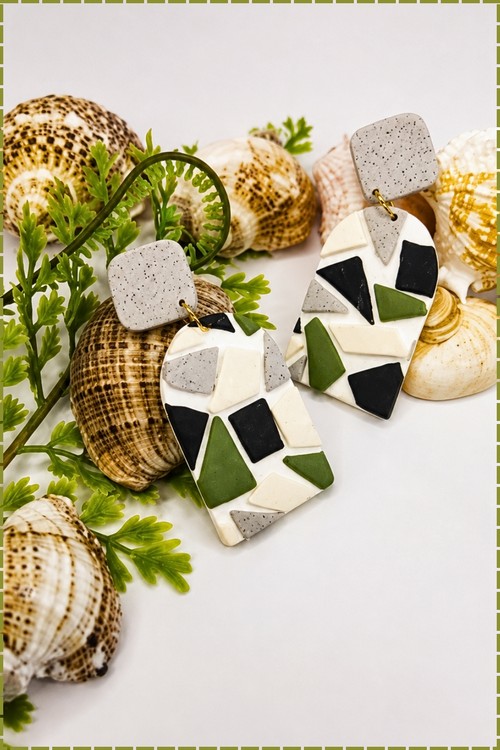
Tortoise Shell Polymer Clay Earrings Idea – Terrazzo Technique
Amber and deep brown blend through the clay in irregular patches, the way real tortoiseshell scatters light rather than sitting flat. The shape stays simple so the pattern does the talking, cut clean and finished smooth at the edges. You blend the colours first, condition them together until the marbling reads soft instead of streaky, then cut and cure. The blending is the whole craft here.
Tortoise Shell Polymer Clay Earrings
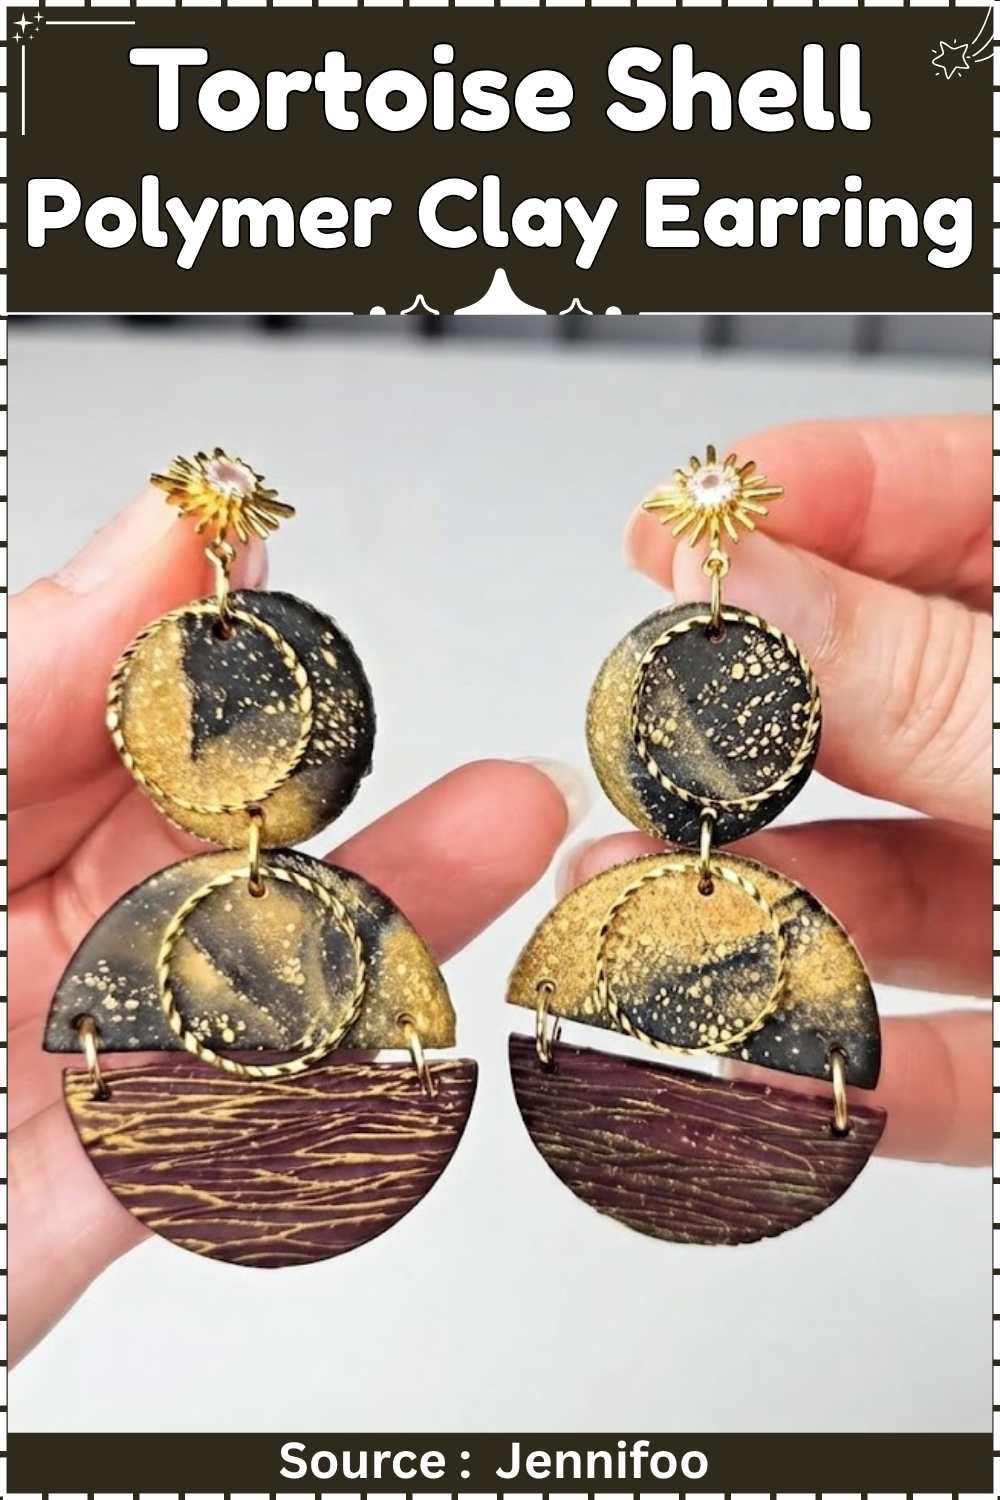
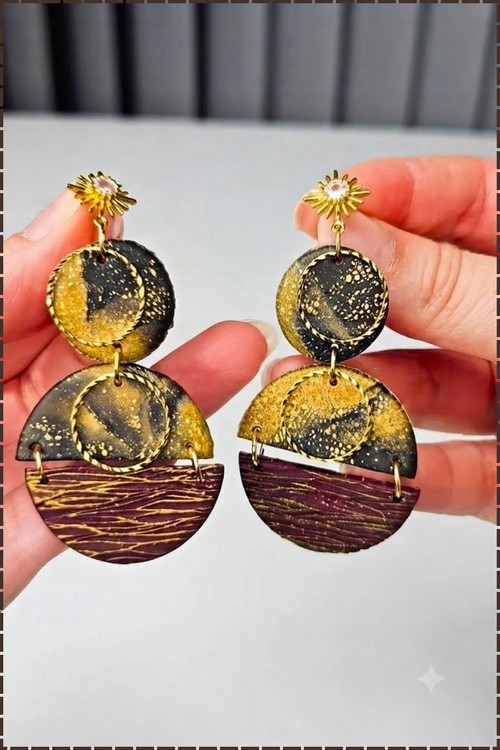
Dark and gold together in polymer clay tend to produce something that reads expensive without being fussy. These tortoise shell earrings use black clay broken up with gold mica powder and scattered fragments to mimic the organic pattern of real shell, then cut into stacked circles and half circles that give the piece its structured silhouette. Sun stud tops add a finishing touch that ties the warm tones together.
This project produces earrings, a terrazzo-style scrap earring set from the offcuts, and a barrette, all from one cane build. The terrazzo pieces are the practical reason to make more clay than you need.
Styling and Wear
Tortoise shell reads warm and neutral, so it pairs with a wide range against the skin: rust linen, cream silk, olive denim. The gold leaf inclusion adds a shift at different light angles that keeps the pattern interesting on the ear through a full day. The barrette reads as an accessory rather than jewellery, so it can sit in an updo or clip back a fringe and the matching clay connects the look without matching it too closely.
For daily wear, the fishhook or hoop attachment is more comfortable than a flat post for these sizes. The terrazzo offcut earrings, smaller and lighter, work better for longer days when you want less lobe weight.
At a Glance
- Clay type and brand: Polymer clay, Sculpey Premo Translucent plus Black, with mica powder colourants
- Technique: Chunk cane, quarter-and-recombine reduction, terrazzo scrap reuse
- Tools: Pasta machine, tissue blade, acrylic roller, earring cutters, ceramic tile, UV lamp
- Cure method: Oven, 275°F / 130°C, 30 minutes
- Finished size: Earring components 25 to 30 mm. Barrette 60 to 70 mm
- Hands-on time: 1 hour 30 minutes
- Total time: 2 hours 30 minutes including cure, cooling, and UV resin cure
- Difficulty: Intermediate
Materials and Tools
Essential
- Sculpey Premo Translucent, one 57 g block
- Sculpey Premo Black, one 57 g block (a small amount is used)
- Orange mica powder
- Bronze mica powder
- Liquid Sculpey clear, small amount (5 ml)
- Gold leaf sheets, 2 to 3 sheets
- Pasta machine dedicated to clay
- Flexible tissue blade
- Acrylic roller
- Earring cutters in your preferred shapes, 25 to 30 mm
- Ceramic tile
- Aluminium foil for tenting
- Oven thermometer
- UV resin, 5 ml minimum
- 36 W UV lamp
- Super glue gel (Loctite or equivalent)
- Barrette finding, 60 to 70 mm, gold-tone
- Nickel-free or surgical steel earring hooks, hoops, or posts to match your cutter shapes
- 5 mm jump rings, nickel-free, 4
Nice to Have
- Plastic sandwich bag for initial compression without fingerprints
- Cornstarch for releasing cutters
- Sunset gold mica powder for cherry brown accent pieces
- Zirconia hook earwires for a dressier finish
- Gold sunburst posts for stud-style pairs
Colour Recipes
Tortoise shell base: Knead orange mica powder into a conditioned translucent block until the colour is fully saturated, then add bronze mica powder a pinch at a time, kneading between each addition, until the orange softens to a warm amber. The ratio is approximately 4 parts orange mica to 1 part bronze, adjusted by eye against natural daylight.
Cherry brown accent (optional): Premo Burnt Sienna or a mix of Premo Terracotta and Brown, used as-is without mica. Cornstarch and sunset gold mica add the surface highlight.
The Build
Conditioning and Colour Mix
- Condition the Translucent block fully through the pasta machine, 15 passes, folding and re-feeding fold-first each time.
- Flatten the conditioned block into a slab and dust orange mica powder across the surface.
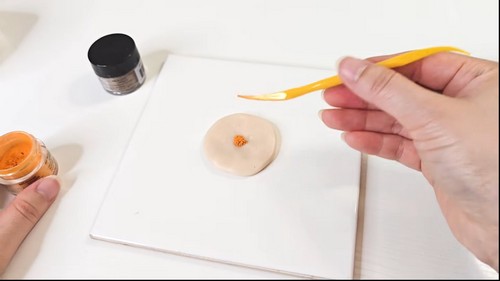
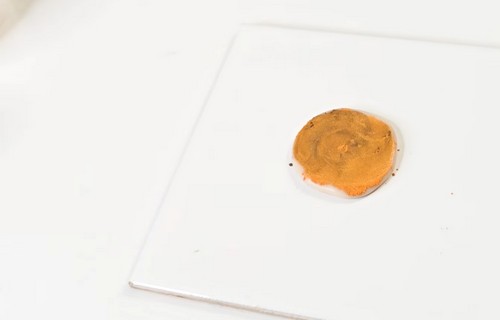
- Fold the slab and pass through the pasta machine. Repeat 10 times until the colour is even throughout.
- Add bronze mica powder in two small additions, re-rolling 5 passes after each, until the colour reads as warm amber rather than bright orange.
- Condition a small amount of Black Premo separately, 10 passes.
Building the Chunk Cane
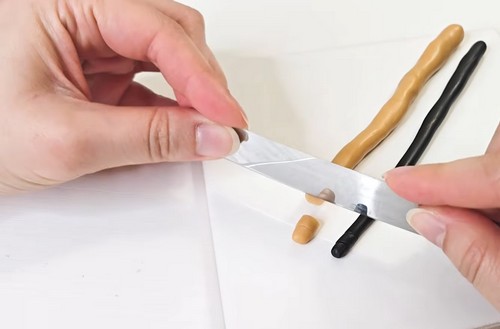
- Roll the amber clay into a snake 15 mm in diameter and 80 mm long.
- Roll the black clay into a snake 6 mm in diameter and 80 mm long.
- Cut both snakes into 10 mm chunks with the tissue blade.
- Lay the chunks loosely together on the tile in a roughly even spread, alternating orange and black without a fixed order.
- Squeeze 5 ml of liquid clay across the chunks.
- Tear two sheets of gold leaf into rough 10 mm pieces and scatter them across the chunk mix.
- Press the mix together with your palms, working from the outside in, until it holds as one rough block. Do not twist or knead at this stage.
- Place the block inside a plastic bag and compress it firmly from all sides through the bag to close the surface seams without adding fingerprints.
- Remove from the bag and roll the block into a cane 40 mm long.
Reducing the Cane
- Cut the cane into 4 equal pieces with the tissue blade.
- Stack the pieces in a 2 x 2 arrangement and compress firmly with the acrylic roller from all sides until the stack is one cane again.
- Cut into 4 pieces again and compress. Repeat this cycle 4 times total, or until the pattern has broken into fine cells with no visible large chunk seams.
- On the final compression, roll the cane to 50 mm long and 30 mm diameter.
- Run the acrylic roller firmly down all four sides of the cane to close any remaining surface seams before it touches the pasta machine.
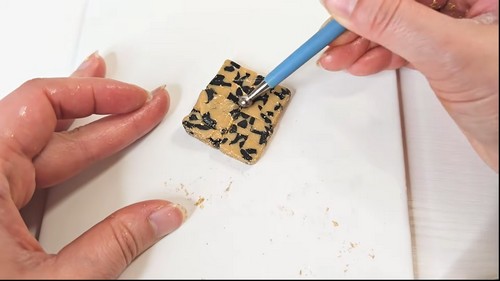
Sheeting and Cutting: Tortoise Shell Earrings
- Slice a 10 mm section from the cane and flatten it by hand to 6 mm.
- Pass it through the pasta machine at 3 mm, feeding the same edge first each time.
- Lay the resulting sheet pattern-side down on the ceramic tile.
- Dip your cutter in cornstarch, tap off the excess, and cut the earring shapes directly through the sheet while it sits on the tile. Do not lift the sheet to check the cut.
- Remove the excess clay from around the cutouts and leave the cut pieces on the tile for baking.
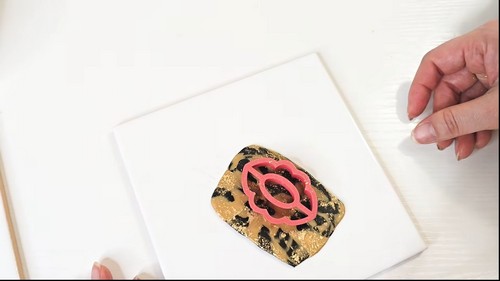
Sheeting and Cutting: Terrazzo Earrings
- Gather all clay scraps from around the cut tortoise shell pieces.
- Fit the scraps together on the tile like puzzle pieces, edges touching but not overlapping.
- Run the acrylic roller firmly across the fitted scraps to close the seams.
- Pass the scrap sheet through the pasta machine at 3 mm.
- Lay the sheet pattern-side down on the tile and cut the second set of earring shapes.
- Leave all pieces on the tile for baking.
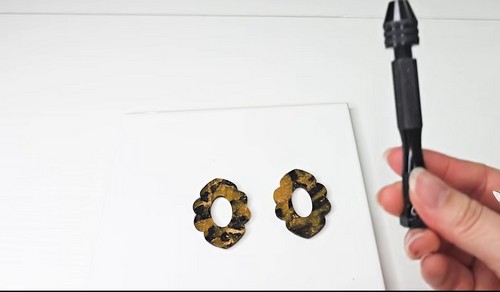
Barrette Base
- Gather remaining scraps and repeat steps 26 to 28.
- Cut a 65 mm x 20 mm rectangle from the scrap sheet.
- Lay it pattern-side down on the tile beside the earring pieces.
Curing
Bake all pieces on the ceramic tile, pattern-side down. Set an oven thermometer on the shelf and preheat to 275°F / 130°C, waiting for the thermometer. Tent with aluminium foil, edges pressed against the tile. Bake 30 minutes. Cool on the tile 20 minutes before handling. The face-down surface will show a slightly higher gloss than the face-up surface: this is the display face for all pieces.
Finishing
- Do not sand earring or barrette faces. The tile-contact surface is the finish. If the back face of any piece shows unwanted roughness, wet sand with 600 grit only, keeping the piece face-down to protect the display surface.
- For the barrette only: apply UV resin to the display face in a thin even coat using a toothpick, working to within 1 mm of the edge. Cure 90 seconds under a 36 W UV lamp. The earring faces do not need resin: the tile gloss is sufficient for wear, and resin on small earring pieces risks running to the edge before it cures.
Hardware and Assembly
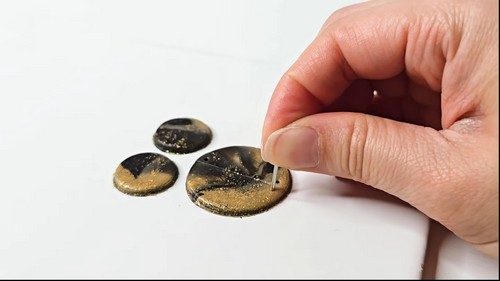
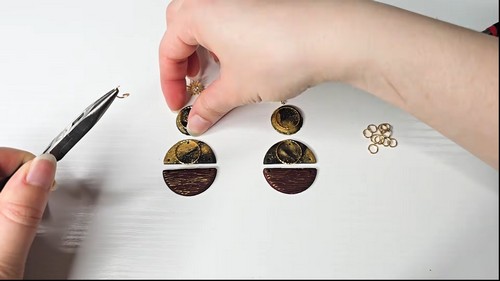
- Earrings: Pierce a 1 mm hole at the top of each cooled earring piece with a needle tool. Open a 5 mm jump ring sideways and thread it through the hole, then through the loop of a fishhook earwire or the opening of a hoop, and close. For sunburst posts, apply a small amount of super glue gel to the post pad, press it centrally onto the back face of the earring, and hold for 60 seconds. Leave 4 hours before wearing.
- Terrazzo earrings: Same method as above. Pair pieces cut from adjacent areas of the scrap sheet so the pattern reads as a deliberate match rather than a leftover.
- Barrette: Apply super glue gel along the spine of the barrette finding. Press the baked clay rectangle onto it, resin-face up, with even pressure from the centre outward. Hold 90 seconds, then leave undisturbed for 4 hours before wearing.
- All earwires, hooks, and hoops are nickel-free or surgical steel. These pieces are flat and 3 mm thick, so even a 30 mm component weighs under 1.5 g, which is comfortable for a full day.
Where Makers Go Wrong
- Ghost seam lines appear after baking on pieces that looked fully fused before. The seam closed at the surface while remaining open beneath it. The compression pass before the pasta machine must go through the full depth of the cane, not just across the exterior, so use the acrylic roller lengthwise along the cane with firm sustained pressure rather than a quick roll.
- The gold leaf clumps in one area and reads as a blob rather than a distributed shimmer. Gold leaf is static-prone and sticks to itself before it reaches the clay. Tear it into small pieces and drop them from 30 mm above the chunk mix rather than pressing a whole sheet in at once.
- Terrazzo pieces cut from opposite ends of a scrap sheet do not read as a pair. The scrap sheet has directionality from the pasta machine pass, so pattern scale and compression differ between the entry edge and the exit edge. Always cut both pieces of a pair from a single cross-section of the sheet rather than one from each end.
- The barrette clay delaminates from the finding within a few weeks. Super glue gel bonds best to roughened metal. Score the spine of the finding lightly with a blade tip before applying the glue, and make sure the baked clay back face is clean and free of mica powder dust before gluing.
Variations
- The amber and black palette is tortoise shell. The same chunk cane method produces three other distinct looks depending on clay colour:
- Night garden: deep teal and cream chunks with no mica powder and silver leaf instead of gold, producing a graphic botanical pattern with a satin rather than shimmery finish.
- Autumn bark: raw sienna, terracotta, and white chunks with bronze mica only, no gold leaf, which reads as natural wood grain rather than shell when the cane is reduced to fine cells.
Care
The resin coat on the barrette face will dull with prolonged contact with oily hair products, so apply serum or oil before clipping in rather than after. Earring backs glued with super glue gel can fail if pulled laterally, so grip the clay piece rather than the post when removing stud-style pairs. Mica powder on the surface of any unresined piece can slowly transfer to pale fabric. These earrings are fine against skin but avoid resting against a white collar for extended periods. Keep the barrette finding away from moisture. The clay is baked and sealed with resin, but the metal spine of most barrette findings is steel that will rust at the hinge with repeated water contact.
Quick Answers
- Can I use acrylic paint instead of mica powder to colour the translucent clay? No. Acrylic paint contains water, which prevents polymer clay from curing evenly and can cause the clay to crack around the pigment particles after baking. Use oil paint (a pea-sized amount per block) or mica powder.
- My cane pattern turned muddy grey after several reductions. Is it salvageable? Muddy grey means the orange and black have blended rather than remaining as distinct cells. That cane will not recover as tortoise shell. Roll it into a solid sheet at 3 mm and use it as a backing sheet for a different project.
- Can I skip the liquid clay and gold leaf and still get tortoise shell? You get the cell pattern without the shimmer. The liquid clay is specifically for bonding the gold leaf into the mix rather than structural adhesion between chunks, so skipping it means the gold leaf tends to stay on the surface rather than distributing through the cane.
- Can I use this same chunk cane method with opaque clay rather than translucent? Yes, and the pattern will be sharper because opaque clay has no light diffusion across cell walls. The amber quality of tortoise shell comes from the translucent base reading warm against the mica, so an opaque version will look more like coloured tile mosaic than shell.