Clay Earring Shapes For Halloween – Pumpkins, Bats, Ghosts Made Of Clay
Pumpkins, bats and ghosts cut from orange, black and white clay. Halloween clay earring shapes suit anyone building a small seasonal set to wear through October or sell at a fall market. Each shape is broken down separately in the steps.
Orange rounds with a ridged top, black wings cut to a point, white shapes with a rounded head and a wavy hem. Halloween earrings come down to three cutter shapes and a small palette. Orange, black, white, maybe a stem in green. Pumpkins take a few pressed lines to give them ribs. Bats and ghosts are flat cuts with the detail added on the surface after. Cheap to make in batches, which matters when the season is short.
Clay Earring Shapes For Halloween
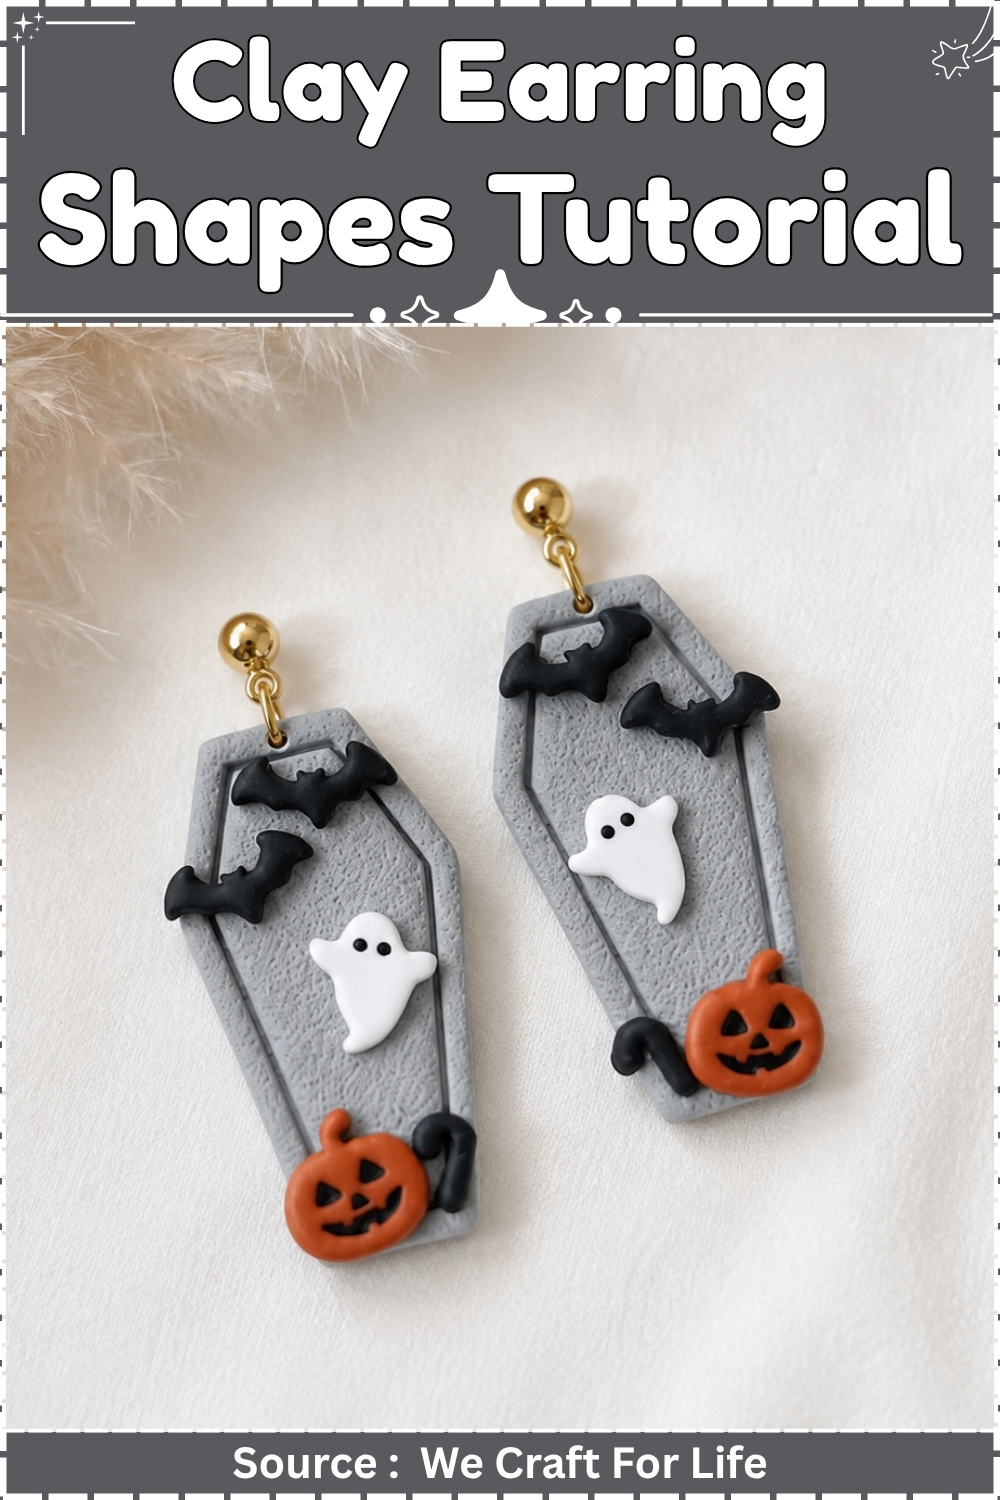
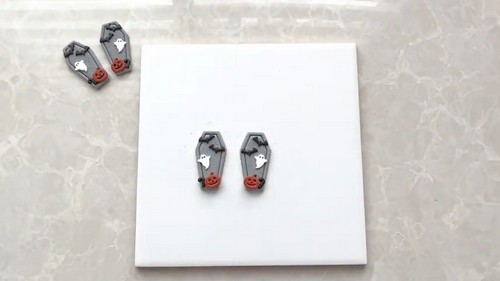
Halloween earrings sell in a specific window, and the ones that move fastest are the ones that read clearly from across a room. A coffin silhouette with three appliqué motifs on a textured grey base does exactly that: each element is immediately recognisable at earring scale without any fine detail work. The construction is a cut-and-apply method. You roll one textured sheet, cut the bases, then cut the decorations from three separate clay colours and press them in place before a single bake. No multi-stage process, no second bake. That speed is the point: a batch that takes under two hours of hands-on time sells at a margin that covers the labour.
Pricing the Labour
At 10 pairs per batch with 90 minutes of active hands-on time, that is 9 minutes per pair before cure. At a fair studio rate of $20 per hour, the labour component per pair is $3. Materials run $1 to $1.50 per pair including findings. A retail price of $12 to $16 per pair yields a workable margin for a market stall or Etsy listing. Price at the top of that range if the texture rolling pin is a distinctive pattern: generic texture undercuts your differentiation.
At a Glance
- Clay type: Polymer clay, oven-cured
- Suitable brands: Sculpey Premo, Fimo Professional
- Tools: acrylic roller or pasta machine, textured rolling pin, coffin cutter 35 to 40 mm, mini cutters for pumpkin, bat, and ghost, dotting tool, tweezers
- Cure method: 275°F / 130°C, 30 minutes
- Finished size: 35 to 40 mm tall coffin base
- Hands-on time: 90 minutes for 10 pairs
- Total time: 3 hours including cure and cool
- Difficulty: Beginner
Materials and Tools
Essential
- Polymer clay in textured grey or stone effect
- Polymer clay in orange (pumpkin)
- Polymer clay in black (bat)
- Polymer clay in white (ghost)
- Acrylic roller or pasta machine
- Textured rolling pin or texture sheet
- Coffin cutter, 35 to 40 mm
- Mini pumpkin cutter, approximately 8 mm
- Mini bat cutter, approximately 10 mm wide
- Mini ghost cutter, approximately 10 mm tall
- Dotting tool or ball tool
- Tweezers
- Nickel-free or surgical steel flat-pad earring posts, 5 mm pad
- Liquid clay (Sculpey Translucent Liquid)
- Cardstock for lining the tray
- Aluminium foil for tenting
- Toaster oven and oven thermometer
Nice to Have
- Pasta machine for consistent sheet thickness
- Cornstarch to prevent mini cutter sticking
- 400 grit and 800 grit wet sanding sponges
- Polymer-compatible gloss varnish
The Build
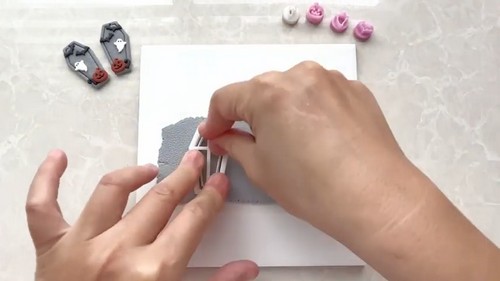
Roll and Texture the Grey Base Sheet
- Condition a 40 g block of grey polymer clay for 4 minutes until smooth and warm.
- Roll the conditioned clay to 3 mm thick using an acrylic roller or pasta machine.
- Press the textured rolling pin firmly across the full sheet in one continuous pass from left to right, keeping even pressure along the pin’s length.
- Rotate the sheet 90 degrees and make a second pass if the texture needs to be denser.
- Roll the sheet lightly one final time with a plain acrylic roller to even the thickness without fully flattening the texture.
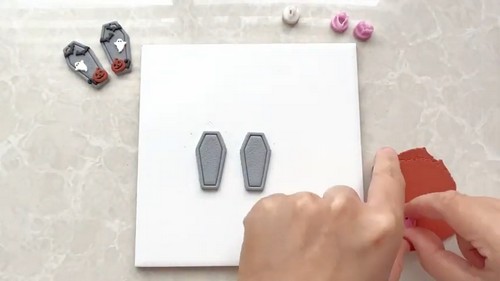
Cut the Coffin Bases
- Press the coffin cutter straight down into the textured sheet with one firm motion, keeping the cutter perpendicular to the surface.
- Lift the cutter and peel the excess sheet away from the cutout.
- Cut all coffin bases from the sheet before moving on: 20 bases for 10 pairs.
- Leave the cut bases in place on the sheet while cutting, then transfer them to a cardstock-lined tray using a tissue blade slid flat underneath each one.
- Space the bases 10 mm apart on the tray.
Cut and Place the Pumpkins
- Condition a 5 g piece of orange clay for 2 minutes.
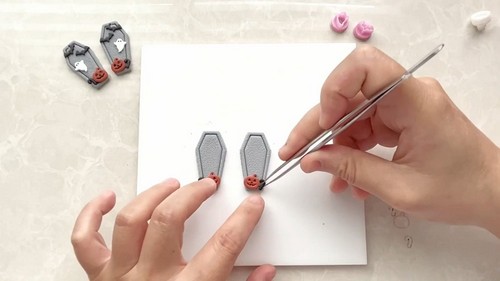
- Roll to 2 mm thick.
- Dust the mini pumpkin cutter lightly with cornstarch on a fingertip, tapping the excess off.
- Press the pumpkin cutter into the orange sheet and cut one pumpkin per coffin base.
- Pick up each pumpkin with tweezers and set it against the lower third of the coffin base, centred side to side.
- Press the pumpkin down firmly with a fingertip so the edges make full contact with the grey clay beneath.
Then Cut and Place the Bats
- Condition a 5 g piece of black clay for 2 minutes.
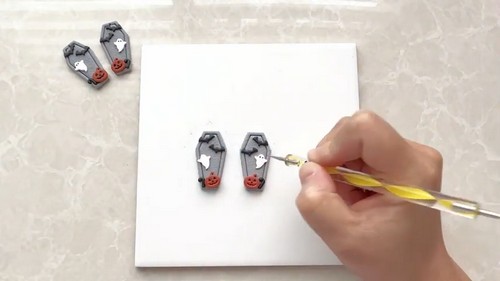
- Roll to 2 mm thick.
- Dust the bat cutter with cornstarch and cut one bat per coffin base.
- Pick up each bat with tweezers and position it near the top of the coffin, centred, with the wings spreading horizontally.
- Press the bat down gently with a fingertip, keeping the wing tips flat against the grey base.
Cut and Place the Ghosts
- Condition a 5 g piece of white clay for 2 minutes.
- Roll to 2 mm thick.
- Dust the ghost cutter with cornstarch and cut one ghost per coffin base.
- Pick up each ghost with tweezers and centre it between the bat and the pumpkin.
- Place the dotting tool in the centre of the ghost and press down lightly to seat the ghost flat without distorting its outline.
- Use the dotting tool to press two small eye dots into the ghost surface.
Attach the Earring Posts
- Apply a thin ring of liquid clay around the back centre of each coffin base using a toothpick.
- Press a flat-pad earring post into the liquid clay at the back centre, pad-side down.
- Hold for 10 seconds to allow the liquid clay to grip the pad before releasing.
- Verify that the post pin points straight out perpendicular to the face of the earring by viewing from the side.

Cure Block
- Preheat the oven to 275°F / 130°C and allow 20 minutes for the temperature to stabilise. Verify the tray temperature with a standalone oven thermometer before loading: the dial reading on most small ovens runs 25 to 50 degrees above actual temperature during the first 10 minutes, and that spike scorches the thin ghost and bat appliqués before the oven settles.
- Bake at 275°F / 130°C for 30 minutes. The coffin base is 3 mm thick, the appliqués add 2 mm at their thickest point, giving a maximum of 5 mm. Premo and Fimo Professional both require 30 minutes at this thickness. Do not reduce the time based on piece count. Tent every tray with foil, folded edges tucked under the tray rim, with no foil touching any clay surface.
- Cool on the tray for 20 minutes before handling. The liquid clay earring post bond reaches full strength cold, not warm.
Finishing
The textured grey surface needs no sanding: the texture is the finish, and sanding flattens it. If orange, black, or white appliqué edges lifted slightly during baking, press them back with a fingertip while still warm, then hold until cool. For a gloss finish over the entire surface, apply one thin coat of polymer-compatible gloss varnish with a soft brush, including the appliqué faces and the grey base, and let it cure per the product instructions. This reads better in photographs and extends the surface life of the white ghost against colour transfer from dark materials. Do not use nail polish as a sealer.
Hardware and Assembly
- The earring posts are embedded and baked-in: no jump rings or hooks needed. Verify each post is upright before packaging. Press each earring back (butterfly clutch or rubber disc) onto the post pin and confirm it grips without rotating freely. If a post feels loose after baking, the liquid clay seal was insufficient: re-apply liquid clay around the pad base, re-bake for a second 30-minute cycle, and recheck.
- Use nickel-free or surgical steel posts for skin contact. Surgical steel flat-pad posts in 5 mm are the standard specification for this format. Nickel posts sold by some craft suppliers as “silver” or “silver-tone” are not a substitute for pieces sold to adults who may have metal sensitivities.
Presentation
Package each pair in a small zip-seal bag with a kraft card earring display card, 60 mm by 90 mm, punched with two 4 mm holes spaced 20 mm apart to hold the posts. Print the card with your maker name and care instructions on the back. A plain black card with white printing reads more deliberately seasonal than mixed-colour packaging and photographs well against both dark and light backgrounds for listings. For a market stall, stand the cards in a small black-painted wooden card holder at eye level so the coffin silhouette faces forward.
Where Makers Go Wrong
- Appliqués that slide to the edge during baking. Polymer clay softens at around 105°C before it begins to cure, and a decoration pressed on at only one point will move as the clay relaxes. Press every appliqué edge down flat against the base before the tray goes in, not just the centre. A piece that slides mid-bake cannot be repositioned without visible marks.
- Grey base texture that disappears under the appliqués. The visual logic of this earring depends on the texture reading through the gaps between the pumpkin, bat, and ghost. If the decorations are placed too large or too close together, the grey reads as a flat coloured background with decorations rather than a textured coffin surface. Keep each appliqué at least 3 mm from the coffin edge and 2 mm from each other.
- Post embedded at a tilt. Liquid clay grips the pad but does not rigidly align it: a post pressed in at a slight angle and released before the liquid clay grips will bake at that angle permanently. The earring then sits forward on the lobe rather than flat. Hold each post for 10 seconds after pressing before releasing, then view from the side to confirm alignment before the tray goes in the oven.
Variations
- A black base with gold-leaf texture instead of grey gives the same coffin silhouette a formal rather than spooky reading, which extends the wearable season past Halloween into autumn generally.
- Replace the three appliqué motifs with a single large skull centred on the coffin face: cut the skull from white clay and press it on, then use a needle tool to cut the eye sockets and nose cavity into the white surface before baking.
Care
If an appliqué chips at the edge after repeated wear, press the chip back with a toothpick dipped in liquid clay and re-bake the single earring for 15 minutes. Avoid pressing the earring face-down in storage since the appliqué edges can catch and lift against a hard surface over time. Earring backs loosen with daily removal: replace the butterfly clutch rather than forcing a worn-out clutch tighter.
Quick Answers
Can I make these without mini cutters? Shape the pumpkin, bat, and ghost by hand from small balls and teardrop shapes. Bat wings are two flattened teardrops pressed against a small ball body. Ghost is a rounded top with a wavy bottom hem pressed flat. Pumpkin is a small sphere flattened and ridged with a needle tool.
How do I stop the mini cutters sticking to the clay? A pinch of cornstarch dusted onto the cutter face before each cut prevents sticking without affecting the clay surface or bake result.
Can I add detail like faces to the pumpkin and bat? Yes. Use a needle tool after pressing the appliqué into place but before baking: press two small triangular eye holes and a jagged mouth into the pumpkin face, and add a dot for the bat’s eye.