Blue clay with gold running through it, and a rolled rose sitting where the two colours meet. The gold does the heavy lifting. A little leaf or a swipe of metallic paste against a deep blue base reads far richer than the effort suggests. The rose is coiled from a thin strip and pressed on before baking. Shapes stay loose and hand cut, so nothing has to line up between the left and the right.
Abstract Clay Earrings
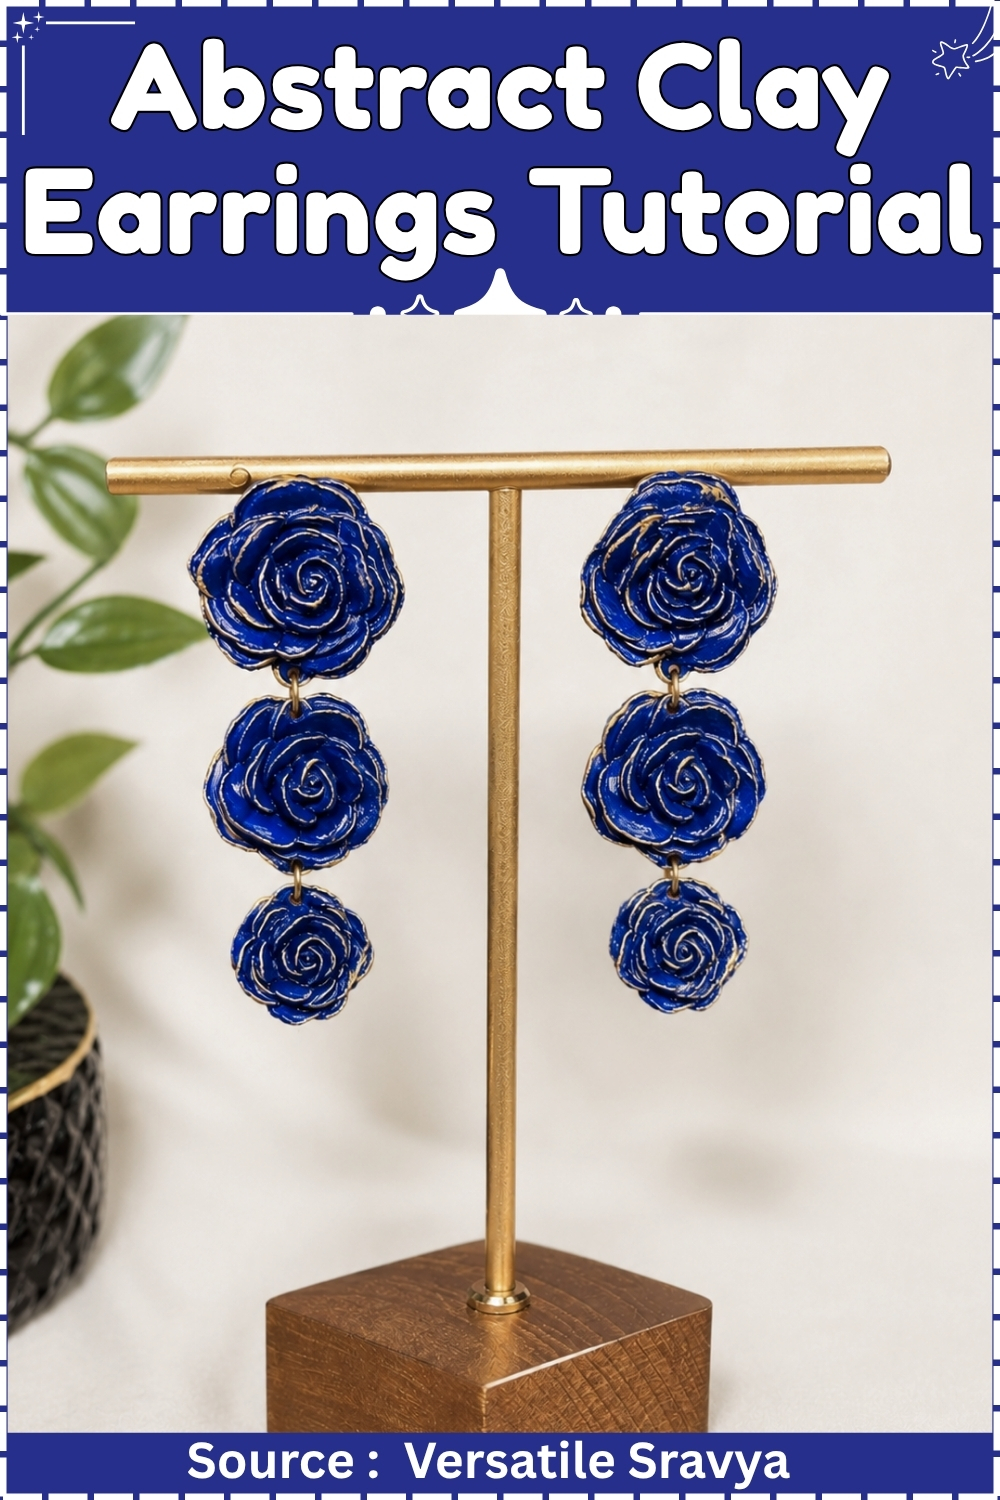
Epoxy clay is the wrong choice for almost every earring, and exactly the right one here. It is dense, so anything you make from it has to stay small. It gives you around twenty five minutes of working time and then it stops being clay and starts being a rock, which is unforgiving if you were planning to think while you work.
What you get in return is a molded rose that keeps every petal edge sharp under years of wear, holds a metal pin without glue, and does not soften in a handbag in July. These are earrings you put on without thinking about them.
Wearing Them
At three grams a side these sit closer to a stud than to a chandelier, so they carry through a full day without the lobe complaining. The strand falls fifty five millimetres from the ear, which clears a shirt collar and stops just short of the shoulder. Deep blue with gold catching the petal edges reads as evening jewellery, but it works against a plain white shirt in daylight too. Wear them with hair up. The cluster is a three-dimensional shape and it disappears completely against loose hair, which is the one styling mistake worth avoiding.
Designer Credit: Versatile Sravya.
At a Glance
- Clay type: Two-part epoxy clay, chemical cure, no oven
- Brand: Fevicryl Mouldit
- Mixing ratio: Equal parts base and hardener
- Working time: 25 minutes from the moment the two parts touch
Key tools: Silicone rose molds in three sizes, craft blade, round-nose pliers, fine brushes
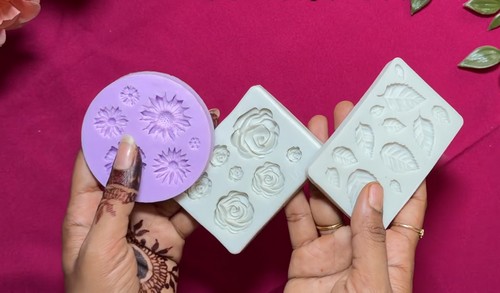
- Finished size: Roses at 18, 14 and 10 millimetres, total drop 55 millimetres
- Weight: 3 grams per earring
- Cure: 4 hours to handle, 24 hours to full hardness
- Paint: Blue acrylic base with dry-brushed gold edges
- Hands-on time: 1 hour 45 minutes across three sessions
- Total time: 30 hours
- Difficulty: Intermediate
Materials and Tools
Essential
- Fevicryl Mouldit two-part epoxy clay
- Silicone rose molds with cavities at 18, 14 and 10 millimetres
- Talcum powder
- Craft blade
- Eye pins, 0.7 millimetre wire, gold-plated
- Round-nose pliers
- Two pairs of chain-nose pliers
- Wire cutters
- Isopropyl alcohol
- Cotton pads
- Sandpaper in 320, 400 and 600 grit
- Acrylic gesso
- Acrylic paint in Ultramarine Blue, Phthalo Blue and Titanium White
- Metallic gold acrylic paint
- Round brush, size 2
- Flat brush, size 4
- Water-based satin polyurethane varnish
- Jump rings, 5 millimetre, 20 gauge, gold-plated
- Earring posts with loop, surgical steel
- Disposable gloves
Nice to have
- Small silicone mat for mixing
- Ceramic tile for curing
- Paper towel for dry-brushing
- Pin vise with 1 millimetre bit
- Small egg cup or foam block to stand pieces in while paint dries
Colour Recipes
- Ratios are by volume. Mix more than you think you need, because matching a second batch by eye across two earrings is harder than it sounds.
- Deep petal blue: 6 parts Ultramarine to 1 part Phthalo Blue to 1 part Titanium White. The white stops the blue reading black in the recesses.
- Gold edges: metallic gold straight from the tube, applied nearly dry. No thinning, no water.
The Pattern
Preparing the Molds
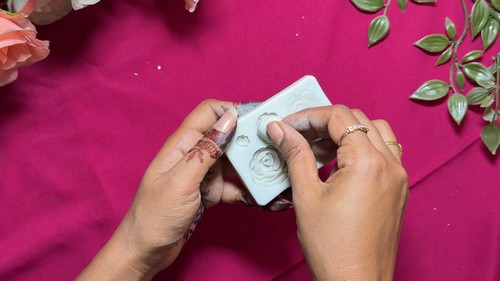
- Dust each mold cavity with a pinch of talcum powder.
- Tap the mold face down on the work surface to shake out any loose excess.
- Bend six eye pins into an L shape with round-nose pliers, leaving a 4 millimetre foot below the loop.
- Trim each foot to 4 millimetres with the wire cutters.
- Lay out two pins for the top rose, two for the middle, and one for each bottom rose, so you have six pins ready.
Mixing the Clay
- Put on gloves.
- Scoop equal amounts of base and hardener, about a 20 millimetre ball of each.
- Knead the two parts together until the colour is completely uniform with no marbling left.
- Work quickly from this point, since the clay stiffens past use at 25 minutes.
Molding the Roses
- Roll a ball slightly larger than the 18 millimetre cavity.
- Press it firmly into the cavity, pushing from the centre outward to the edges.
- Level the back flat with your thumb so the rose sits 5 millimetres deep.
- Flex the mold and peel the rose out from one edge.
- Repeat for the second 18 millimetre rose.
- Mold two roses at 14 millimetres, keeping the depth at 4 millimetres.
- Mold two roses at 10 millimetres, keeping the depth at 3 millimetres.
- Trim any flash from the outer rim of each rose with the craft blade.
Setting the Pins
- Press one eye pin into the top edge of each 18 millimetre rose so the loop stands clear of the petals.
- Press a second pin into the bottom edge of each 18 millimetre rose.
- Set the same two-pin arrangement into each 14 millimetre rose.
- Set a single top pin into each 10 millimetre rose.
- Push a little clay over each embedded foot and smooth it flush.
- Stand all six roses face up on a ceramic tile.
Sanding and Priming
- Sand the back and rim of each cured rose with 320 grit, then 400, then 600, working dry.
- Wipe every piece with a cotton pad dampened with isopropyl alcohol.
- Let the alcohol flash off for ten minutes.
- Brush one thin coat of acrylic gesso over the whole rose including the back.
- Let it dry two hours, then apply a second thin coat.
Painting
- Paint the full surface of each rose with the deep petal blue using the size 2 round brush.
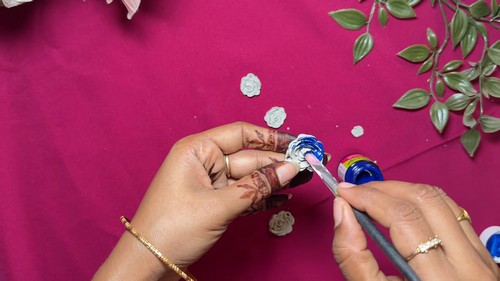
- Work the brush tip into every recess between the petals.
- Let it dry one hour, then apply a second coat.
- Load the flat brush with metallic gold and wipe almost all of it off onto paper towel.
- Drag the nearly dry brush lightly across the raised petal edges only.
- Repeat the gold pass on any edge that needs more definition.
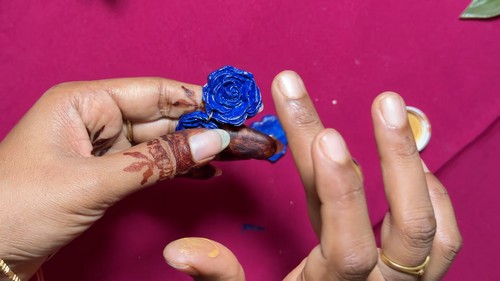
- Let the paint dry four hours.
- Brush two thin coats of satin polyurethane over every surface, allowing two hours between coats.
Curing
There is no oven here. Fevicryl Mouldit hardens through a chemical reaction between its two parts, and heat only shortens the time you have to work rather than helping the set. Leave the molded roses standing face up on a ceramic tile at normal room temperature, away from any radiator or sunny windowsill. They will be firm enough to handle after four hours and reach full hardness at twenty four. Do not sand, drill or paint before that full day is up, because epoxy that feels hard at hour six still deforms under pressure and a pin pressed sideways at that stage never fully recovers its seat.
Finishing
- Sand dry, never wet. Epoxy clay produces a fine dust that turns to slurry the moment water touches it, and that slurry packs into the petal recesses where you cannot get it out again.
- Confine sanding to the back and the outer rim. The molded petal faces already carry the detail you paid for, and 320 grit takes a petal edge off in one careless stroke.
- The alcohol wipe matters more than it looks. Cured epoxy carries a faint greasy film from the reaction, and acrylic gesso beads on it rather than gripping.
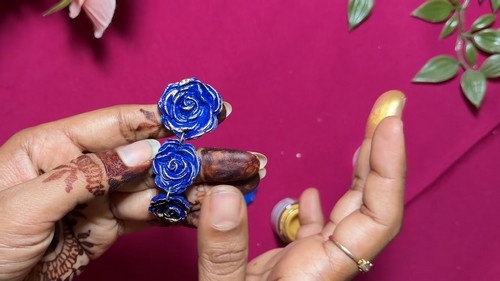
- Varnish everything, including the backs. Bare acrylic paint on a piece that rubs against a jawline all day wears through at the high points within a season.
Assembly
- Open every jump ring by twisting one end toward you and the other away, never by spreading the ends apart.
- Link the bottom loop of the 18 millimetre rose to the top loop of the 14 millimetre rose. Link the bottom loop of the 14 to the top loop of the 10. Link the top loop of the 18 to the loop on the earring post. Close each ring until the ends meet under pressure.
- Hold each finished strand by the post and let it hang free. All three roses should face forward. A rose that sits rotated is corrected now by twisting its jump ring a few degrees.
- Surgical steel posts against the piercing, gold-plated rings below it. The largest rose carries the whole strand from a single embedded pin, so check that pin’s seat before you wear them.

Where Makers Go Wrong
- Working time is a cliff, not a slope. The mixed clay stays soft and cooperative for twenty minutes and then goes crumbly within about ninety seconds, and a rose pressed after that moment takes the mold detail badly and will not close around an eye pin. Mix in two small batches rather than one large one, and accept the small waste.
- Your hands shorten the clock. The reaction is heat-driven, so a long kneading session or a warm room can take five or six minutes off the working time you planned for, and nothing warns you it is happening. In summer, work the clay on a cool tile rather than in your palm.
- Paint fails at the petal edges first, months later. Hair catches the raised edges every day, and gold dry-brushed over an under-cured or unprimed surface lifts from exactly those high points while the recesses still look perfect. The failure is gradual enough that you will blame the paint rather than the preparation.
- Two roses from the same mold are not the same rose. How hard you press changes how deeply the petals form, so a strand built from a firmly pressed rose and a gently pressed one reads as mismatched even though both came from one cavity. Mold all six in a single session and compare them side by side before any pin goes in.
Variations
- Single rose stud. Mold one 14 millimetre rose, skip the pins entirely, and glue a flat-pad post to the sanded back with two-part epoxy. The weight drops to one gram and the piece stops moving on the ear.
- Mixed metals. Prime in black gesso instead of white, paint the base in deep teal, and dry-brush antique copper rather than gold. The dark ground makes the metallic edge read as tarnish rather than gilding.
- Graduated cluster. Mold five roses per earring at 10, 12, 14, 16 and 18 millimetres and hang them in one descending strand. The drop reaches 85 millimetres, so switch to a hook and expect the top rose to carry twice the load.
Care
The embedded pin in the largest rose carries everything, and that seat is where these fail. Perfume sprayed onto the neck lands on the varnish and clouds it permanently. Gold dry-brushing sits on the raised edges only, so anything that rubs those edges wears the gold before it touches the blue. Never store these face down, since the petal tips take the weight and chip the varnish. Do not use jewellery dip or polish cloths on the gold, because both strip acrylic paint straight off.
Quick Answers
- Can I use polymer clay in the molds instead? Yes, and it is lighter. You lose the ability to embed a pin without glue, since polymer grips metal far less well than epoxy does.
- My mixed clay went hard before I finished molding. It is gone. Cured epoxy cannot be softened or reactivated by any solvent, so scrape the mold clean immediately and mix a fresh, smaller batch.
- Do I really need the gesso? On anything that will be worn, yes. Acrylic straight onto epoxy looks fine for a month and then lifts in sheets from the flat back where it has nothing to grip.
- Can I drill a hole after curing instead of embedding pins? You can, epoxy drills cleanly with a 1 millimetre bit. A drilled hole plus a jump ring is weaker than a cured-in pin, so keep it for repairs.
Leave a Reply