Do you need to bake polymer clay earrings? Yes, and skipping it is why some pairs snap in a week. Baking is what fuses the plasticizer through the clay and turns a soft slab into something that holds up to being worn. Air dry clay is the alternative that cures on its own, but it is a different material with a different feel and finish.
Polymer clay earrings have to be baked. There is no workaround, no drying method that gets you there, and the pairs that break along a thin edge after a week are almost always underbaked rather than badly made. Baking is a chemical change, not just drying out, and it is what makes the difference between clay that flexes and clay that snaps. This post covers why it matters, what happens when you cut it short, and where air dry clay fits in if an oven genuinely is not an option.
Trendy Polymer Clay Earrings

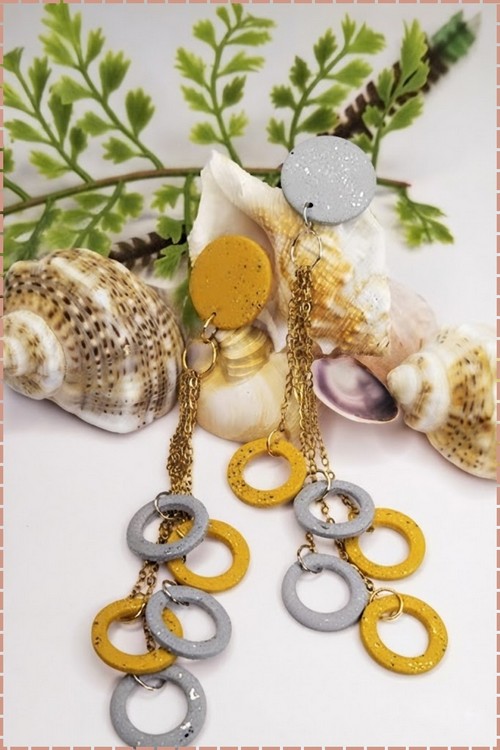
Speckled foil pressed into gray and mustard clay gives these earrings a stone like finish that reads far more expensive than the materials behind it. The design is built from simple cut circles and open rings, then strung along thin gold chain so the pieces swing at different lengths. Nothing here needs sculpting skill, only a steady hand with a cutter and a pair of pliers.
At a Glance
- Clay type and brand: Polymer, Sculpey Premo
- Colours: cream and speckled terracotta
- Tools: pasta machine, 18 mm circle cutter, 11 mm circle cutter, 12 mm circle cutter, flexible tissue blade, needle tool, two pairs of flat nose pliers, ceramic tile
- Sheet thickness: 3 mm
- Cure method: oven, 275°F / 130°C, 30 minutes
- Finished size: 48 mm total drop, 18 mm rings, 12 mm stud top
- Weight: under 3 g per earring
- Hands-on time: 50 minutes per pair
- Total time: 1 hour 45 minutes to assembly, plus 24 hours for the glue to reach full strength
- Difficulty: easy to intermediate
Materials and Tools
Essential
- Sculpey Premo in white, translucent, orange, burnt umber, and black
- Pasta machine or acrylic roller with 3 mm guide rails
- 18 mm circle cutter
- 11 mm circle cutter
- 12 mm circle cutter
- Flexible tissue blade
- Needle tool with a 1.5 mm shaft
- Glazed ceramic tile, 200 mm square
- Aluminium foil
- Oven thermometer
- Wet and dry sandpaper in 400, 600, 800, 1000, and 2000 grit
- Surgical steel flat pad earring posts, 8 mm pad, with butterfly backs
- Surgical steel jump rings, 7 mm outer diameter and 0.8 mm wire
- Surgical steel jump rings, 5 mm outer diameter and 0.8 mm wire
- Fine cable chain, 2 mm link, surgical steel
- Two pairs of flat nose pliers
- E6000 adhesive
Nice to Have
- Denim offcut or muslin buffing wheel
- Clay-dedicated ceramic tile for conditioning
- Wire cutters with a flush jaw
- Bead mat for assembly
Colour Recipes
- Mix by volume, then adjust by eye against the light you will photograph in.
- Cream: 8 parts white, 1 part translucent, and a pinhead of orange. The translucent keeps it from reading as flat paint.
- Speckled terracotta: 6 parts white, 3 parts orange, 1 part burnt umber. Condition to an even colour first, then crumble a pea of black clay into flecks between your fingers and fold them through with three passes only.
The Build
Condition the Clay
- Slice each block into 5 mm slabs with the tissue blade.
- Pass every colour through the pasta machine on the thickest setting, fold, and repeat 15 times.
- Mix each colour to the recipe above.
- Condition the mixed clay for a further 10 passes.
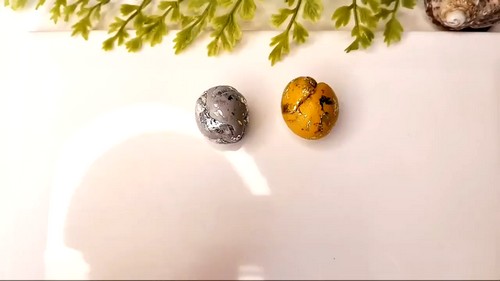
Roll and Rest the Sheets
- Set the pasta machine to 3 mm.
- Pass the cream through once, then the terracotta once.
- Lay both sheets flat on the ceramic tile.
- Rest them for 20 minutes.
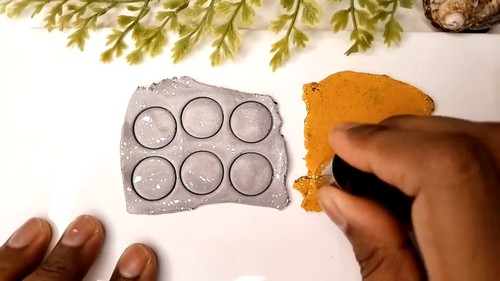
Cut the Rings
- Press the 18 mm cutter through the cream sheet twice.
- Press the 18 mm cutter through the terracotta sheet twice.
- Leave all four circles sitting in place in their sheets.
- Centre the 11 mm cutter inside each 18 mm circle and press straight down without twisting.
- Peel the surrounding waste sheet away first.
- Push each 11 mm centre out with the blunt end of the needle tool.
- Slide the tissue blade under each ring and lift it onto the tile.
Cut and Pierce the Stud Tops
- Press the 12 mm cutter through the terracotta sheet twice.
- Lift both circles onto the tile.
- Mark a point 2 mm in from the edge of each circle.
- Push the 1.5 mm needle shaft straight through that point and twist it once to clear the hole.
- Smooth the raised lip on the underside with a fingertip.
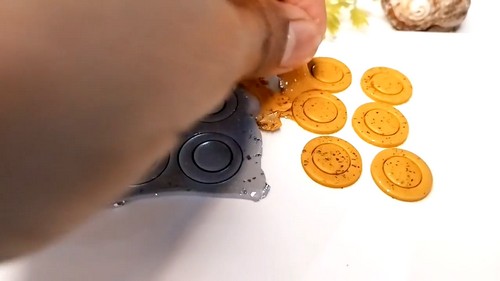
Curing
- Set the oven to 275°F / 130°C and check it with an oven thermometer sitting on the middle shelf, because domestic ovens routinely run 25 degrees out. Bake the pieces on the glazed tile, never on bare metal. Tent the whole tile loosely with foil, leaving a gap at each end for air.
- Bake for 30 minutes. Every piece here is 3 mm, well under the 6 mm that the 30 minute figure is measured against, but Premo still gets the full brand minimum. Time is calculated from the thickest piece on the tile, not from how many pieces are on it. Thin flat work does not get a shortened cure.
- Polymer does not begin to break down until around 350°F, so five extra minutes at the correct temperature costs nothing. Underbaked rings snap at the jump ring.
- Leave the tile to cool completely before touching anything. Warm polymer bends.
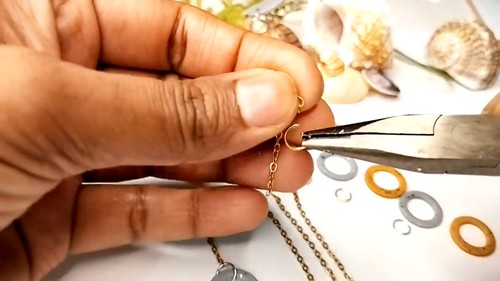
Finishing
- Wet sand only. Fill a bowl with water, add a drop of dish soap, and keep the paper and the piece wet throughout so the dust stays down and the grit does not load up.
- Work 400, 600, 800, 1000, then 2000, and rinse the piece between grits so a coarse particle does not travel up and score the surface. Concentrate on the inner cut edge of each ring, which is the edge a cutter leaves rough and the one closest to the eye when the earring hangs.
- Dry the pieces, then buff each one against folded denim for 30 seconds a side until a low sheen comes up.
- Skip sealing entirely. A buffed Premo surface outlasts a varnished one, and gloss glaze on a matte speckle flattens the flecks into the background.
Hardware and Assembly
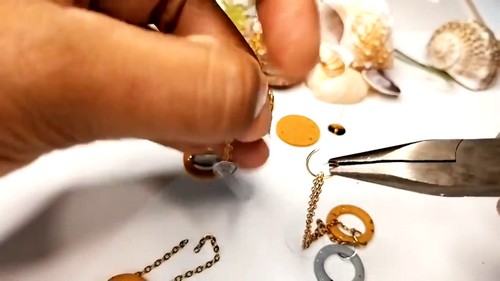
- Open a 7 mm jump ring by gripping each side with pliers and twisting one end towards you, never pulling the ends apart.
- Thread the open ring around the band of a cream clay ring and close it flush.
- Cut two chain lengths, one at 8 mm and one at 14 mm.
- Link the 8 mm chain to the cream ring’s jump ring.
- Attach a terracotta clay ring to the 14 mm chain with a second 7 mm jump ring.
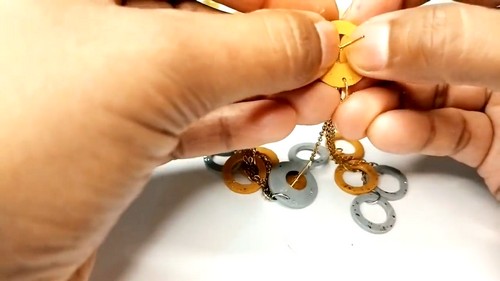
- Join both chain tops to one 5 mm jump ring.
- Thread that 5 mm ring through the pierced hole in a stud top and close it.
- Scuff the back of the stud top with 220 grit until the shine is gone.
- Apply a 3 mm bead of E6000 to the post pad and press it centrally onto the scuffed back.
- Stand the earring pad down and leave it 24 hours before wearing.
Use surgical steel or nickel-free findings throughout. Anything plated will wear through at the post first.
Batch Running Order
- Roll two full sheets at 3 mm, each around 120 by 200 mm. Butt the 18 mm cutter edge to edge and a sheet that size gives 24 rings with almost no waste.
- Cut every 18 mm outer circle across both colours before you swap cutters. Then do every 11 mm centre. Then take all the stud tops from the offcut strips with the 12 mm cutter, and pierce them in one sitting so the needle depth stays consistent.
- One 200 mm tile holds 32 rings and 16 tops, which is eight pairs, and the cure is the same 30 minutes.
- Roll leftover scrap into a marbled sheet for the next run rather than remixing it.
Where Makers Go Wrong
- The jump ring wears a groove in the clay. A 0.8 mm ring riding on a 3.5 mm band cuts a visible flat spot after a few months of daily wear. Step up to 1 mm wire, or roll the rings at 4 mm and accept the extra gram.
- The glue joint fails weeks later, not on the day. Cured polymer has a slick skin that adhesive sits on rather than grips, so the bond feels solid and then lifts off in one clean disc. Keying the pad with 220 grit is what prevents it.
- Sheets firm as the batch runs. The first rings come out of soft clay and the last come out of clay that has sat for an hour, and the firmer sheet takes a crisper inner edge while the soft one drags and ovals. Cut everything in one pass, not as you go.
- The stagger reads differently on the ear. Two drops that look balanced flat on the mat swing across each other once they hang, and the shorter ring ends up sitting behind the longer one. Hold a finished earring against a mirror before you glue the second post.
Variations
| Variation | What changes | What to watch |
|---|---|---|
| Graduated triple drop | Three chains at 8 mm, 14 mm, and 20 mm, with 14 mm, 18 mm, and 22 mm rings | Drop passes 60 mm, so the 5 mm top ring takes the whole load and needs 1 mm wire |
| Open hoop conversion | Skip the stud top, hang the rings from a 25 mm steel hoop on 5 mm rings | The rings slide along the hoop and need a crimp bead each side to hold position |
Care
- Take them off before pulling a jumper over your head; the chain catches knit.
- Store pairs flat and apart, since polymer picks up dye from clay it rests against.
- Keep sunscreen and perfume off the stud pad, which softens the glue joint.
- Pinch closed any jump ring seam that has crept open before it drops a ring.
- Do not store them in soft plastic, which reacts with polymer and goes tacky.
Quick Answers
- Can I use air-dry clay for this design instead? Not at 3 mm. Air-dry rings that thin snap at the jump ring, so go to 5 mm, dry them flat for 48 hours, and seal every surface with acrylic varnish.
- My rings snapped when I opened a jump ring around them. Can I save the rest? They were underbaked. Rebake the survivors for a full 30 minutes at 275°F; a second cure does no harm to polymer.
- Can I link the rings straight to each other and skip the chain? Yes, using 5 mm jump rings. The drop shortens by around 20 mm and the ring edges rub against each other, so sand those contact points to 2000.
- Can I glue the posts on before baking to save a step? No. E6000 will not survive the oven, and the pad has to be scuffed after curing anyway.
Leave a Reply