Polymer Clay Pendant Ideas – Clay and Resin Earrings
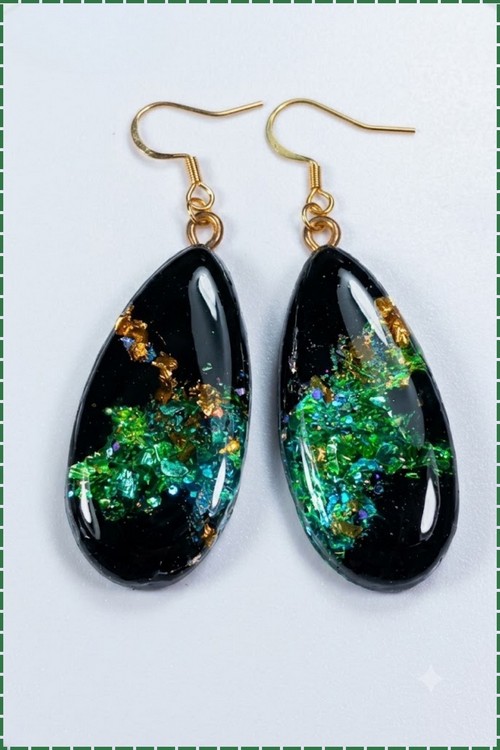
Clear scotch tape wrapped around a baked black polymer clay teardrop becomes the mould for layers of UV resin, hexagon glitter and ocean green mica. Sanding up to 1200 grit then polishes each 30 mm drop into a glossy black opaline earring.
Polymer Clay Pendant
How to Make Black Opaline Gemstone Earrings with Polymer Clay and Resin
Flat or slightly domed, a pendant hangs from a bail or loop pressed into the clay before baking. Polymer clay pendants come as single sculpted pieces, layered builds with texture on top, or cut shapes with clean edges.
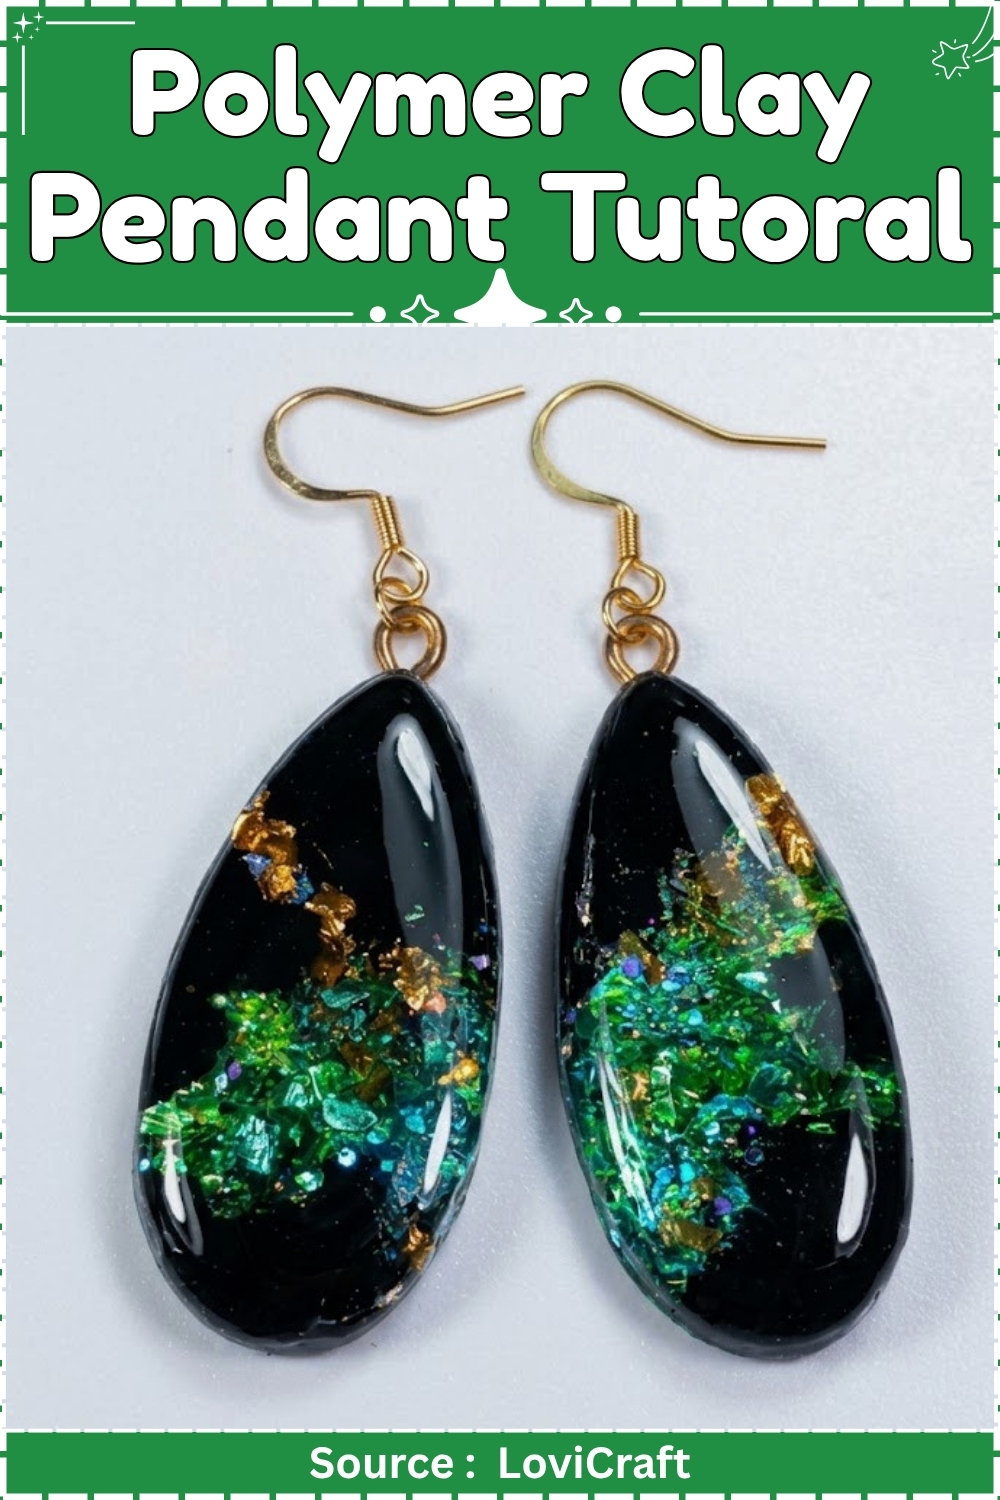
The baked body is firm and lightweight against the chest. Most are finished with a sealant coat that protects the surface and adds either a matte or glossy finish.
At a Glance
| Field | Detail |
|---|---|
| Clay type and brand | Polymer clay (black, brand unspecified — Premo or Fimo recommended) |
| Tools | Roller, teardrop cutter, scotch tape, UV lamp, sandpaper (400/800/1200 grit), polishing cloth |
| Cure method | Oven: 275°F / 130°C for 30 minutes, then UV resin cured in layers under UV lamp |
| Finished size | Approximately 30 mm (dangle earring range) |
| Hands-on time | 45 minutes active work |
| Total time | 3 hours including resin cure cycles |
| Difficulty | Intermediate |
Materials and Tools
Essential
- Black polymer clay
- Roller or pasta machine
- Teardrop cutter
- Scotch tape (clear)
- UV resin (low-viscosity)
- UV lamp
- Hexagon glitter in mixed tones
- Mica powder: Ocean Green, Neon Green
- Gold glitter
- Yellow glitter
- Broken glass stones (rhinestone fragments) in assorted colours
- Sandpaper: 400, 800, 1200 grit (wet/dry)
- Earring hooks (surgical steel or nickel-free)
- Jump rings (5 mm, nickel-free)
- Round-nose pliers and flat-nose pliers
- Tile or parchment paper for baking
- Foil for tenting
Nice to Have
- Pasta machine (for consistent sheet thickness)
- Silicone mixing cups for resin
- Toothpick or needle tool for placing glitter
- UV torch for spot-curing edges
- Polishing compound (Novus Plastic Polish No. 1 or equivalent)
Build
Part 1: Clay Base
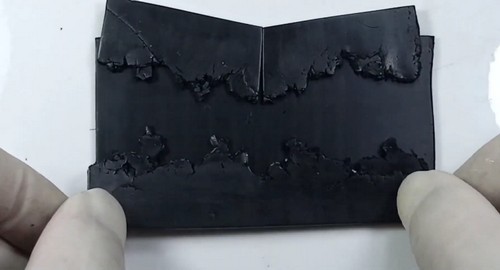
- Condition black polymer clay thoroughly until smooth and pliable with no cracks at the edges.
- Roll a sheet to 3 mm thickness using a roller or pasta machine on a medium setting.
- Fold the sheet in half, roll out again, and repeat twice to remove air pockets and build density.
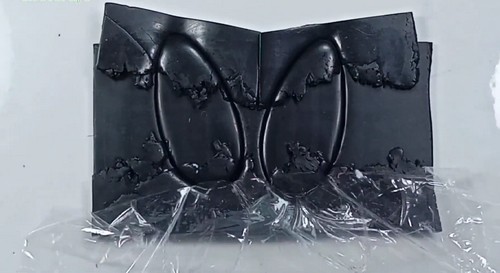
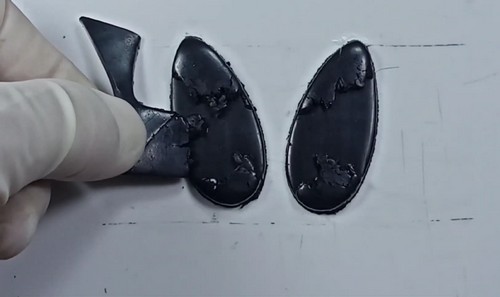
- Use a teardrop cutter to punch two matching shapes from the sheet. Aim for pieces approximately 28 to 32 mm at the longest point.
- Smooth any rough edges with a fingertip dampened lightly with water.
- Place pieces on a parchment-lined tile. Tent loosely with foil.
Part 2: First Bake
- Bake at 275°F / 130°C for 30 minutes.
- Leave on the tile inside the closed oven for 15 minutes after switching off. Remove and cool fully to room temperature before touching.
Part 3: Tape Mold Setup
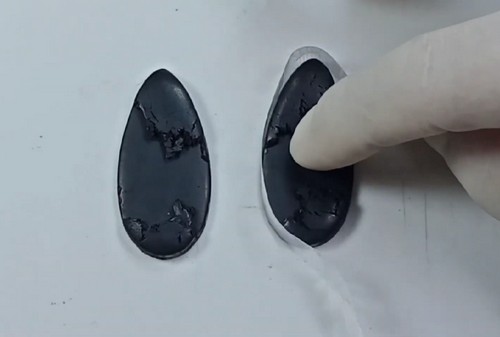
- Once cool, wrap scotch tape firmly around the perimeter of each teardrop, building a wall approximately 3 to 4 mm above the clay surface. Press the tape flat against the back so no resin can seep underneath.
- Check that the tape wall is level. An uneven wall causes resin to pool to one side during the first pour.
Part 4: Base Resin Layer
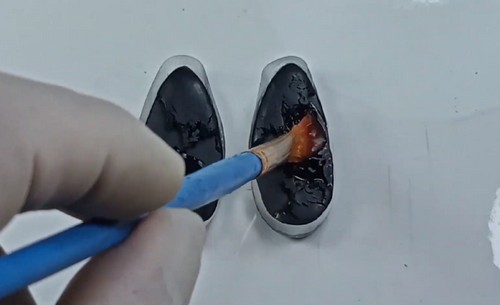
- Pour a thin base coat of UV resin to cover the clay surface, roughly 1 mm deep.
- Use a toothpick to push any bubbles to the edge. Tilt the piece to level the surface.
- Cure under a UV lamp for 60 seconds. The layer should be tacky but firm.
Part 5: Opal Embellishment Layers
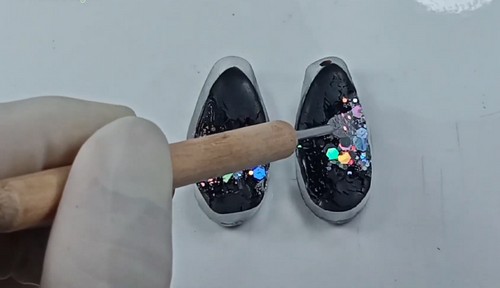
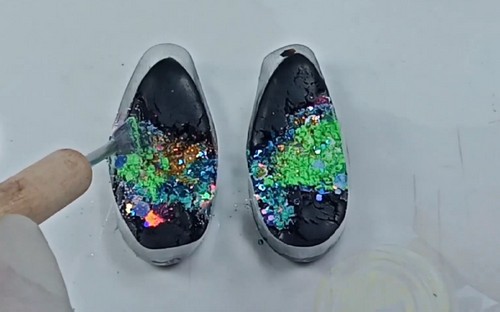
- Sprinkle hexagon glitter across the tacky surface, distributing evenly with a dry toothpick.
- Tap a small amount of Ocean Green mica powder lightly over the glitter using a dry brush. Follow immediately with Neon Green mica powder, concentrating it near the centre.
- Scatter gold glitter sparingly across the surface, then add yellow glitter in the same way.
- Place broken glass stones at irregular intervals. Press each stone gently into the resin layer so it sits flush rather than standing proud.
- Apply a small amount of UV resin over the glitter and stones only enough to anchor them without fully covering them.
- Cure under the UV lamp for 90 seconds.
Part 6: Final Resin Fill
- Pour UV resin slowly over the entire surface until it reaches the top of the tape wall, fully encasing all embellishments.
- Use a toothpick to coax resin into any gaps around the stones.
- Pop any surface bubbles by passing a lighter flame briefly across the surface from a distance of 10 cm, or exhale gently through a straw directed at the bubble.
- Cure under the UV lamp for 3 to 4 minutes. Check the centre by pressing lightly with a gloved fingertip. If it gives at all, cure for another 2 minutes.
Part 7: Demold, Sand, and Polish
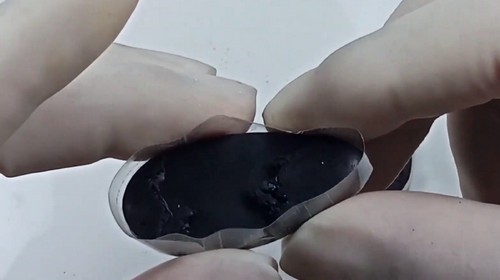
- Peel the scotch tape away carefully, pulling outward and downward rather than upward to avoid chipping the resin edge.
- Sand the resin edge with 400-grit wet sandpaper, keeping the piece and paper wet throughout. Work in small circles around the perimeter only.
- Progress through 800-grit, then 1200-grit using the same wet method.
- Buff with a soft polishing cloth or a small amount of plastic polishing compound until the edge is clear and flush with the surface.
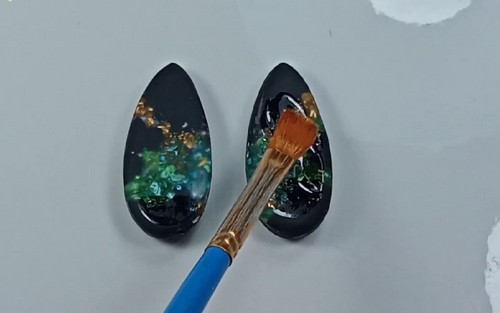
- Apply a final thin coat of UV resin over the entire top surface for a domed, gemstone-grade gloss. Cure for 3 minutes.
Cure Block
Polymer clay used for the base requires oven curing at 275°F / 130°C for a minimum of 30 minutes. Calculate time from the thickest point, which here is 3 mm. That falls below the per-quarter-inch minimum, so the 30-minute brand minimum applies regardless. Bake on a parchment-lined ceramic tile, never on bare metal. Tent with foil to prevent surface darkening. Use an independent oven thermometer: most domestic ovens run 15 to 25 degrees off the dial setting, and black clay scorches more visibly than pale colours if the temperature spikes.
The UV resin layers cure separately under a UV lamp and are independent of the oven step. Each layer requires its own cure cycle as specified in the build. Skipping intermediate cures causes layers to mix, which muddies the opal colour play.
Finishing
Sand only the resin edge, not the polished top surface. Wet-sand through 400, 800, and 1200 grit in sequence. Skipping a grit leaves scratches the next grit cannot fully remove. The final UV top coat seals the sanded edge and restores clarity. No additional sealer is needed over cured UV resin. Buff lightly with a microfibre cloth before attaching hardware.
Hardware and Assembly
Open each jump ring sideways, never by pulling the ends apart. Thread the jump ring through the top point of the teardrop before closing. Attach a surgical steel or nickel-free earring hook to the jump ring. Close the jump ring fully with flat-nose pliers until the gap disappears, then give the hook a half-turn toward the face of the piece so it hangs correctly against the ear. At roughly 30 mm and a thin resin fill, these sit comfortably without dragging. If the finished piece feels heavy due to a generous stone load, switch to a thicker-gauge hook (21 gauge rather than 24) for better lobe support.
Wearing These
Black opaline earrings work hardest against a plain background. A crew-neck or a simple scoop neck in cream, rust, or deep navy lets the colour play in the resin read clearly rather than competing with a printed fabric. Because the resin top coat gives a mirror finish, they catch light as the wearer moves, so they do not need to be large to register. The 30 mm size is the right call: enough visual weight without the fatigue of a heavier statement piece worn all day. Pair with stud earrings in a second piercing if worn, keeping those matte rather than shiny to avoid fragmentation.
Where Makers Go Wrong
- Rushing the intermediate resin cures. An undercured layer stays soft beneath the next pour, which causes the embellishments to drift and the layers to bleed together. The opal effect depends on each layer holding its position. The UV lamp cure time given assumes a standard 36-watt lamp at 10 cm distance. A lower-wattage lamp needs longer.
- Tape walls that aren’t level. If the scotch tape mold tilts even slightly, the poured resin levels itself, not the tape, and the finished surface will be thicker at one end. Press the tape down on a flat surface and check from eye level before pouring.
- Sanding the top surface. The 400-grit pass is for the edge only. Dragging sandpaper across the cured resin top produces visible scratches that a final coat cannot fully hide, because the scratches exist below the new resin layer and show through it.
- Polymer shrinkage at the tape bond. Polymer clay shrinks very slightly on cooling. If the tape was applied before the clay was fully cold, a small gap opens at the base of the tape wall when the clay contracts, and resin seeps through. Always wait until the piece is completely cool before taping.
Variations
| Variation | What Changes |
|---|---|
| Ivory opal base | Use white or translucent polymer clay for the base instead of black. The lighter ground shifts the colour play toward pink and gold tones rather than deep greens. All resin steps identical. |
| Single-colour flash | Use one mica powder colour only, concentrating it in the centre and fading toward the edges. Removes the layered colour complexity but produces a cleaner, more wearable everyday piece. |
| Teardrop to oval | Swap the teardrop cutter for an oval. The oval sits flatter against the ear and reads as quieter, making it an easier sell for workwear contexts. Finished size stays the same. |
Care
Store flat or hang individually. Stacked earrings scratch the resin surface. Wipe with a soft dry cloth. No ultrasonic cleaners. Remove before swimming. Cured UV resin is water-resistant, not waterproof at the clay-resin bond line. Keep away from acetone and alcohol-based sprays, including some perfumes. Both cloud cured resin. If the gloss dulls over time, buff with a small amount of plastic polishing compound and reapply a thin UV top coat.
Quick Answers
- Can I use epoxy resin instead of UV resin? Yes. Two-part epoxy resin gives a harder, more self-levelling surface and a longer working time, which makes placing stones easier. Mix ratio varies by brand. Cure time is 24 to 48 hours rather than minutes. Tape must stay in place throughout.
- What if my resin yellows over time? UV-stabilised resin yellows far more slowly than non-stabilised formulas. On a black base the effect is minimal and takes years to show. On a white or translucent base, use a resin labelled UV-resistant or UV-stabilised from the start.
- Can I make these without a UV lamp? Not with UV resin. Without a lamp, UV resin either stays permanently tacky or cures unevenly in sunlight. Swap to two-part epoxy resin if you do not have a UV lamp.
- Will the mica powder muddy the resin? Only if applied too thickly. A light dusting over a partially cured tacky layer stays at the surface and produces the colour flash. Stirring mica directly into uncured liquid resin disperses it and turns the resin opaque.